Essa tradução foi gerada por um programa e ainda não foi revisada por uma pessoa. Falas essa língua? Dá uma olhada.

Substituição do disco rígido do iPod de 5ª geração (vídeo)

Última atualização em 23 de jul de 2026
Visualizações: 287 mil
Visualizar Estatísticas:
- Últimas 24 horas:
- 18
- Últimos 7 dias:
- 168
- Últimos 30 dias:
- 828
- Ao todo:
- 287.422
Comentários: 155
146 comments on steps, 9 guide comments.
Go to guide commentsConcluído: 236 237
236 pessoas marcaram este guia como "concluído". Será você o próximo?
237· pessoas marcaram este guia como "concluído". Incluindo você — ótimo trabalho!
Favorites: 91 92
91 pessoas favoritaram (e se inscreveram) neste guia. Você será o próximo?
92 pessoas marcaram como favorito (e assinaram) este guia - incluindo você!
Guia em destaque
Este guia foi considerado super bacana pela equipe da iFixit.
Introdução
Ir para o passo 1 ↓Este guia mostra como remover o disco rígido de um iPod Video.
O que você precisa


-
-
-
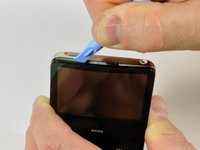
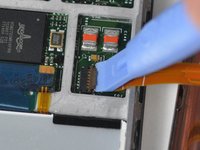
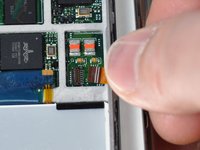
Solte o primeiro clipe de retenção na parte inferior do iPod usando a Ferramenta de abertura. A borda da ferramenta deve estar voltada para a carcaça traseira de metal para evitar riscar a parte frontal de plástico.
-
-
-
Use esta foto do iPod ABERTO como referência para localizar onde estão os clipes de retenção — quatro em cada lateral, um na tampa superior e dois na parte inferior. Isso evitará muita frustração e ajudará a não riscar a tampa de plástico.
-
-
-
Insira a Ferramenta de abertura de iPod no lado esquerdo do aparelho, com a extremidade da ferramenta apontada para a parte traseira de metal.
-
Uma palheta (de abertura) pequena pode ser extremamente útil para abrir o iPod. Basta inseri-la e deslizá-la ao redor da carcaça para soltar os clipes e facilitar o processo.
-
Alargue suavemente a fenda existente balançando a Ferramenta de abertura de iPod e movendo-a para a esquerda.
-
Continue fazendo isso até que todo o lado do iPod esteja solto.
-
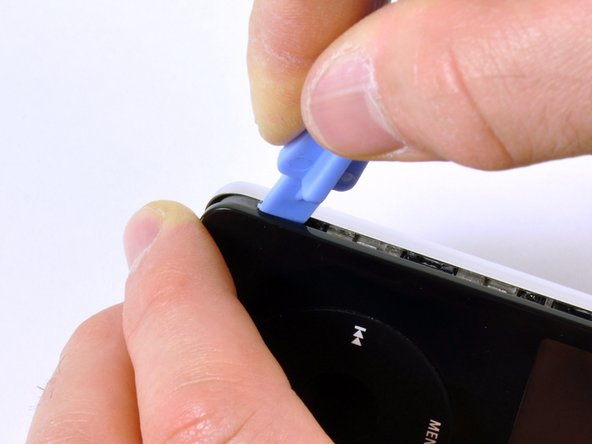
Em seguida, você pode inserir uma Ferramenta de abertura de iPod à direita do botão Hold. Tenha muito cuidado ao inserir a ferramenta, pois a tela é muito frágil.
-
-
-
-
Deslize suavemente a Ferramenta de abertura na parte superior do painel do display, garantindo que os clipes de retenção sejam soltos.
-
Os outros lados do iPod deverão agora soltar-se facilmente. Caso contrário, utilize as Ferramentas de abertura no lado direito do iPod da mesma forma que fez no lado esquerdo.
-
Separe a parte frontal do iPod da parte traseira cerca de 2,5 cm (ou alguns centímetros).
-
-
Ferramenta utilizada neste passo:Tweezers$3.99
-
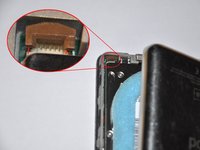
Use a pinça curva ou uma Ferramenta de abertura para deslizar para cima a trava marrom do conector, que prende o cabo plano laranja da bateria. Certifique-se de puxar pelos dois lados da trava. Você só precisa levantar a trava marrom do conector cerca de 1 a 2 mm para soltar o cabo. Não levante mais do que isso nem remova a trava, ou você poderá puxar o conector branco junto!
-
Remova o cabo do conector.
-
-
-
Agora você deve ter apenas um cabo plano laranja conectando a carcaça frontal à parte traseira.
-
Neste ponto, você pode remover e substituir os protetores de borracha azuis ou continuar com a separação da carcaça.
-
-
-
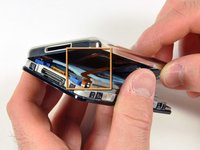
Levante o disco rígido para expor o conector flexível da entrada para fone de ouvido (indicado pelo retângulo amarelo).
-
-
-
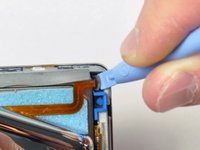
Com a Ferramenta de abertura, levante suavemente a aba marrom do conector do cabo plano da entrada para fone de ouvido. A aba girará 90 graus para cima, liberando o cabo plano.
-
Com os dedos, puxe o cabo plano da entrada para fone de ouvido.
-
-
-
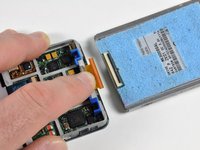
A parte frontal e a traseira do iPod devem agora estar completamente separadas.
-
-
-
-
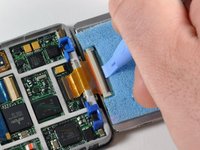
Use uma pequena Ferramenta de abertura de iPod para liberar a dobradiça preta que prende o cabo plano do disco rígido. A aba girará 90 graus para cima em direção à placa lógica, liberando o cabo plano.
-
Use o dedo indicador para segurar o cabo plano no lugar; desconecte o disco do cabo plano.
-
-

 Pergunte ao FixBot












Para a remontagem de seu dispositivo, siga estas instruções na ordem inversa.
Cancelar: não concluí este guia.
236 outras pessoas executaram este guia.
Um agradecimento especial a esses tradutores:
100%

Sandra Hiller está nos ajudando a consertar o mundo! Quer contribuir?
Comece a traduzir ›

9Comentários do guia
Okay, I apparently did the same thing as Jeff above. When I opened the case, the plastic front came off cleanly, but now I can't figure out how to pry the innards out of the metal casing, which apparently was supposed to just happen by itself, according to the instructions above.
I've tried very gingerly pulling and prying around the edges to see if I can dislodge the metal casing, but no such luck so far. Now what?
Guide was helpfull and well detailed. The screewed on parts from the black cover broke but what the !&&*, it's not like i need them now. I switched the battery without problems, everything from the guide is well detailed.
Buttons wont work now. Re opened it 4 times and buttons still wont work.
Threw this Apple Crap at my wall, now it's all opened up again, permanently!
Guide is perfect tho! Thanks for the help.
I saved myself about $400 (that is on the cheap end of a new iPod 7th gen on Amazon) by buying new hard drive for $25, buying a new battery that came with iPod repair tool for $7.99 (all on Amazon), and used this guide. I had no problems with disassembly and reassembly. This guide is fantastic!
With this guide i managed to save some bacon on my two 5th generation iPods. One black and one white. Just for 25E i managed to find replacement hard disks for them. Now i enjoy the music in both car and living room. Thanks again mate... Cheers from Greece.
I decided to fix my boyfriends ipod video(5th gen 60gb) for his Christmas present. He dropped it a while back and the hard drive went to crap. So I got all my parts and tools today(very quick shipping btw) and decided to go for it. I was a little intimidated at first since I've never done this before but everything was so easy. Had no problem opening or separating the case. Changed the battery while I was in there and that was easy. Got to the hard drive and got it done. Before closing I checked that it was working but it just hung out on the apple screen. Was a little worried that the new hard drive was bad so I disconnected and the reconnected it and it worked perfectly! So proud of myself! All in all, the guide was a huge help, and it only took about 45 minutes to do everything. Easy peasy. Now I know I can change the battery in my ipod with no problem. Thanks!!!
