Introdução
The telescoping handle is a crucial component of any wheeled luggage. Over time, repeated use can cause friction that affects the internal clip mechanism, making the handle sticky or completely jammed- a frustrating issue! Fortunately, applying lubrication is a simple and effective solution to restore smooth functionality.
This guide will demonstrate how to lubricate the handle of Patagonia Freewheeler/Freightliner Wheeled Duffels. If the handle is bent or damaged, or there is damage to the handle housing, it will need a full handle replacement. See Handle Replacement on Patagonia Freewheeler/Freightliner Luggage.
Replacement parts are currently unavailable. To get your luggage fixed, take it in to a local Patagonia retail store for repair evaluation or send it in to Patagonia through their mail-in repair service.
Related Tutorials
O que você precisa
-
-
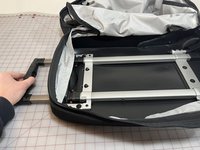
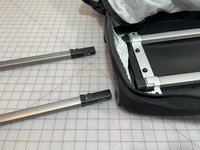
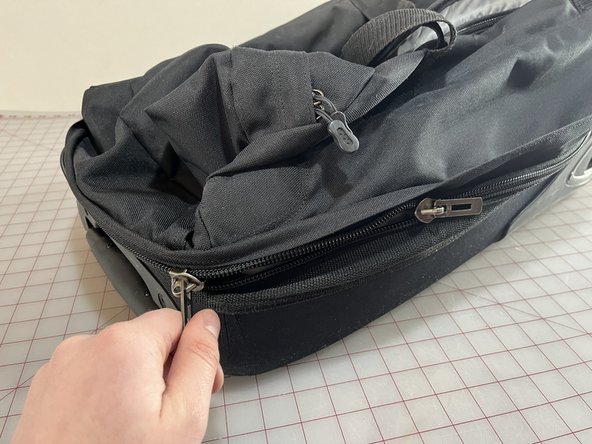
Open the zipper at the base of the bag, then open the zipper in the compartment liner to expose the handle mechanisms.
-
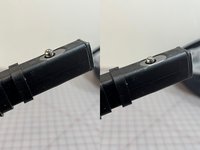
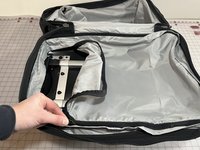
Inspect the handle housing.
-
-
-
There are multiple sets of holes along the external sides of the handle housing. The toggle buttons of the handle (sometimes referred to as 'spring clips') lock into these holes, raising and lowering the height of the retractable handle.
-
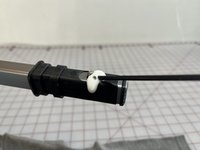
Check the function of this mechanism by pressing the handle's release button and watching the toggle buttons:
-
When the luggage handle is fully functional, the handle release button causes these toggle buttons to fully retract into the holes.
-
When the luggage handle mechanism is sticky or fully stuck, the handle release button does not cause the toggle buttons to retract properly.
-
-
-
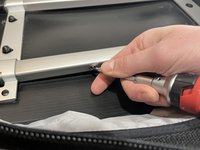
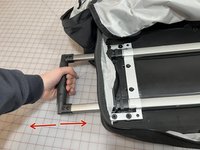
With one hand pressing the handle release button, use a pointed object (like a screwdriver) in the other hand to depress each toggle button into the handle housing manually. This should allow the handle to slide to a new position.
-
-
-
-
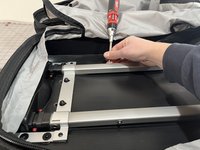
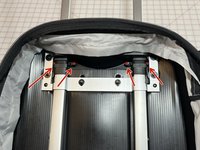
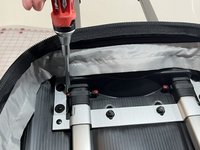
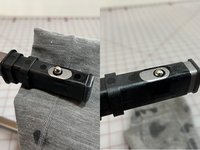
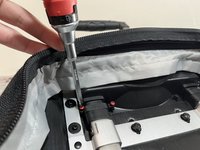
Use a Phillips PH1 screwdriver to remove the four screws at the top handle bracket.
-
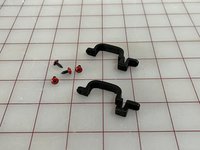
Then remove the two black plastic retaining clips that were kept in place by the red screws.
-
-
-
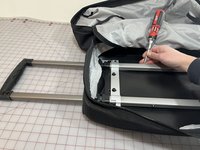
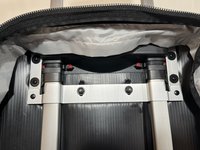
Using the screwdriver trick from Step 3, depress the toggle buttons and pull the handle out of the handle housing as far as you can.
-
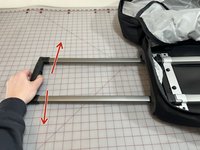
Once the handle is in its highest position, use a repeated side-to-side movement to free the black plastic sleeves on the bottom portion of the handle.
-
With the handle separated from the bag, press the handle release button multiple times and take a mental note of how deep the toggle buttons depress.
-
-
-
Spray lubricant into the toggle button mechanism on both sides of the handle. Wipe away excess lubricant with a rag.
-
Press the handle release button repeatedly to spread the lubricant within the mechanism.
-
The toggle buttons should depress noticeably deeper than in Step 5. Reapply lubricant and retest if necessary.
-
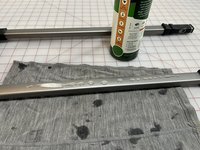
Apply a thin layer of lubricant to the bars of the removed handle. Wipe away any excess.
-
-
-
Reinsert the handle:
-
While holding the handle release button, use a repeated up-and-down movement to insert the black plastic sleeves into the handle housing.
-
Continue to hold the handle release button, and insert the handle all the way back in.
-
You should notice the handle's function has significantly improved.
-
Move the handle up and down, testing every position.
-
If the handle is still malfunctioning, it may need to be fully replaced.
-
-
-
Reinstall the 2 black plastic clips.
-
Reinstall all 4 red screws.
-
-
-
Check the liner compartment to make sure no tools have been left behind.
-
Close the zipper at the perimeter of the liner.
-
Close the zipper to the compartment at the bottom of the bag.
-


Cancelar: não concluí este guia.
Uma outra pessoa concluiu este guia.


1Comentário do guia
These comments are based on repairing an Antler wheelie bag (10+ years old) just now..
1/ One of the 2 screws holding on the telescopic handle had stripped it's thread into the vertical aluminum tube. Temp fix while on hols was gaffer tape to stop the screw coming out. Lasting (hopefully) fix was just a thicker screw. Fairly easy.
2/ The extension handle was sticking and I worked out the reason was that the outer aluminium tube was dented. I removed the extension handle assembly and managed to treat the dents with a combination of a nut driver/ socket on a screwdriver - just small enough to get into the undented tube - and a small hammer to gently tap out the dents from the outside. The socket was inside the tube to stop it deforming inwards. By rotating the socket as I pulled it out, I managed to avoid getting the socket stuck in the aluminium tube. Once dents reduced and extension handle action was easier, I reassembled the handle into the wheelie bag. This was quite hard - but succeeded eventually!