Introdução
Use this guide to replace the cooling fan in your Steam Deck LCD, or remove it for cleaning.
Remember: follow general electrostatic discharge (ESD) safety procedures while repairing your device.
Note: Valve started shipping Steam Decks with refreshed internal designs in early 2023. Your Steam Deck may look different than the one depicted in the photos, but the procedure is the same. The Steam Deck's fan design differs between versions. Before ordering a replacement fan, remove the back cover of your Steam Deck to check what version you have. An original Steam Deck will have a metallic motherboard shield and a fan with square sides, as seen here. A refreshed Steam Deck will have a black motherboard shield and a fan with curved sides, as seen here.
O que você precisa
-
-
Power down your Steam Deck and unplug any cables.
-
-
-
Use a Phillips driver to remove the eight screws securing the back cover:
-
Four coarse thread 9.5 mm-long screws
-
Four fine thread 5.8 mm-long screws
-
-
-
Insert an opening pick into the thin gap between the back cover and the front shell, along the edge of the right grip.
-
Pry up on the back cover to release it from the locking clips.
-
-
-
Grip the back cover at the opening you just created and pull it up and away from the device to unclip the long edges.
-
Remove the back cover.
-
-
-
-
Use a pair of tweezers to remove the piece of foil tape covering the hidden screw on the board shield.
-
-
-
Use a Phillips driver to remove the three screws securing the board shield:
-
One 3.4 mm screw
-
Two 3.7 mm screws
-
-
-
Grip the battery cable by its pull tab and pull it directly away from the motherboard to disconnect it.
-
-
-
Use a pair of tweezers to remove the sticker from the top edge of the fan.
-
-
-
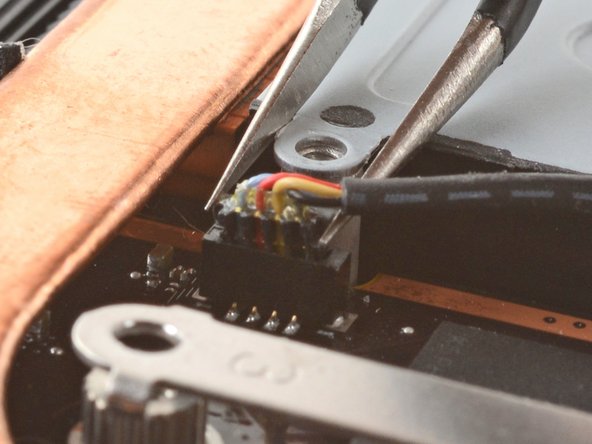
Use a pair of tweezers to grip the edges of the fan connector and pull up to disconnect it from the motherboard.
-
-
-
Use a Phillips driver to remove the two 3.7 mm screws securing the fan.
-
To reassemble your device, follow these instructions in reverse order.
Take your e-waste to an R2 or e-Stewards certified recycler.
Repair didn’t go as planned? Try some basic troubleshooting, or ask our Steam Deck answers community for help.
To reassemble your device, follow these instructions in reverse order.
Take your e-waste to an R2 or e-Stewards certified recycler.
Repair didn’t go as planned? Try some basic troubleshooting, or ask our Steam Deck answers community for help.
Cancelar: não concluí este guia.
74 outras pessoas executaram este guia.
22 comentários
Hi ifixit Team, as the cooler seems to be a non factory one: how does it compare noise wise to the standard Steam Deck cooler, which is unbearably loud?
To those asking, you want a huaying fan as opposed to a delta fan. The delta is terribly bad with its acoustics.
is this the delta or huaying?


