Ir para o conteúdo principal

Sprint Sanyo RL-4920 Vibrator Motor Replacement

O que você precisa

  1. Sprint Sanyo RL-4920 Vibrator Motor Replacement, Back of Phone: passo 1, imagem 1 %32
    • Flip the phone over so that the screen is facing down.

  2. Sprint Sanyo RL-4920 Vibrator Motor Replacement, Remove Battery Pack: passo 2, imagem 1 %32 Sprint Sanyo RL-4920 Vibrator Motor Replacement, Remove Battery Pack: passo 2, imagem 2 %32
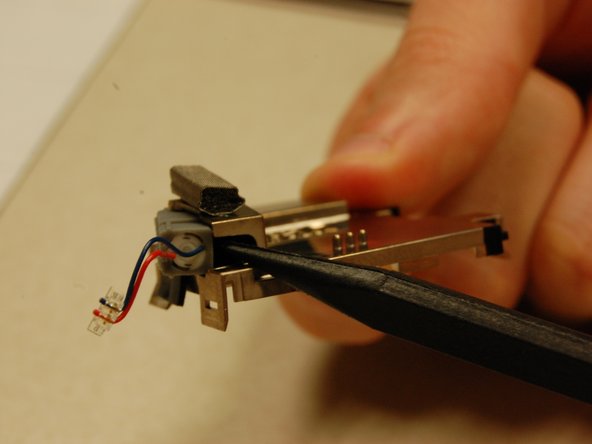
    • Push the gray lever up towards the top of the phone.

    • Pull up on the battery pack and completely separate it from the phone.

  3. Sprint Sanyo RL-4920 Vibrator Motor Replacement, Screws: passo 3, imagem 1 %32 Sprint Sanyo RL-4920 Vibrator Motor Replacement, Screws: passo 3, imagem 2 %32
    • Locate the five screws around the back casing.

    • Use a three-prong screw bit to remove all five screws.

  4. Sprint Sanyo RL-4920 Vibrator Motor Replacement, Separate Cases: passo 4, imagem 1 %32
    • Use the plastic opening tool and slide it around the phone to pull apart the front and back casing.

  5. Sprint Sanyo RL-4920 Vibrator Motor Replacement, Separate Cases: passo 5, imagem 1 %32
    • Separate the two cases.

  6. Sprint Sanyo RL-4920 Vibrator Motor Replacement, The Front Case: passo 6, imagem 1 %32
    • Use the plastic opening tool to remove the motherboard from the front case.

  7. Sprint Sanyo RL-4920 Vibrator Motor Replacement, Display: passo 7, imagem 1 %32 Sprint Sanyo RL-4920 Vibrator Motor Replacement, Display: passo 7, imagem 2 %32
    • Locate the 4 white clips of the dispaly.

  8. Sprint Sanyo RL-4920 Vibrator Motor Replacement: passo 8, imagem 1 %32 Sprint Sanyo RL-4920 Vibrator Motor Replacement: passo 8, imagem 2 %32
    • Using the plastic opening tool, pull the white clips of the display away from the printed circuit board to unclip display.

  9. Sprint Sanyo RL-4920 Vibrator Motor Replacement: passo 9, imagem 1 %32 Sprint Sanyo RL-4920 Vibrator Motor Replacement: passo 9, imagem 2 %32
    • Grasp the display on both sides and carefully pull the display off of the printed circuit board.

  10. Sprint Sanyo RL-4920 Vibrator Motor Replacement: passo 10, imagem 1 %32 Sprint Sanyo RL-4920 Vibrator Motor Replacement: passo 10, imagem 2 %32
    • Using the plastic opening tool, carefully remove the yellow film covering the display connector.

    • Do not damage the yellow film. Ensure that it stays in one piece and does not tear.

  11. Sprint Sanyo RL-4920 Vibrator Motor Replacement, Vibrator Motor: passo 11, imagem 1 %32
    • Use a Phillips-head screw bit to remove the screw under the yellow film

  12. Sprint Sanyo RL-4920 Vibrator Motor Replacement: passo 12, imagem 1 %32 Sprint Sanyo RL-4920 Vibrator Motor Replacement: passo 12, imagem 2 %32 Sprint Sanyo RL-4920 Vibrator Motor Replacement: passo 12, imagem 3 %32
    • Use the spudger tool to pry the latches ways from the circuit board

    • Detach the metal casing from the circuit board

  13. Sprint Sanyo RL-4920 Vibrator Motor Replacement: passo 13, imagem 1 %32 Sprint Sanyo RL-4920 Vibrator Motor Replacement: passo 13, imagem 2 %32
    • Remove wires attaching vibrator motor to circuit board gently so as not to damage them

  14. Sprint Sanyo RL-4920 Vibrator Motor Replacement: passo 14, imagem 1 %32 Sprint Sanyo RL-4920 Vibrator Motor Replacement: passo 14, imagem 2 %32 Sprint Sanyo RL-4920 Vibrator Motor Replacement: passo 14, imagem 3 %32
    • Once the metal casing is removed from the circuit board take it and locate the vibrator motor on the top side of the casing

    • Use the spudger tool to gently pry the vibrator motor out of its protective shell

  15. Sprint Sanyo RL-4920 Vibrator Motor Replacement: passo 15, imagem 1 %32
    • With the vibrator motor completely removed, you can now replace it with a new one

Conclusão

To reassemble your device, follow these instructions in reverse order.

Uma outra pessoa concluiu este guia.

Austin Shores

Membro desde: 10/18/13

301 Reputação

Autoria de 3 guias

Equipe

Clemson, Team 13-5, Benson Fall 2013 Membro de Clemson, Team 13-5, Benson Fall 2013

CLEM-BENSON-F13S13G5

Membros da 3

Autoria de 12 guias

0 comentários

Adicione um comentário

Exibir estatísticas:

Últimas 24 horas: 0

Últimos 7 dias: 0

Últimos 30 dias: 2

Duração total: 288