Esta versão pode conter edições incorretas. Mude para o último instantâneo verificado.
O que você precisa
-
Este passo não foi traduzido. Ajude a traduzi-lo
-
Use the small suction cup to lift the back panel:
-
Press the small suction cup on to the middle of the back panel.
-
-
Este passo não foi traduzido. Ajude a traduzi-lo
-
While holding the Sony Xperia Z ultra down with your left hand, slightly pull the small suction cup upwards to create a small opening between the back panel and the front panel.
-
While continuing to pull the small suction cup upwards, insert the spudger in the small opening.
-
Pry the front panel downwards with the spudger while continuing to pull the small suction cup upwards.
-
-
Este passo não foi traduzido. Ajude a traduzi-lo
-
Remove the back panel by pulling the small suction cup upwards.
-
-
Este passo não foi traduzido. Ajude a traduzi-lo
-
Remove the following six screws with a Phillips #000 screwdriver:
-
five silver 2.1 mm screws
-
one gold 3.1 mm screw
-
-
Este passo não foi traduzido. Ajude a traduzi-lo
-
Pry the plastic motherboard shield open by placing the spudger under the shield and running it along the edges.
-
-
Este passo não foi traduzido. Ajude a traduzi-lo
-
Remove the motherboard shield by lifting the lower end upwards first.
-
-
-
Este passo não foi traduzido. Ajude a traduzi-lo
-
Detach the battery connection cable by prying it upward with the spudger.
-
-
Este passo não foi traduzido. Ajude a traduzi-lo
-
Pry the upper end of the antenna upwards with the spudger.
-
-
Este passo não foi traduzido. Ajude a traduzi-lo
-
Detach the antenna by pulling the upper end upwards and outwards.
-
-
Este passo não foi traduzido. Ajude a traduzi-lo
-
Insert the spudger underneath the battery and run it back and forth to remove any adhesive.
-
-
Este passo não foi traduzido. Ajude a traduzi-lo
-
Detach the headphone jack connection by prying it upwards with the spudger.
-
-
Este passo não foi traduzido. Ajude a traduzi-lo
-
Detach the earphone jack connection by prying it upwards with the spudger.
-
-
Este passo não foi traduzido. Ajude a traduzi-lo
-
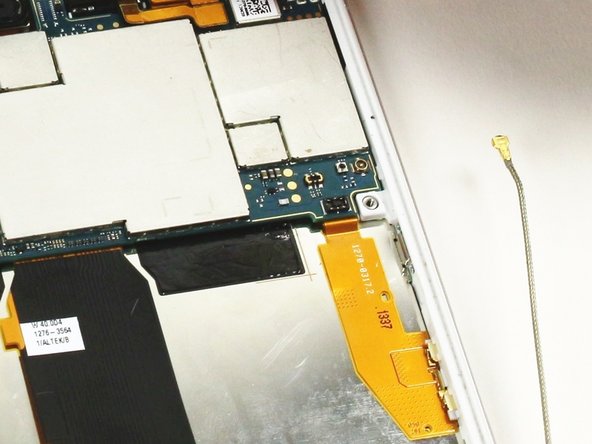
Disconnect the ribbon cable at the bottom right of the motherboard. (It's shown tucked under the motherboard in this photo, which is incorrect—don't do this!)
-
-
Este passo não foi traduzido. Ajude a traduzi-lo
-
Detach the upper end of the motherboard by pulling the top end upwards.
-
-
Este passo não foi traduzido. Ajude a traduzi-lo
-
Remove the yellow clip that secures the headphone jack slot with a pair of tweezers.
-
-
Este passo não foi traduzido. Ajude a traduzi-lo
-
Push the red stopper of the headphone jack connection through the plastic tunnel with the spudger.
-
While holding the back end of the headphone jack connection, grasp the headphone jack connection with the pair of tweezers and guide it through the plastic tunnel.
-
Remove the headphone jack connection from the device.
-
Cancelar: não concluí este guia.
2 outras pessoas executaram este guia.


