Ir para o conteúdo principal

Sony NWZ-E473 Audio Jack Replacement

O que você precisa

  1. Sony NWZ-E473 Audio Jack Replacement, Back Panel: passo 1, imagem 1 %32
    • Use a Phillips #00 screwdriver to unscrew the two 5 mm screws located on the bottom of the back of the device.

  2. Sony NWZ-E473 Audio Jack Replacement: passo 2, imagem 1 %32
    • Use a plastic opening tool to loosen the bottom portion of device.

  3. Sony NWZ-E473 Audio Jack Replacement: passo 3, imagem 1 %32
    • Use a plastic opening tool to loosen the top panel of the device.

  4. Sony NWZ-E473 Audio Jack Replacement: passo 4, imagem 1 %32
    • Use a Phillips #00 screwdriver to remove the two 3 mm screws located on the portion under the top panel of the device.

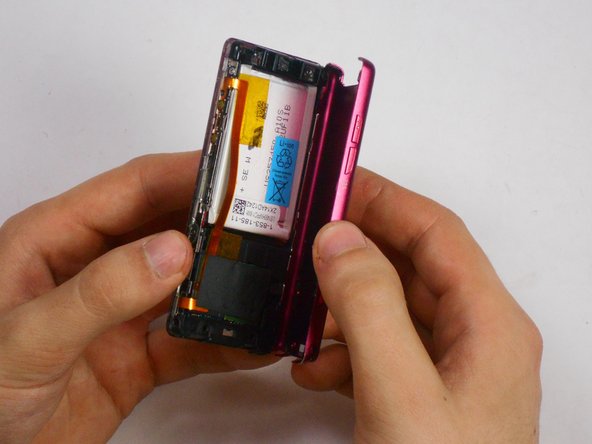
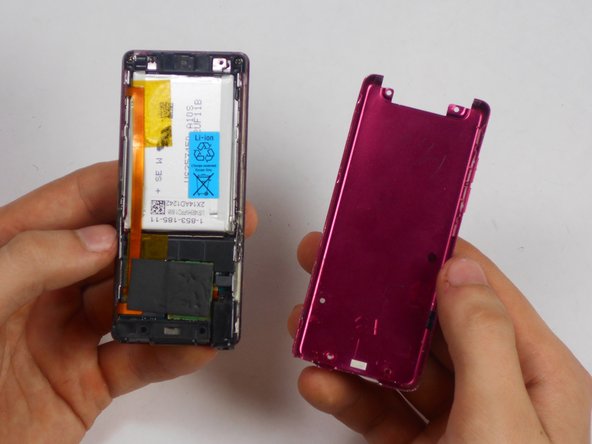
  5. Sony NWZ-E473 Audio Jack Replacement: passo 5, imagem 1 %32 Sony NWZ-E473 Audio Jack Replacement: passo 5, imagem 2 %32 Sony NWZ-E473 Audio Jack Replacement: passo 5, imagem 3 %32
    • Remove the back plate from the device.

  6. Sony NWZ-E473 Audio Jack Replacement, Audio Jack: passo 6, imagem 1 %32
    • Unscrew one 2.5 mm screw using a Phillips #00 screwdriver on bottom right portion of device located near audio jack.

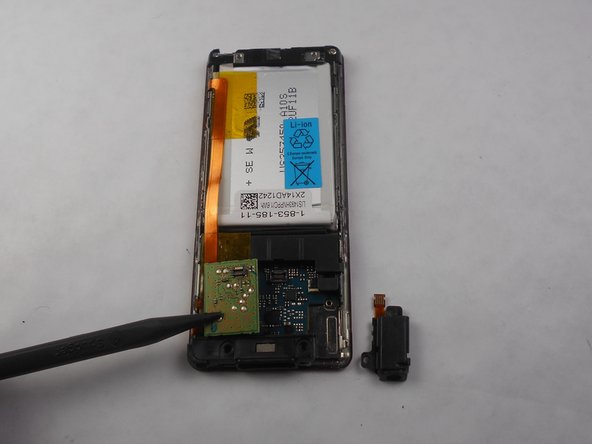
  7. Sony NWZ-E473 Audio Jack Replacement: passo 7, imagem 1 %32 Sony NWZ-E473 Audio Jack Replacement: passo 7, imagem 2 %32
    • Disconnect the headphone jack connection from the motherboard using any tool to remove black audio piece that needs to be replaced.

Conclusão

To reassemble your device, follow these instructions in reverse order.

Uma outra pessoa concluiu este guia.

Chaz

Membro desde: 01/16/15

119 Reputação

Autoria de 1 guia

Equipe

USF Tampa, Team 17-6, Watkins Winter 2015 Membro de USF Tampa, Team 17-6, Watkins Winter 2015

USFT-WATKINS-W15S17G6

Membros da 4

Autoria de 7 guias

0 comentários

Adicione um comentário

Exibir estatísticas:

Últimas 24 horas: 0

Últimos 7 dias: 2

Últimos 30 dias: 4

Duração total: 1,066