Ir para o conteúdo principal

Sony Ericsson xPeria Active Screen Replacement

O que você precisa

  1. Sony Ericsson xPeria Active Screen Replacement, Remove the back cover.: passo 1, imagem 1 %32 Sony Ericsson xPeria Active Screen Replacement, Remove the back cover.: passo 1, imagem 2 %32 Sony Ericsson xPeria Active Screen Replacement, Remove the back cover.: passo 1, imagem 3 %32
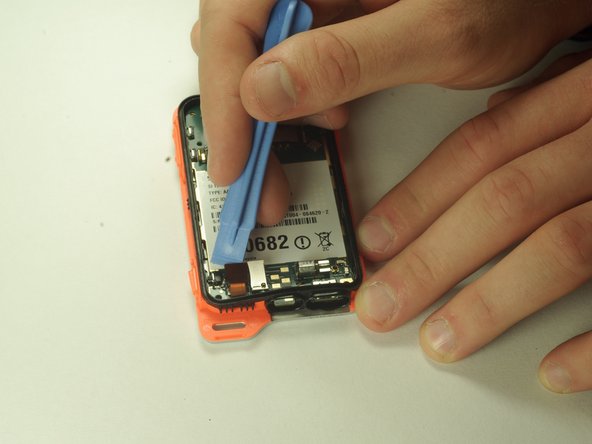
    • Open the flaps and remove the back cover using the plastic opening device.

  2. Sony Ericsson xPeria Active Screen Replacement, Remove inside plastic battery cover.: passo 2, imagem 1 %32 Sony Ericsson xPeria Active Screen Replacement, Remove inside plastic battery cover.: passo 2, imagem 2 %32
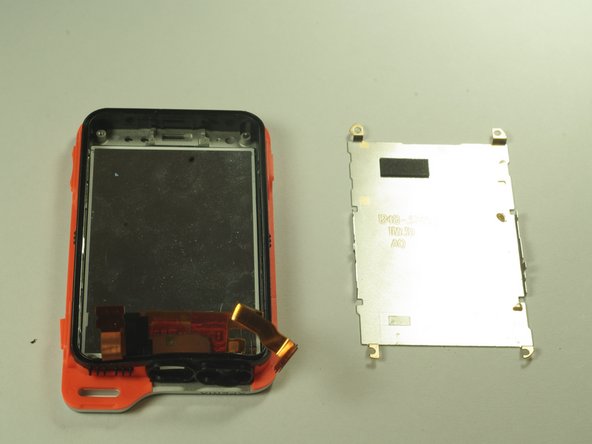
    • Remove the battery shield with the plastic opening device.

  3. Sony Ericsson xPeria Active Screen Replacement, Remove the battery: passo 3, imagem 1 %32 Sony Ericsson xPeria Active Screen Replacement, Remove the battery: passo 3, imagem 2 %32
    • Remove the battery.

  4. Sony Ericsson xPeria Active Screen Replacement, Unfastening The Motherboard Cover: passo 4, imagem 1 %32
    • Unscrew the 5mm screws with the T5 head.

    • Unscrew the 6mm screw with the T6 head.

  5. Sony Ericsson xPeria Active Screen Replacement, Removing The Motherboard Cover: passo 5, imagem 1 %32 Sony Ericsson xPeria Active Screen Replacement, Removing The Motherboard Cover: passo 5, imagem 2 %32
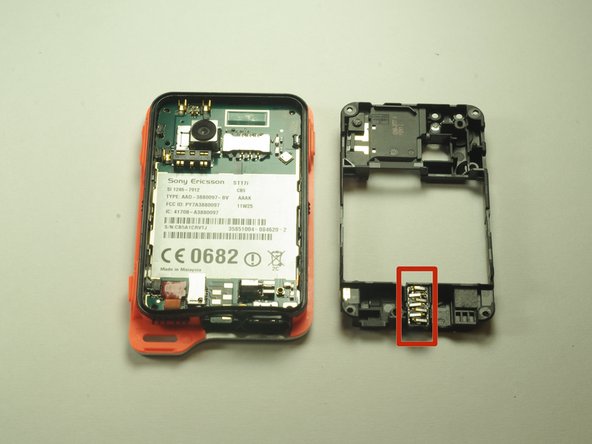
    • Remove the black cover with the plastic opening tool.

    • Remove the headphone jack from its slot.

  6. Sony Ericsson xPeria Active Screen Replacement, Screen: passo 6, imagem 1 %32 Sony Ericsson xPeria Active Screen Replacement, Screen: passo 6, imagem 2 %32
    • Unplug the power cable by carefully prying it away from the motherboard.

  7. Sony Ericsson xPeria Active Screen Replacement: passo 7, imagem 1 %32 Sony Ericsson xPeria Active Screen Replacement: passo 7, imagem 2 %32
    • Remove the power strip on the back side of the motherboard.

  8. Sony Ericsson xPeria Active Screen Replacement, Remove back screen shield: passo 8, imagem 1 %32 Sony Ericsson xPeria Active Screen Replacement, Remove back screen shield: passo 8, imagem 2 %32
    • Remove the shield.

  9. Sony Ericsson xPeria Active Screen Replacement, Remove the screen module: passo 9, imagem 1 %32 Sony Ericsson xPeria Active Screen Replacement, Remove the screen module: passo 9, imagem 2 %32
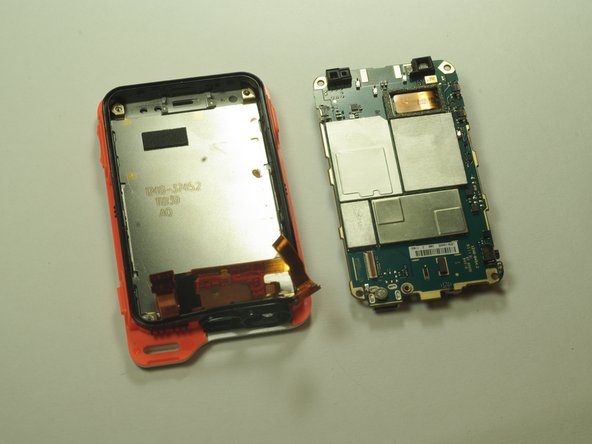
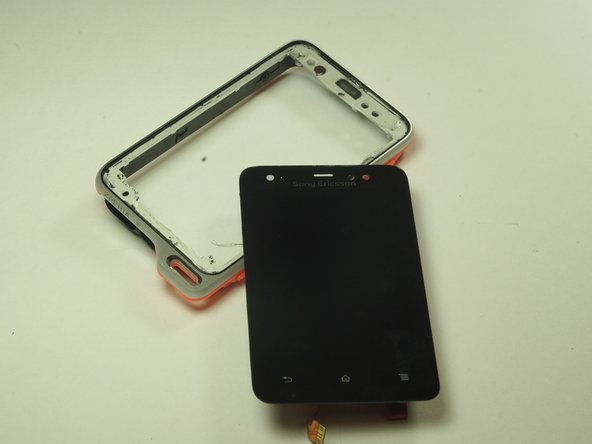
    • Push the screen through the front of the case, gently.

    • It may be a little tough, just work your way around the edges of the screen until it separates from the main case.

Conclusão

To reassemble your device, follow these instructions in reverse order.

5 outras pessoas executaram este guia.

Alex Tobin

Membro desde: 10/06/14

406 Reputação

Autoria de 3 guias

Equipe

USF Tampa, Team 14-5, Leahy Fall 2014 Membro de USF Tampa, Team 14-5, Leahy Fall 2014

USFT-LEAHY-F14S14G5

Membros da 3

Autoria de 5 guias

Um comentário

hi can you add explain

abdnour master2 - Responder

Adicione um comentário

Exibir estatísticas:

Últimas 24 horas: 0

Últimos 7 dias: 0

Últimos 30 dias: 4

Duração total: 2,325