Esta versão pode conter edições incorretas. Mude para o último instantâneo verificado.
O que você precisa
-
Este passo não foi traduzido. Ajude a traduzi-lo
-
Remove the eight 5mm T6 screws from the back of the phone.
-
-
Este passo não foi traduzido. Ajude a traduzi-lo
-
Use a case opening tool to release clips holding the case together.
-
-
Este passo não foi traduzido. Ajude a traduzi-lo
-
Take the part on the left side and put it out of the way.
-
-
-
Este passo não foi traduzido. Ajude a traduzi-lo
-
Insert a flat head screw driver under the two clips and pry up.
-
-
Este passo não foi traduzido. Ajude a traduzi-lo
-
Using a flat head screwdriver, flip the chip to the left and remove the ribbon cable.
-
-
Este passo não foi traduzido. Ajude a traduzi-lo
-
Remove the volume and camera buttons. Using your fingers or a screwdriver, pull off the black plastic piece on the very top of the phone.
-
-
Este passo não foi traduzido. Ajude a traduzi-lo
-
Using a flat head screw driver, undo the ribbon cables connected to the phone.
-
-
Este passo não foi traduzido. Ajude a traduzi-lo
-
Gently insert a flat head screw driver under the logic board and pry to remove it from the phone casing.
-
-
Este passo não foi traduzido. Ajude a traduzi-lo
-
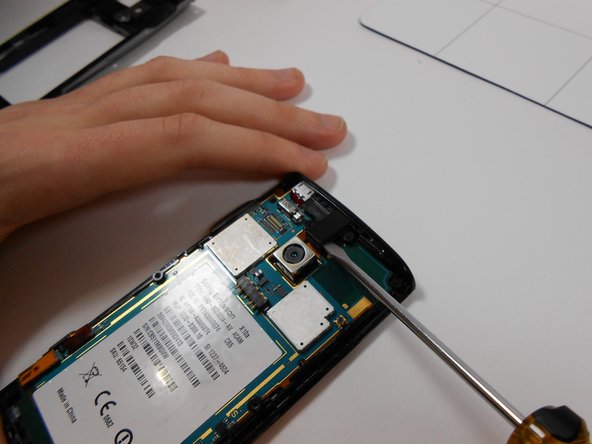
Using a flat head screw driver, disconnect the glue holding the left ribbon cable to the phone. Pull up the black plastic piece being pointed to in the image.
-
-
Este passo não foi traduzido. Ajude a traduzi-lo
-
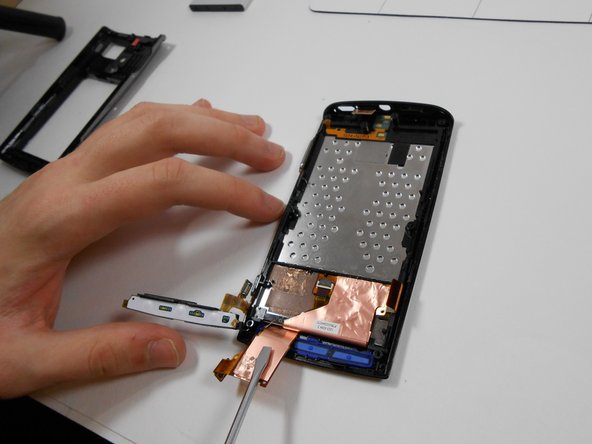
Using a flat head screwdriver, pry up the board.
-
Remove the power button from the top of the phone.
-


Equipe

UMass Dartmouth, Team 1-5, Shastany Fall 2013 Membro de UMass Dartmouth, Team 1-5, Shastany Fall 2013
UMASSD-SHASTANY-F13S1G5
Membros da 2
Autoria de 3 guias