Ir para o conteúdo principal
Sony Cyber-shot DSC-WX100 LCD Screen Replacement

Sony Cyber-shot DSC-WX100 LCD Screen Replacement

Peter Prins

Peter Prins e 2 outros colaboradores

Última atualização em June 22, 2015

20 minutos
Moderado

Introdução

Ir para o passo 1

The purpose of this guide is to replace the LCD screen. This guide will provide the necessary information to disassemble the camera, replace the screen, and to properly reassemble the components involved.

O que você precisa

Ferramentas

Exibir mais…

  1. Sony Cyber-shot DSC-WX100 LCD Screen Replacement, Battery: passo 1, imagem 1 %32
    • Open the flap indicated to allow access to the battery slot.

    • The gray switch indicated has to be moved to the right in order to release the flap.

  2. Sony Cyber-shot DSC-WX100 LCD Screen Replacement: passo 2, imagem 1 %32
    • If the old battery is still in the slot, then make sure the camera is turned off prior to removal.

    • If there is a battery currently in the slot, remove by first pulling downwards on the blue component. This will allow you to remove the battery from the slot.

  3. Sony Cyber-shot DSC-WX100 LCD Screen Replacement, Outer Casing: passo 3, imagem 1 %32 Sony Cyber-shot DSC-WX100 LCD Screen Replacement, Outer Casing: passo 3, imagem 2 %32 Sony Cyber-shot DSC-WX100 LCD Screen Replacement, Outer Casing: passo 3, imagem 3 %32
    • Remove all of the 1mm screws using a Philips #000 Screwdriver.

    • Remover the rest of the screws (2mm) from the camera covers using a Phillips #000 Screwdriver.

  4. Sony Cyber-shot DSC-WX100 LCD Screen Replacement: passo 4, imagem 1 %32 Sony Cyber-shot DSC-WX100 LCD Screen Replacement: passo 4, imagem 2 %32
    • Use the plastic opening tool to gently remove the front and back plates of the camera.

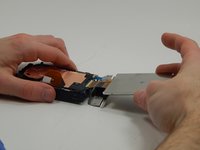
  5. Sony Cyber-shot DSC-WX100 LCD Screen Replacement: passo 5, imagem 1 %32 Sony Cyber-shot DSC-WX100 LCD Screen Replacement: passo 5, imagem 2 %32
    • Use a plastic opening tool to gently release the two indicated tabs.

    • Pull up on the lower end of the plate. Lift it so the plate is high enough so that the marked bump is not holding it in place.

    • Pull away from the camera at the end of the metal plate with the blue circuits to then remove the plate from the rest of the camera.

    • For help please watch the video.

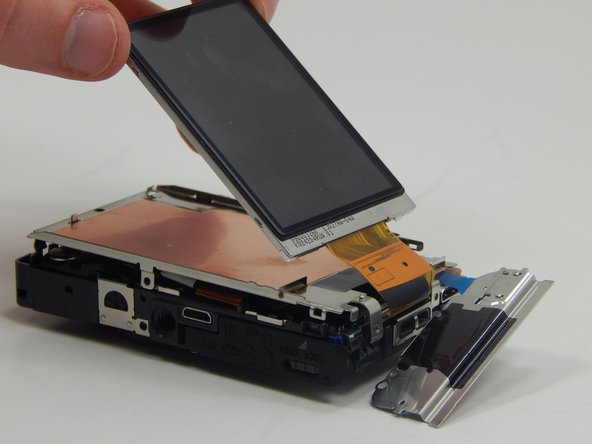
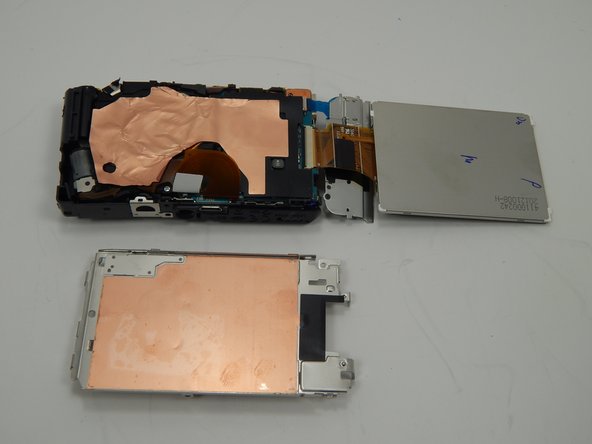
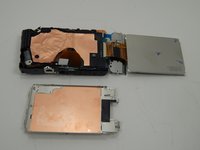
  6. Sony Cyber-shot DSC-WX100 LCD Screen Replacement: passo 7, imagem 1 %32 Sony Cyber-shot DSC-WX100 LCD Screen Replacement: passo 7, imagem 2 %32 Sony Cyber-shot DSC-WX100 LCD Screen Replacement: passo 7, imagem 3 %32
    • Remove this screw (1mm) with a Phillips #000 Screwdriver.

    • Gently lift the LCD from the metal plate.

    • Remove the metal plate that was underneath the LCD screen from the camera.

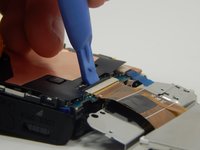
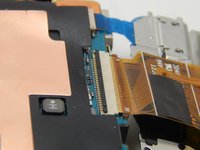
  7. Sony Cyber-shot DSC-WX100 LCD Screen Replacement: passo 8, imagem 1 %32 Sony Cyber-shot DSC-WX100 LCD Screen Replacement: passo 8, imagem 2 %32 Sony Cyber-shot DSC-WX100 LCD Screen Replacement: passo 8, imagem 3 %32
    • Use the plastic opening tool to pry the black bar upwards.

    • Pull the LCD screen from out of the slot.

Conclusão

To reassemble your device, follow these instructions in reverse order.

Uma outra pessoa concluiu este guia.

Peter Prins

Membro desde: 03/19/15

262 Reputação

Autoria de 2 guias

Equipe

1Comentário do guia

be careful with capacitor !!! i touched it 5-10 minutes after battery was removed and felt electricity in my chest, ears… be careful :D

k.bilius - Responder

Comentar

Visualizações:

Últimas 24 horas: 0

Últimos 7 dias: 1

Últimos 30 dias: 11

Ao todo: 1,424