Ir para o conteúdo principal

Sony Cyber-shot DSC-W55 AV Port Replacement

O que você precisa

  1. Sony Cyber-shot DSC-W55 AV Port Replacement, Battery: passo 1, imagem 1 %32 Sony Cyber-shot DSC-W55 AV Port Replacement, Battery: passo 1, imagem 2 %32
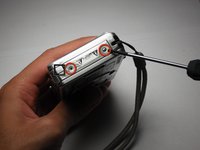
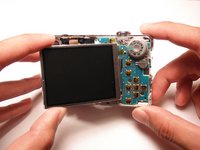
    • Slide the battery cover in the direction the arrow points.

    • Pull the battery cover towards you.
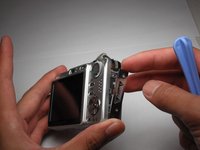
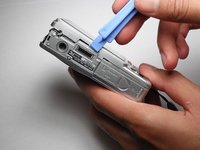
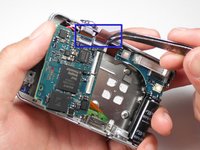
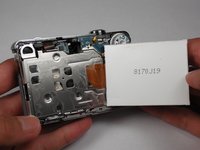
  2. Sony Cyber-shot DSC-W55 AV Port Replacement: passo 2, imagem 1 %32 Sony Cyber-shot DSC-W55 AV Port Replacement: passo 2, imagem 2 %32
    • Flick the blue switch for the battery to pop out.

    • Remove the battery from the camera.

  3. Sony Cyber-shot DSC-W55 AV Port Replacement, Back Case: passo 3, imagem 1 %32 Sony Cyber-shot DSC-W55 AV Port Replacement, Back Case: passo 3, imagem 2 %32
    • Using the Phillips #00 Screwdriver, remove the two screws from the caution panel.

    • Remove that panel.

    • Careful for falling pieces.

  4. Sony Cyber-shot DSC-W55 AV Port Replacement: passo 4, imagem 1 %32 Sony Cyber-shot DSC-W55 AV Port Replacement: passo 4, imagem 2 %32
    • Remove the screw with a Phillips #00 screwdriver from the right side of the camera (with '3x optical zoom' engraved on the side panel).

    • Remove that panel.

  5. Sony Cyber-shot DSC-W55 AV Port Replacement: passo 5, imagem 1 %32
    • Remove the screw using the Phillips #00 screwdriver from the bottom of the camera, closest to the back cover.

  6. Sony Cyber-shot DSC-W55 AV Port Replacement: passo 6, imagem 1 %32 Sony Cyber-shot DSC-W55 AV Port Replacement: passo 6, imagem 2 %32
    • Gently remove the back cover.

    • It may be a bit stiff, so use some force to remove it. Proceed with caution.

  7. Sony Cyber-shot DSC-W55 AV Port Replacement, Front Case: passo 7, imagem 1 %32
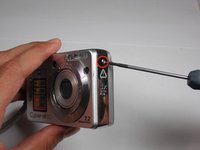
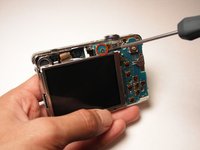
    • Remove the screw using a Phillips #00 screwdriver on the left side (where the "3x optical zoom" panel use to be).

  8. Sony Cyber-shot DSC-W55 AV Port Replacement: passo 8, imagem 1 %32 Sony Cyber-shot DSC-W55 AV Port Replacement: passo 8, imagem 2 %32 Sony Cyber-shot DSC-W55 AV Port Replacement: passo 8, imagem 3 %32
    • Remove the small screw using a Phillips #00 screwdriver on the bottom of the camera attached to the front cover.

    • Gently remove the front cover.

    • Put a little force to pop off the case. Proceed with caution.

  9. Sony Cyber-shot DSC-W55 AV Port Replacement, Lens: passo 9, imagem 1 %32 Sony Cyber-shot DSC-W55 AV Port Replacement, Lens: passo 9, imagem 2 %32
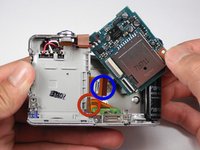
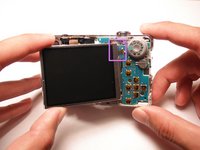
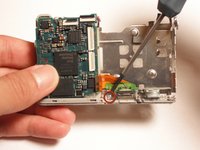
    • Flip the black secure locks off. Tweezers may be necessary.

    • Detach the two orange cables.

  10. Sony Cyber-shot DSC-W55 AV Port Replacement: passo 10, imagem 1 %32 Sony Cyber-shot DSC-W55 AV Port Replacement: passo 10, imagem 2 %32
    • Gently pull the lens container out of the camera.

  11. Sony Cyber-shot DSC-W55 AV Port Replacement, Motherboard - First Half: passo 11, imagem 1 %32
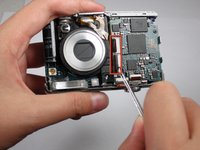
    • Remove the black screw using a Phillips #00 Screwdriver on the motherboard.

  12. Sony Cyber-shot DSC-W55 AV Port Replacement: passo 12, imagem 1 %32 Sony Cyber-shot DSC-W55 AV Port Replacement: passo 12, imagem 2 %32
    • Remove the two orange cables on the top of the motherboard with tweezers.

    • Lift the motherboard out of its slot.

  13. Sony Cyber-shot DSC-W55 AV Port Replacement: passo 13, imagem 1 %32 Sony Cyber-shot DSC-W55 AV Port Replacement: passo 13, imagem 2 %32
    • For the AV port, detach the bottom orange cable.

    • For the LCD screen, detach the top orange cable on the right side of the motherboard.

    • For the motherboard, detach all the orange cables.

    • Careful not to damage the red, white, and black wires when lifting the board.

  14. Sony Cyber-shot DSC-W55 AV Port Replacement, LCD Screen: passo 14, imagem 1 %32 Sony Cyber-shot DSC-W55 AV Port Replacement, LCD Screen: passo 14, imagem 2 %32 Sony Cyber-shot DSC-W55 AV Port Replacement, LCD Screen: passo 14, imagem 3 %32
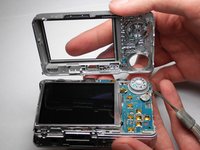
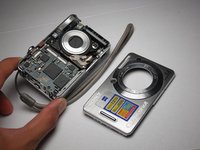
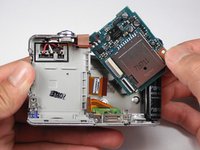
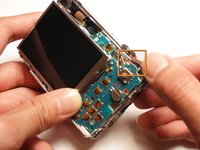
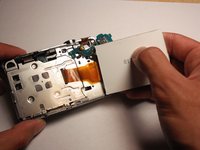
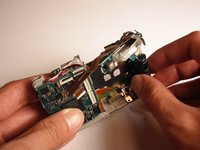
    • Verify the orange cables from the motherboard are removed from the LCD screen.

    • Lift the LCD screen off the hinge.

  15. Sony Cyber-shot DSC-W55 AV Port Replacement: passo 15, imagem 1 %32 Sony Cyber-shot DSC-W55 AV Port Replacement: passo 15, imagem 2 %32 Sony Cyber-shot DSC-W55 AV Port Replacement: passo 15, imagem 3 %32
    • Verify that the LCD screen is attached to the chip on the back on the camera.

    • Remove the dial from the back of the camera. It pops right off very easily.

    • Remove the screw using a Phillips #00 Screwdriver from the camera.

  16. Sony Cyber-shot DSC-W55 AV Port Replacement: passo 16, imagem 1 %32 Sony Cyber-shot DSC-W55 AV Port Replacement: passo 16, imagem 2 %32
    • Remove the orange cable that is attached between the top of the camera and the chip. It should slide straight out with a little bit of force.

    • Remove the chip and the LCD screen now from the camera.

    • The chip may need a slight upward tug with a fingernail or tweezer.

  17. Sony Cyber-shot DSC-W55 AV Port Replacement, Flash Assembly: passo 17, imagem 1 %32 Sony Cyber-shot DSC-W55 AV Port Replacement, Flash Assembly: passo 17, imagem 2 %32
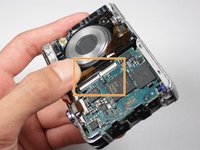
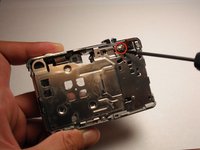
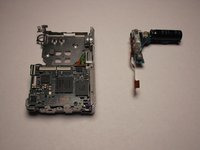
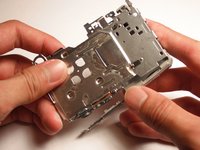
    • Verify that the orange cables from the top piece are removed from the motherboard.

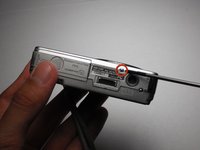
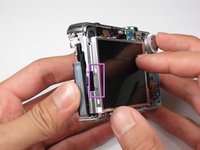
    • Remove the screw using a Phillips #00 Screwdriver on the upper part of the back side.

    • Pull the top off slowly and with caution. It is still slightly attached and may need a little force.

  18. Sony Cyber-shot DSC-W55 AV Port Replacement: passo 18, imagem 1 %32 Sony Cyber-shot DSC-W55 AV Port Replacement: passo 18, imagem 2 %32
    • Slowly twist out the flash assembly.

    • It is attached to the hinge so a little force is necessary.

  19. Sony Cyber-shot DSC-W55 AV Port Replacement, AV Port: passo 19, imagem 1 %32 Sony Cyber-shot DSC-W55 AV Port Replacement, AV Port: passo 19, imagem 2 %32 Sony Cyber-shot DSC-W55 AV Port Replacement, AV Port: passo 19, imagem 3 %32
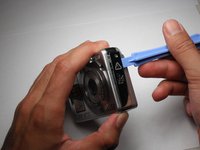
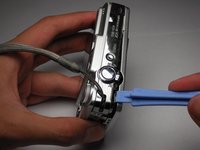
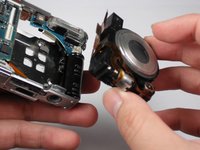
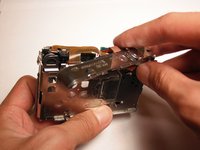
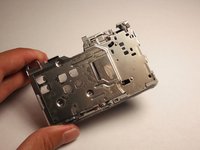
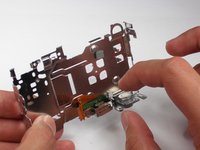
    • Remove the screw using a Phillips #00 Screwdriver connected to the AV port.

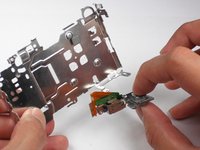
    • Flip the camera to its back, gently pull the bottom cover.

  20. Sony Cyber-shot DSC-W55 AV Port Replacement: passo 20, imagem 1 %32 Sony Cyber-shot DSC-W55 AV Port Replacement: passo 20, imagem 2 %32 Sony Cyber-shot DSC-W55 AV Port Replacement: passo 20, imagem 3 %32
    • Grab the circular top and pull it straight out.

    • The tripod socket and the AV port can be separated.

Conclusão

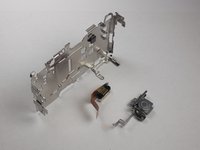
To reassemble your device, follow these instructions in reverse order.

Uma outra pessoa concluiu este guia.

Eddie Lo

Membro desde: 10/11/10

319 Reputação

Autoria de 4 guias

Equipe

Cal Poly, Team 9-20, Regan Fall 2010 Membro de Cal Poly, Team 9-20, Regan Fall 2010

CPSU-REGAN-F10S9G20

Membros da 5

Autoria de 18 guias

0 comentários

Adicione um comentário

Exibir estatísticas:

Últimas 24 horas: 0

Últimos 7 dias: 0

Últimos 30 dias: 8

Duração total: 5,257