Ir para o conteúdo principal

Este guia tem alterações mais recentes. Mudar para a última versão não verificada.

Sony Cyber-shot DSC-T1 CCD chip Replacement

O que você precisa

  1. Sony Cyber-shot DSC-T1 CCD chip Replacement, Battery: passo 1, imagem 1 %32
    • Locate the cover on the bottom of the camera.

    • Slide the cover towards the back of the camera.

    • Be careful—the battery can slide out on its own.

  2. Sony Cyber-shot DSC-T1 CCD chip Replacement: passo 2, imagem 1 %32
    • Carefully remove the exposed battery.

    • If it is difficult to remove, flip over the camera and the battery will slide out.

  3. Sony Cyber-shot DSC-T1 CCD chip Replacement, CCD chip: passo 3, imagem 1 %32 Sony Cyber-shot DSC-T1 CCD chip Replacement, CCD chip: passo 3, imagem 2 %32 Sony Cyber-shot DSC-T1 CCD chip Replacement, CCD chip: passo 3, imagem 3 %32
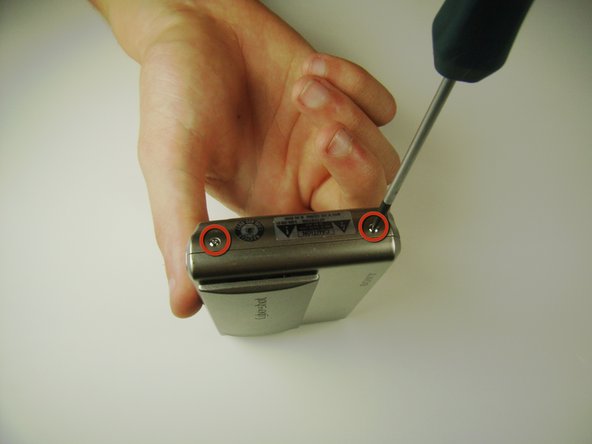
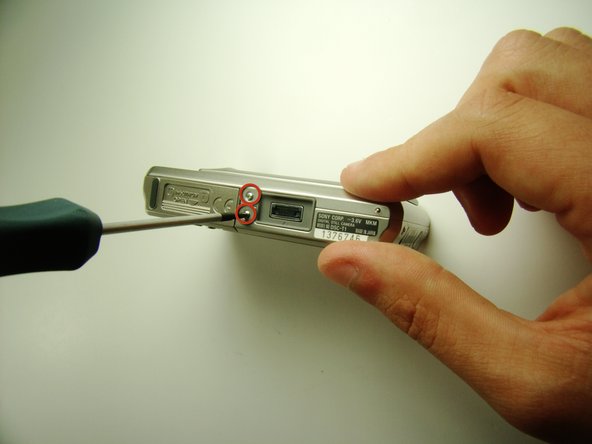
    • Locate and remove the 3mm screws on the bottom and sides of the camera with a JIS size #0 screwdriver.

  4. Sony Cyber-shot DSC-T1 CCD chip Replacement: passo 4, imagem 1 %32
    • Pull the two halves of the camera apart.

    • Place the two halves down with the insides facing you.

  5. Sony Cyber-shot DSC-T1 CCD chip Replacement: passo 5, imagem 1 %32
    • Find the two clips holding the motherboard to the black lens box.

    • Slide the plastic opening tool in between the ribbon and the black part of the clip, then flip it up. (If difficult, your fingernail can also be used)

  6. Sony Cyber-shot DSC-T1 CCD chip Replacement: passo 6, imagem 1 %32
    • After releasing the clips, pull out the black lens box.

    • If the black lens box does not come out, go back to the previous step and make sure you released the correct clips.

  7. Sony Cyber-shot DSC-T1 CCD chip Replacement: passo 7, imagem 1 %32
    • Locate and unscrew the two 3mm screws on the bottom of the black lens box with the JIS #0 screwdriver.

  8. Sony Cyber-shot DSC-T1 CCD chip Replacement: passo 8, imagem 1 %32
    • With the tweezers remove the black tape to detach the chip from the lens box.

  9. Sony Cyber-shot DSC-T1 CCD chip Replacement: passo 9, imagem 1 %32 Sony Cyber-shot DSC-T1 CCD chip Replacement: passo 9, imagem 2 %32
    • Grab the chip with your thumbs and carefully pull it off.

    • The copper tab will be glued to the lens box. Be careful not to rip it.

    • The attached copper ribbons are part of the CCD chip.

Conclusão

To reassemble your device, follow these instructions in reverse order.

3 outras pessoas executaram este guia.

Rosario

Membro desde: 04/12/12

48 Reputação

Autoria de 1 guia

Equipe

Cal Poly, Team 7-35, Maness Spring 2012 Membro de Cal Poly, Team 7-35, Maness Spring 2012

CPSU-MANESS-S12S7G35

Membros da 4

Autoria de 3 guias

0 comentários

Adicione um comentário

Exibir estatísticas:

Últimas 24 horas: 2

Últimos 7 dias: 7

Últimos 30 dias: 52

Duração total: 4,993