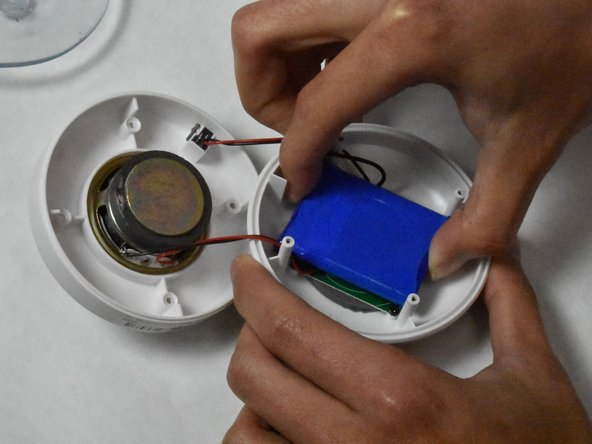
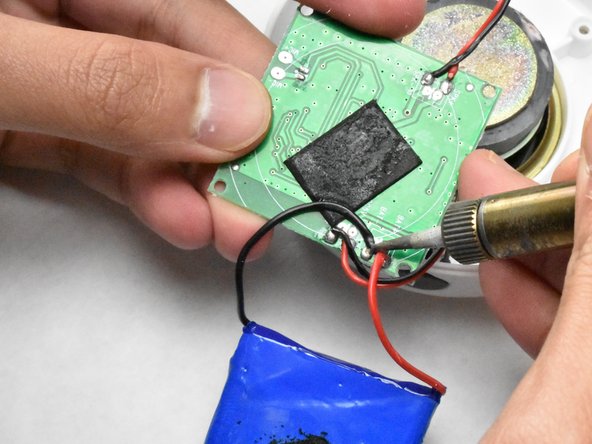
Ir para o conteúdo principal

ShowerDoorDirect Shower Speaker Motherboard Replacement

O que você precisa

  1. ShowerDoorDirect Shower Speaker Motherboard Replacement, Battery: passo 1, imagem 1 %32 ShowerDoorDirect Shower Speaker Motherboard Replacement, Battery: passo 1, imagem 2 %32
    • Remove the suction pad by pulling the suction out of the slot that it is in.

  2. ShowerDoorDirect Shower Speaker Motherboard Replacement: passo 2, imagem 1 %32
    • Remove the four 9.09mm Philips #1 screws that hold the 2 pieces of the cover together.

    • Pull apart the two halves.

  3. ShowerDoorDirect Shower Speaker Motherboard Replacement: passo 3, imagem 1 %32
    • Hold the base and pull up on the battery.

  4. ShowerDoorDirect Shower Speaker Motherboard Replacement: passo 4, imagem 1 %32 ShowerDoorDirect Shower Speaker Motherboard Replacement: passo 4, imagem 2 %32 ShowerDoorDirect Shower Speaker Motherboard Replacement: passo 4, imagem 3 %32
    • Remove the four 5mm Phillips #1 screws from the motherboard.

    • Desolder the two wires connecting the battery tp the motherboard.

  5. ShowerDoorDirect Shower Speaker Motherboard Replacement, Motherboard: passo 5, imagem 1 %32
    • Desolder the four remaining wires that are connected to the motherboard.

Conclusão

To reassemble your device, follow these instructions in reverse order.

Matthew Dunkle

Membro desde: 05/21/18

203 Reputação

Autoria de 2 guias

Equipe

IUPUI, Team S1-G1, Harley Spring 2018 Membro de IUPUI, Team S1-G1, Harley Spring 2018

IUPUI-HARLEY-S18S1G1

Membros da 7

Autoria de 6 guias

0 comentários

Adicione um comentário

Exibir estatísticas:

Últimas 24 horas: 0

Últimos 7 dias: 0

Últimos 30 dias: 2

Duração total: 341