Esta versão pode conter edições incorretas. Mude para o último instantâneo verificado.
O que você precisa
-
Este passo não foi traduzido. Ajude a traduzi-lo
-
Begin by removing the 8 quarter inch phillips head screws found along the back panel
-
Once all 8 screws have been removed, gently remove the back panel from the rest of the mop's body
-
-
-
Este passo não foi traduzido. Ajude a traduzi-lo
-
Start by gently moving the midframe from the top portion of the panel to expose the bottom portion of the mop's water tank / bladder.
-
-
Este passo não foi traduzido. Ajude a traduzi-lo
-
Remove the 10 quarter inch phillips head screws from the bottom portion of the water tank / bladder.
-
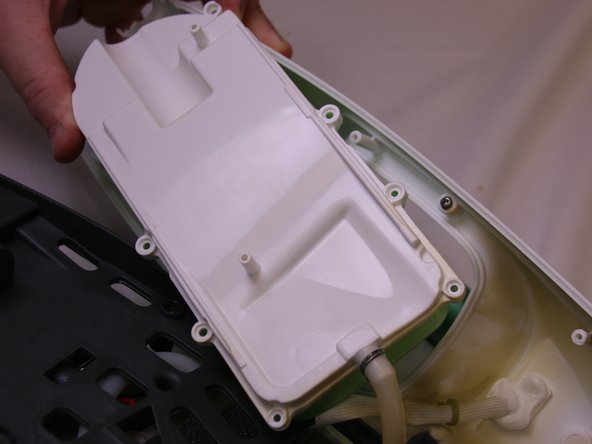
Then gently lift the water tank / bladder out of its plastic housing. and turn it over.
-
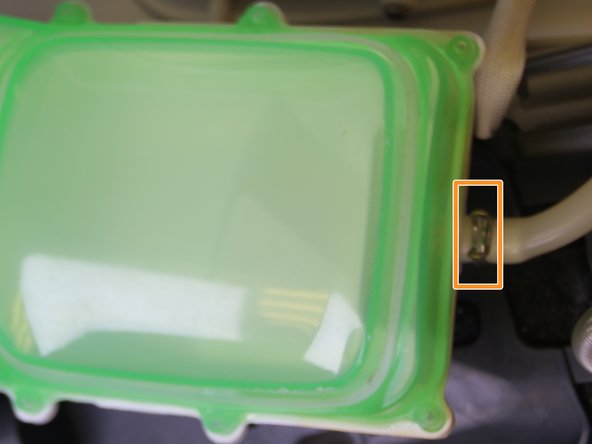
To fully remove the water tank / bladder, use your tweezers to remove the metal ring that keeps the hose fastened to the plastic tank.
-


Equipe

USF Tampa, Team S13-G7, Cagle Fall 2017 Membro de USF Tampa, Team S13-G7, Cagle Fall 2017
USFT-CAGLE-F17S13G7
Membros da 4
Autoria de 10 guias