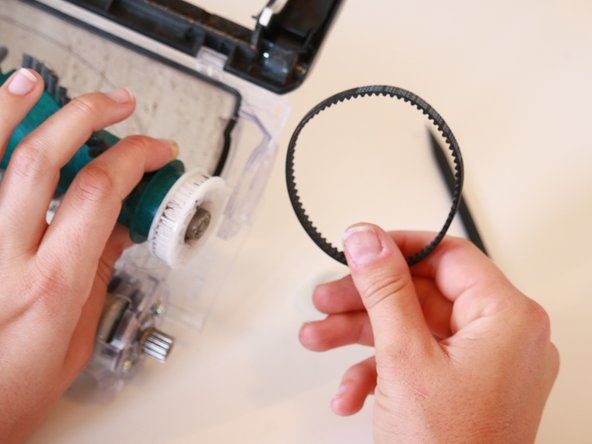
Ir para o conteúdo principal

Shark Rotator Powered Lift-Away Speed Belt Replacement

O que você precisa

  1. Shark Rotator Powered Lift-Away Speed Belt Replacement, Belt: passo 1, imagem 1 %32 Shark Rotator Powered Lift-Away Speed Belt Replacement, Belt: passo 1, imagem 2 %32 Shark Rotator Powered Lift-Away Speed Belt Replacement, Belt: passo 1, imagem 3 %32
    • Turn the vacuum on its side.

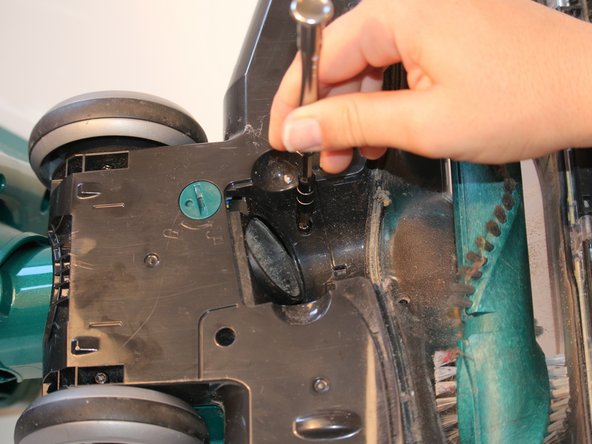
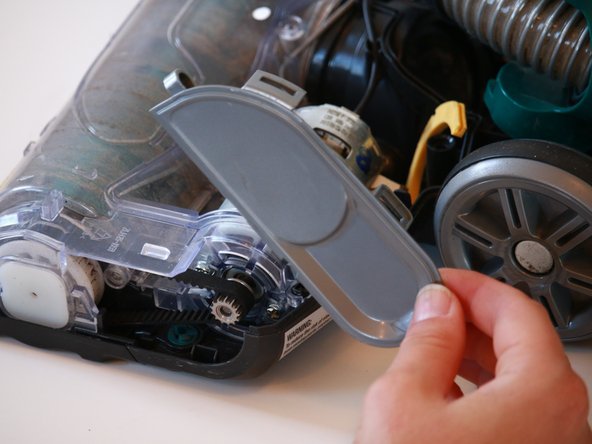
    • Using a quarter, twist the three green locks to the unlock position.

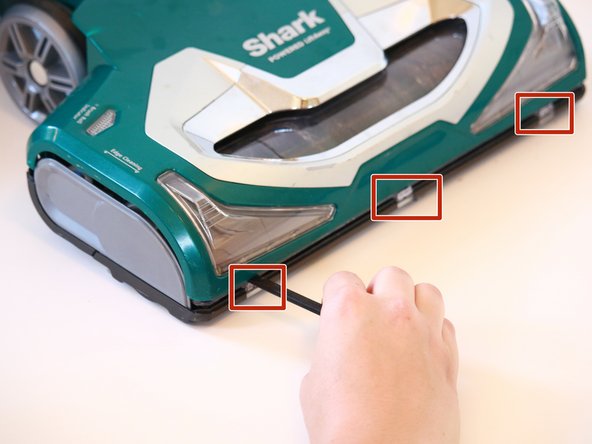
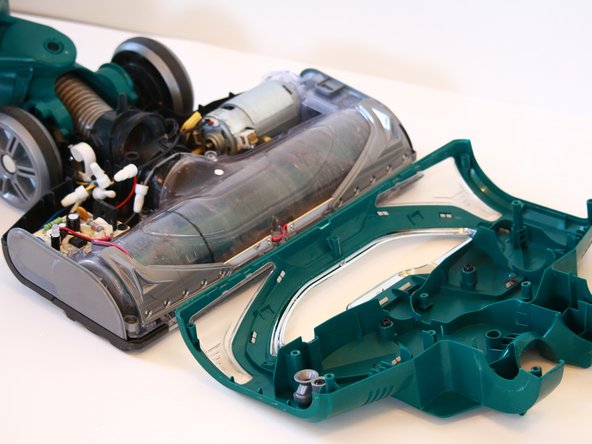
    • Pull the bottom roller brush cover to open the vacuum.

  2. Shark Rotator Powered Lift-Away Speed Belt Replacement: passo 2, imagem 1 %32
    • Using a T20 screwdriver, remove the five 15.9 mm screws on the outside cover.

  3. Shark Rotator Powered Lift-Away Speed Belt Replacement: passo 3, imagem 1 %32 Shark Rotator Powered Lift-Away Speed Belt Replacement: passo 3, imagem 2 %32
    • Remove the three 14.3 mm screws with a T20 screwdriver.

  4. Shark Rotator Powered Lift-Away Speed Belt Replacement: passo 4, imagem 1 %32
    • Remove the two 14.3 mm screws under the wheels with a T20 screwdriver bit.

  5. Shark Rotator Powered Lift-Away Speed Belt Replacement: passo 5, imagem 1 %32
    • Remove the two 15.9 mm screws from behind the wheels with a T20 bit screwdriver.

  6. Shark Rotator Powered Lift-Away Speed Belt Replacement: passo 6, imagem 1 %32
    • Remove the single 13.4 mm small screw behind the roller brush with a PH0 screwdriver bit.

  7. Shark Rotator Powered Lift-Away Speed Belt Replacement: passo 7, imagem 1 %32
    • Remove the single 13.4 mm screw from behind the belted end of the roller brush with a T20 screwdriver bit.

  8. Shark Rotator Powered Lift-Away Speed Belt Replacement: passo 8, imagem 1 %32 Shark Rotator Powered Lift-Away Speed Belt Replacement: passo 8, imagem 2 %32 Shark Rotator Powered Lift-Away Speed Belt Replacement: passo 8, imagem 3 %32
    • Turn the vacuum around.

    • Using a spudger, pry the top of the vacuum cover off. There are three tabs behind each of the clear rectangles below the headlights.

  9. Shark Rotator Powered Lift-Away Speed Belt Replacement: passo 9, imagem 1 %32 Shark Rotator Powered Lift-Away Speed Belt Replacement: passo 9, imagem 2 %32
    • Remove both of the headlight covers with the spudger.

  10. Shark Rotator Powered Lift-Away Speed Belt Replacement: passo 10, imagem 1 %32 Shark Rotator Powered Lift-Away Speed Belt Replacement: passo 10, imagem 2 %32 Shark Rotator Powered Lift-Away Speed Belt Replacement: passo 10, imagem 3 %32
    • Remove the grey side panel on the motor side of the vaccum with a spudger. Pry under each tab to release the side panel.

  11. Shark Rotator Powered Lift-Away Speed Belt Replacement: passo 11, imagem 1 %32
    • Remove the two 13.4 mm screws with a T20 bit screwdriver.

  12. Shark Rotator Powered Lift-Away Speed Belt Replacement: passo 12, imagem 1 %32
    • Remove the single 13.4 mm screw located next to where the belt was detached, securing the motor in place, with a PH1 screwdriver.

  13. Shark Rotator Powered Lift-Away Speed Belt Replacement: passo 13, imagem 1 %32 Shark Rotator Powered Lift-Away Speed Belt Replacement: passo 13, imagem 2 %32 Shark Rotator Powered Lift-Away Speed Belt Replacement: passo 13, imagem 3 %32
    • Remove the visible side of the belt from the gear with a spudger.

  14. Shark Rotator Powered Lift-Away Speed Belt Replacement: passo 14, imagem 1 %32
    • Remove the grey panel from the opposite side, by uncrewing the single 13.4 mm screw with a PH1 screwdriver. This will release the container for the roller brush and belt motor.

  15. Shark Rotator Powered Lift-Away Speed Belt Replacement: passo 15, imagem 1 %32 Shark Rotator Powered Lift-Away Speed Belt Replacement: passo 15, imagem 2 %32
    • Using the spudger, push the white end cap out of the clear plastic by placing the spudger on the roller brush side and pushing the cap outward.

  16. Shark Rotator Powered Lift-Away Speed Belt Replacement: passo 16, imagem 1 %32 Shark Rotator Powered Lift-Away Speed Belt Replacement: passo 16, imagem 2 %32
    • Remove the belt from the gear.

Conclusão

To reassemble your device, follow these instructions in reverse order.

2 outras pessoas executaram este guia.

Equipe

Cal Poly, Team S4-G6, White Fall 2018 Membro de Cal Poly, Team S4-G6, White Fall 2018

CPSU-WHITE-F18S4G6

Membros da 4

Autoria de 12 guias

2 comentários

Where can we buy belts in UK?

Greg Norman - Responder

where cn i get a belt for this vaccum

Annie Pappineau - Responder

Adicione um comentário

Exibir estatísticas:

Últimas 24 horas: 31

Últimos 7 dias: 222

Últimos 30 dias: 1,106

Duração total: 37,792