Esta versão pode conter edições incorretas. Mude para o último instantâneo verificado.
O que você precisa
-
Este passo não foi traduzido. Ajude a traduzi-lo
-
Remove the four 1.5mm screws on the back of the device.
-
-
Este passo não foi traduzido. Ajude a traduzi-lo
-
Using a plastic opening tool, lift the metal backing from the front of the device.
-
-
Este passo não foi traduzido. Ajude a traduzi-lo
-
Grip the bottom of the battery with your thumb and forefinger and pull it away from the device.
-
-
-
Este passo não foi traduzido. Ajude a traduzi-lo
-
Remove the four 1.5mm screws on the inner casing of the device.
-
-
Este passo não foi traduzido. Ajude a traduzi-lo
-
Flip the device so that the front is facing you.
-
Slide a plastic opening tool between the plastic front cover and the metal back cover of the device.
-
-
Este passo não foi traduzido. Ajude a traduzi-lo
-
Pull the front cover away from the rest of the device.
-
-
Este passo não foi traduzido. Ajude a traduzi-lo
-
Gently pry the bottom of the black button to remove it from the device.
-
-
Este passo não foi traduzido. Ajude a traduzi-lo
-
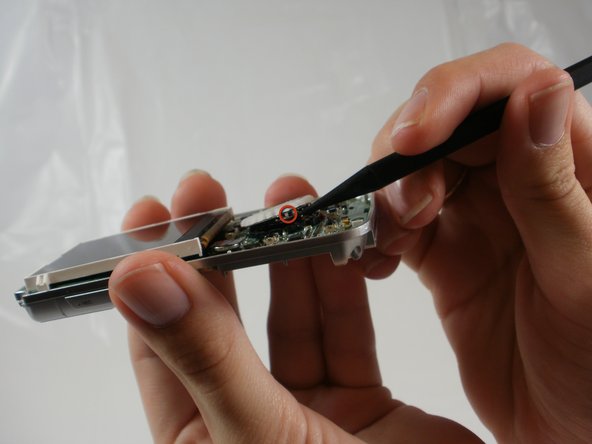
To remove the white scrolling mechanism, remove two of the bottom hooks using a spudger.
-
-
Este passo não foi traduzido. Ajude a traduzi-lo
-
Clean the area around the button to remove any dirt or other outside material that would prevent the scroll wheel from moving freely.
-


Cancelar: não concluí este guia.
6 outras pessoas executaram este guia.
Equipe

Cal Poly, Team 8-15, Maness Winter 2012 Membro de Cal Poly, Team 8-15, Maness Winter 2012
CPSU-MANESS-W12S8G15
Membros da 5
Autoria de 5 guias
Um comentário
Thanks very much for this guide. I used it to expose and clean my Sansa scroll wheel which is now functioning much better.