Ir para o conteúdo principal

Samsung TFT Color YP-T7J Motherboard Replacement

O que você precisa

  1. Samsung TFT Color YP-T7J Motherboard Replacement, The Back Cover: passo 1, imagem 1 %32 Samsung TFT Color YP-T7J Motherboard Replacement, The Back Cover: passo 1, imagem 2 %32
    • Remove the 2 screws on the back cover using a Phillips head #0 screwdriver.

  2. Samsung TFT Color YP-T7J Motherboard Replacement: passo 2, imagem 1 %32 Samsung TFT Color YP-T7J Motherboard Replacement: passo 2, imagem 2 %32
    • Remove the screw on each side of the device using a Phillips head screwdriver.

  3. Samsung TFT Color YP-T7J Motherboard Replacement: passo 3, imagem 1 %32 Samsung TFT Color YP-T7J Motherboard Replacement: passo 3, imagem 2 %32 Samsung TFT Color YP-T7J Motherboard Replacement: passo 3, imagem 3 %32
    • Using the plastic opening kit, place the prying end of the kit into the opening created by removing the screws.

    • Gently pry open the back cover. Insert the plastic opening tool in between the cover joints.

  4. Samsung TFT Color YP-T7J Motherboard Replacement, The Battery: passo 4, imagem 1 %32 Samsung TFT Color YP-T7J Motherboard Replacement, The Battery: passo 4, imagem 2 %32
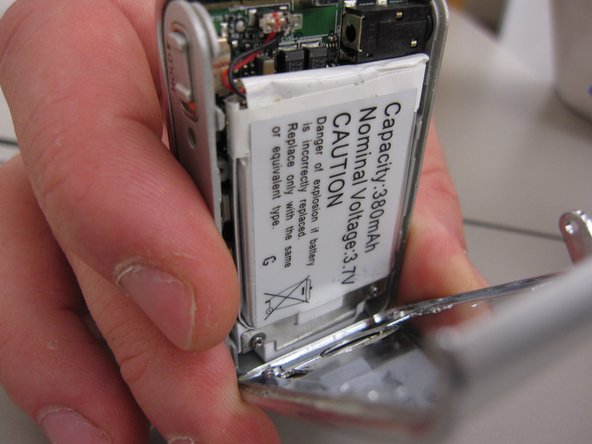
    • Once the back cover has been removed the battery will be visible.

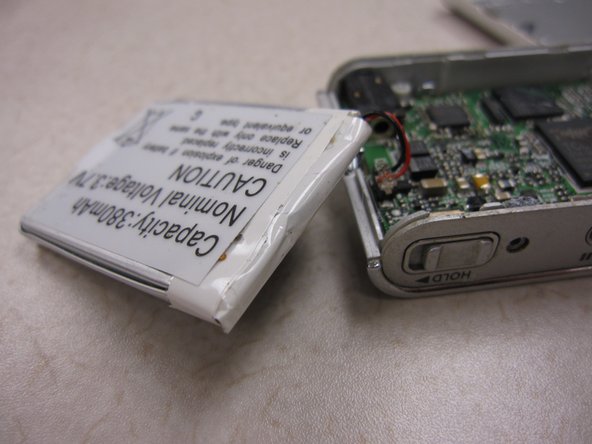
    • Pry the battery from the device.

    • NOTE: The battery should still be connected to the device

  5. Samsung TFT Color YP-T7J Motherboard Replacement: passo 5, imagem 1 %32 Samsung TFT Color YP-T7J Motherboard Replacement: passo 5, imagem 2 %32
    • Unplug the battery connecting cables.

    • NOTE: The battery now should be free from all connections to the device.

  6. Samsung TFT Color YP-T7J Motherboard Replacement, Disassembling Samsung TFT Color YP-T7J USB Connector Dock: passo 6, imagem 1 %32 Samsung TFT Color YP-T7J Motherboard Replacement, Disassembling Samsung TFT Color YP-T7J USB Connector Dock: passo 6, imagem 2 %32 Samsung TFT Color YP-T7J Motherboard Replacement, Disassembling Samsung TFT Color YP-T7J USB Connector Dock: passo 6, imagem 3 %32
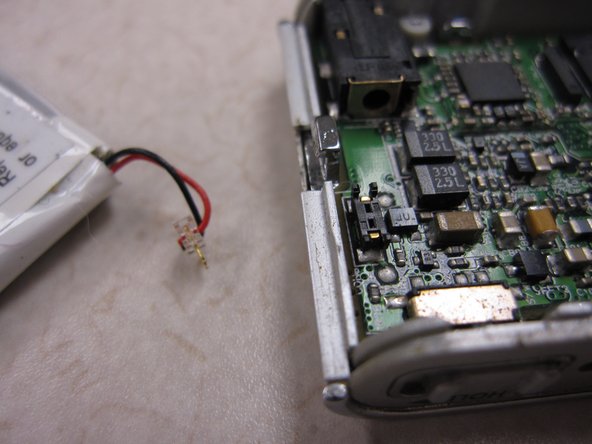
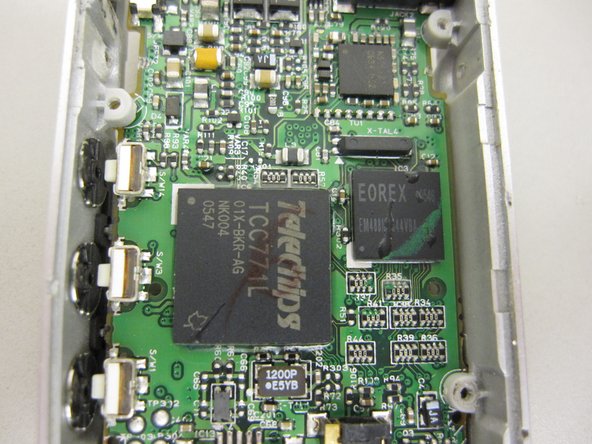
    • Once the battery has been removed you can see the motherboard.

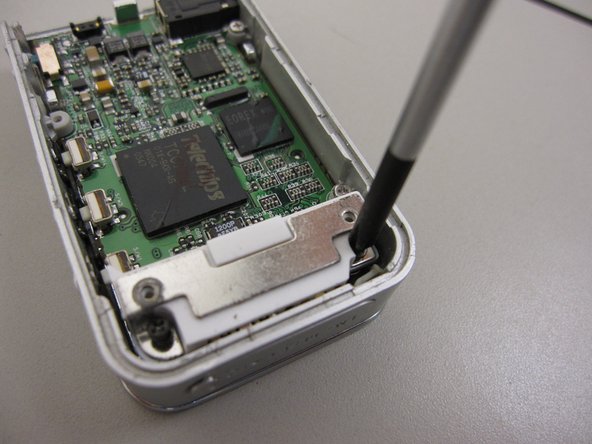
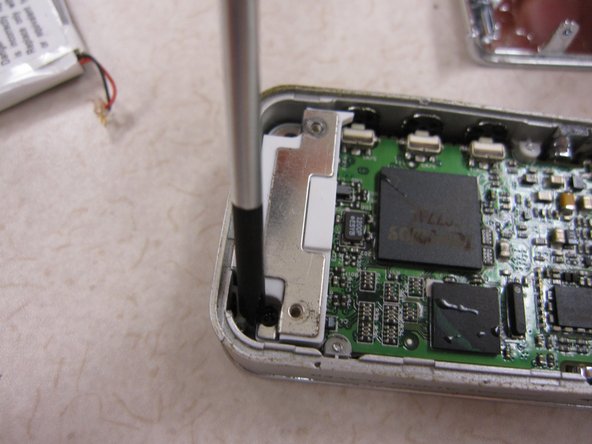
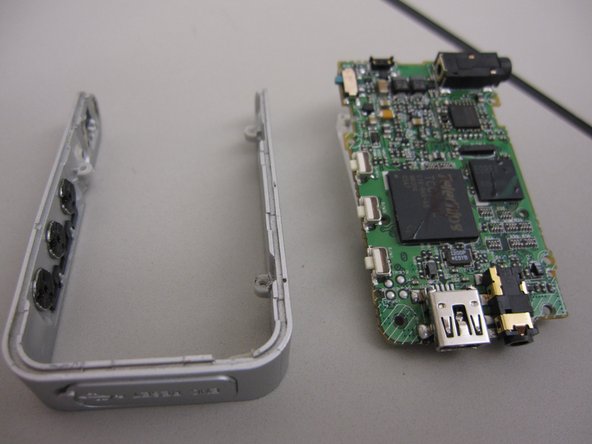
    • Unscrew 4 screws on the metal docket using a Phillips head screw driver.

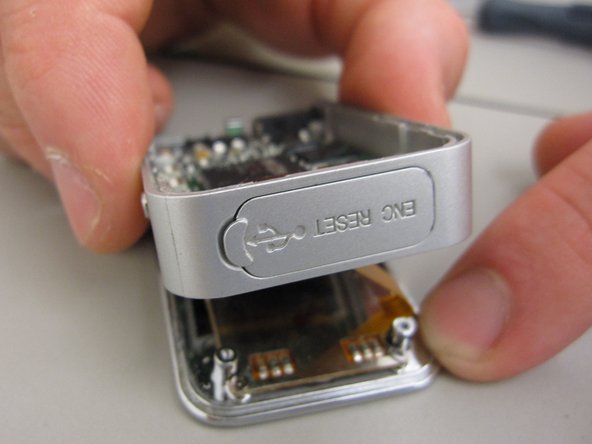
    • The USB connector can now be taken off of the device.

  7. Samsung TFT Color YP-T7J Motherboard Replacement, The Front Cover: passo 7, imagem 1 %32 Samsung TFT Color YP-T7J Motherboard Replacement, The Front Cover: passo 7, imagem 2 %32
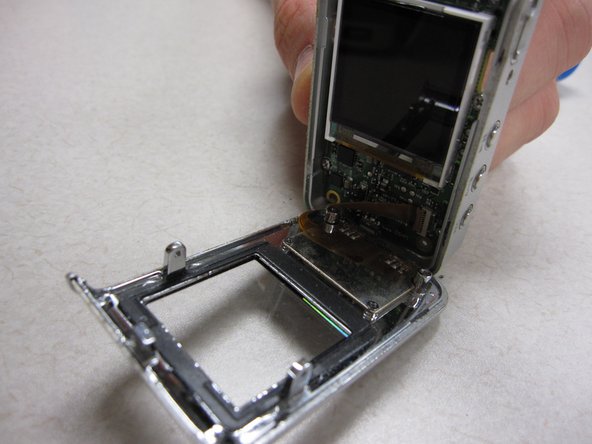
    • Using the philips screwdriver, remove the two screws on the mother board.

  8. Samsung TFT Color YP-T7J Motherboard Replacement: passo 8, imagem 1 %32 Samsung TFT Color YP-T7J Motherboard Replacement: passo 8, imagem 2 %32 Samsung TFT Color YP-T7J Motherboard Replacement: passo 8, imagem 3 %32
    • Place the pry tool in-between the front cover and mother board.

    • Gently separate the front cover.

  9. Samsung TFT Color YP-T7J Motherboard Replacement: passo 9, imagem 1 %32
    • After opening the front cover you will see and electric ribbon connecting the buttons to the mother board.

  10. Samsung TFT Color YP-T7J Motherboard Replacement: passo 10, imagem 1 %32 Samsung TFT Color YP-T7J Motherboard Replacement: passo 10, imagem 2 %32
    • CAUTION: Do not rip the electric ribbon from the mother board.

    • Carefully flip up the plastic lip that holds the electric ribbon to the board.

  11. Samsung TFT Color YP-T7J Motherboard Replacement, Motherboard: passo 11, imagem 1 %32 Samsung TFT Color YP-T7J Motherboard Replacement, Motherboard: passo 11, imagem 2 %32
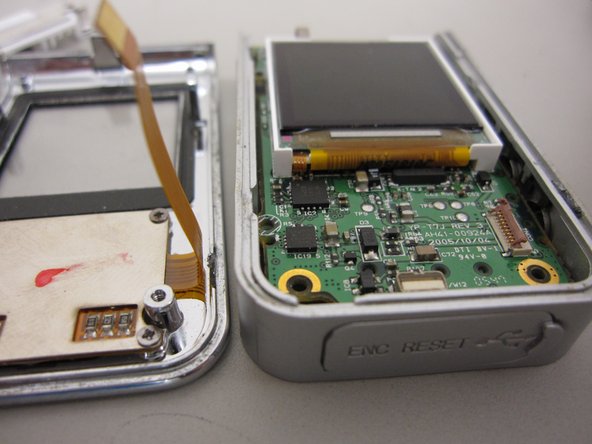
    • Remove the 3 screws located around the motherboard. 2 screws are located on the left side and1 screw is located on the right side.

    • NOTE:The orientation of the second picture is screen side down!

  12. Samsung TFT Color YP-T7J Motherboard Replacement: passo 12, imagem 1 %32 Samsung TFT Color YP-T7J Motherboard Replacement: passo 12, imagem 2 %32
    • The motherboard should be loose from the middle casing.

    • Gently pull the motherboard away from the middle casing

    • The device should now be in multiple parts.

Conclusão

To reassemble your device, follow these instructions in reverse order.

Uma outra pessoa concluiu este guia.

Dylan Peters

Membro desde: 10/18/13

409 Reputação

Autoria de 4 guias

Equipe

Clemson, Team 14-8, Benson Fall 2013 Membro de Clemson, Team 14-8, Benson Fall 2013

CLEM-BENSON-F13S14G8

Membros da 3

Autoria de 7 guias

0 comentários

Adicione um comentário

Exibir estatísticas:

Últimas 24 horas: 0

Últimos 7 dias: 0

Últimos 30 dias: 3

Duração total: 454