Ir para o conteúdo principal

Samsung Series 7XE700T1A Battery Replacement

O que você precisa

  1. Samsung Series 7XE700T1A Battery Replacement, Back panel: passo 1, imagem 1 %32
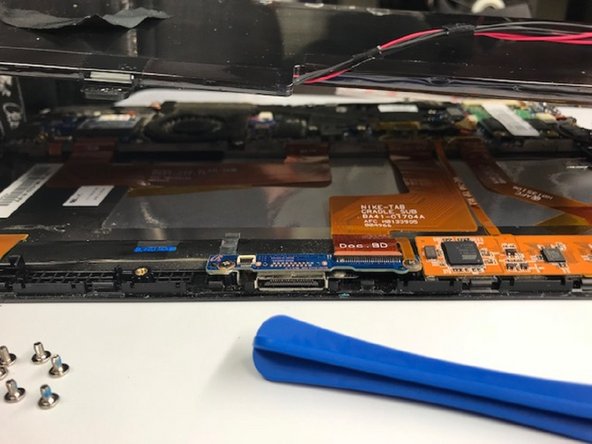
    • Remove the microSD card before attempting to open the device. Wedge the opening tools inside the device and move it around the perimeter (between the black and silver panels, not between the glass and the black panel) until you have loosened the adhesive that is keeping it together.

  2. Samsung Series 7XE700T1A Battery Replacement: passo 2, imagem 1 %32 Samsung Series 7XE700T1A Battery Replacement: passo 2, imagem 2 %32
    • With your hands, open up the back panel, separating it from the tablet.

  3. Samsung Series 7XE700T1A Battery Replacement, Battery: passo 3, imagem 1 %32
    • With the back panel removed, take the tape off the battery restricting it from coming loose.

  4. Samsung Series 7XE700T1A Battery Replacement: passo 4, imagem 1 %32
    • Using the FH000 phillip screwdriver, unscrew the screw that connects the battery to the motherboard, releasing the battery.

  5. Samsung Series 7XE700T1A Battery Replacement: passo 5, imagem 1 %32
    • Lift the clamp that is holding on to the red and black wires by using a spudger.

    • Remove the wires from the clamp.

  6. Samsung Series 7XE700T1A Battery Replacement: passo 6, imagem 1 %32 Samsung Series 7XE700T1A Battery Replacement: passo 6, imagem 2 %32
    • After all the screws are removed, and all wires are detached, lift the battery away from the tablet.

Conclusão

To reassemble your device, follow these instructions in reverse order.

0 comentários

Adicione um comentário

Exibir estatísticas:

Últimas 24 horas: 0

Últimos 7 dias: 1

Últimos 30 dias: 11

Duração total: 1,805