Esta versão pode conter edições incorretas. Mude para o último instantâneo verificado.
O que você precisa
-
Este passo não foi traduzido. Ajude a traduzi-lo
-
Place the laptop face-down on a stable surface.
-
Remove the nine 6.5mm Phillips #0 screws shown.
-
Use the blue opening tool to gently pry the back of the laptop off of the body.
-
-
Este passo não foi traduzido. Ajude a traduzi-lo
-
Use a Phillips #0 screwdriver to remove the six 4.5mm screws holding the motherboard to the case.
-
-
-
Este passo não foi traduzido. Ajude a traduzi-lo
-
Use the spudger to remove the red and black cable located above the speaker from it's connector.
-
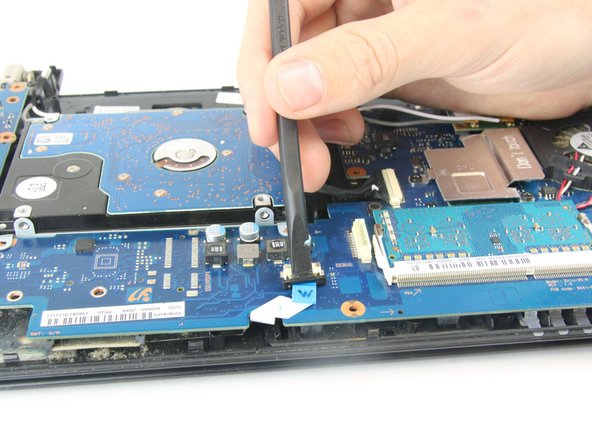
Also using the spudger, remove the small ribbon cable located a the bottom of the motherboard, towards the middle.
-
Fold the motherboard back, using the computer hinge as the axis of rotation. The motherboard will still be attached to the case by a few wires.
-
-
Este passo não foi traduzido. Ajude a traduzi-lo
-
Gently unhook the red and black wires from the plastic clips holding them to the case. This can be done with only your fingers.
-
-
Este passo não foi traduzido. Ajude a traduzi-lo
-
Using the spudger, lift the speaker up and out of it's holder, as shown. The yellow plastic tape should peel off as well.
-


Equipe

USF Tampa, Team 2-4, Nance Fall 2016 Membro de USF Tampa, Team 2-4, Nance Fall 2016
USFT-NANCE-F16S2G4
Membros da 4
Autoria de 5 guias