Ir para o conteúdo principal

Samsung NC110 Display Replacement

O que você precisa

  1. Samsung NC110 Display Replacement, Ordering a new screen: passo 1, imagem 1 %32 Samsung NC110 Display Replacement, Ordering a new screen: passo 1, imagem 2 %32 Samsung NC110 Display Replacement, Ordering a new screen: passo 1, imagem 3 %32
    • You may be able to order a screen by giving the details from your Product Code on the bottom of your notebook. However to find the best price from multiple manufacturers, you would be wise to disassemble to find details of the actual part, Step 5 - in this case the LTN101xxxx. You will need to discuss with the seller compatible screens.

    • Be sure to ask if the part is new or refurbished, and whether it will be tested before being shipped.

  2. Samsung NC110 Display Replacement, Battery Removal: passo 2, imagem 1 %32 Samsung NC110 Display Replacement, Battery Removal: passo 2, imagem 2 %32 Samsung NC110 Display Replacement, Battery Removal: passo 2, imagem 3 %32
    • Place the notebook upside down on something soft, for example a mouse mat, to avoid scratching the lid.

    • Remove the battery using both thumbs, sliding both clips outwards at the same time, and rolling your thumbs toward the battery. It will easily slide out, no force is required.

  3. Samsung NC110 Display Replacement, Removing the rubber feet and bezel screws: passo 3, imagem 1 %32 Samsung NC110 Display Replacement, Removing the rubber feet and bezel screws: passo 3, imagem 2 %32 Samsung NC110 Display Replacement, Removing the rubber feet and bezel screws: passo 3, imagem 3 %32
    • For some reason the knife is the only way to get the correct angle and pressure to make the rubber feet release. Use of other tools is not recommended.

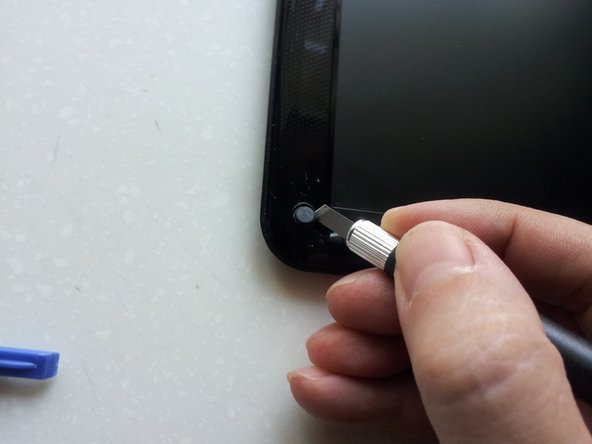
    • There are four rubber feet covering the four casing screws. Carefully using a sharp knife, these may be lifted out.

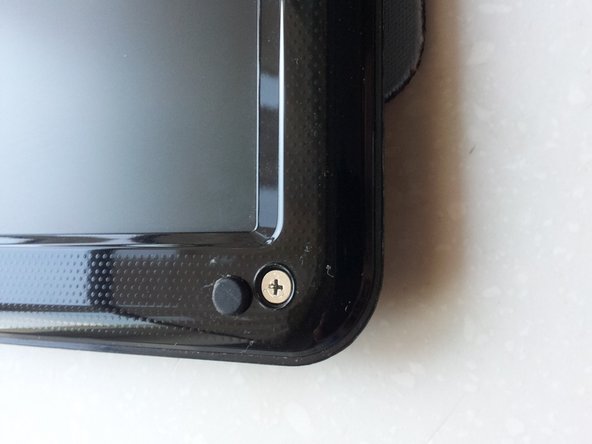
    • Use a Philips screwdriver to remove the four screws and set them aside.

    • These sticky rubber feet are best gently stuck next to the corresponding exposed screw hole, to minimize risk of loss. They will not leave a mark.

  4. Samsung NC110 Display Replacement, Removing the front bezel: passo 4, imagem 1 %32 Samsung NC110 Display Replacement, Removing the front bezel: passo 4, imagem 2 %32 Samsung NC110 Display Replacement, Removing the front bezel: passo 4, imagem 3 %32
    • This is by far the most difficult part, take your time. Use the plastic tools or guitar pick. Do not attempt this with any other tools or considerable cosmetic damage to the case will occur.

    • Starting from mid-way down the right side, using a plastic tool, gently slide up and down the seam with light pressure inwards, trying to find a separation between the case.

    • Finding a small gap, insert the plastic tool 1 - 2mm into the space at an angle, begin to gently slide open the case. You will come across resistance were the plastic clips hold together. A gentle slide up/down motion and nudge should pop them apart.

    • Open from right, top, and down the left side. You will also need to turn it on its side to do the same on the bottom edge between the hinges.

  5. Samsung NC110 Display Replacement, Removing the screen: passo 5, imagem 1 %32 Samsung NC110 Display Replacement, Removing the screen: passo 5, imagem 2 %32 Samsung NC110 Display Replacement, Removing the screen: passo 5, imagem 3 %32
    • Remove the four screws. Gently peel the screen away by the metal tabs and lay down on the keyboard.

    • At this point you will be able to find the product number (LTN101xxxx), if you have not already ordered a screen.

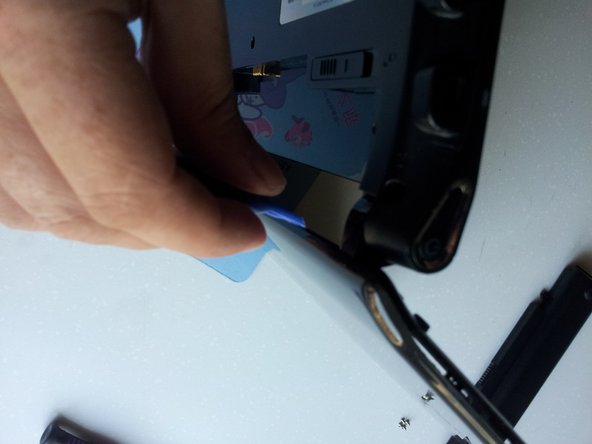
    • The cable is held in place by strong tape. A knife will help peel it towards the cable, as you will reuse it.

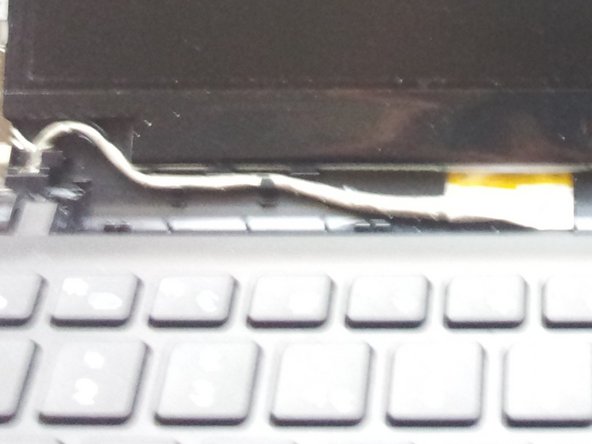
    • Remove the connector by gently rocking left/right and pull back. It is quite secure and may need a gentle tug.

  6. Samsung NC110 Display Replacement, Testing the new screen: passo 6, imagem 1 %32 Samsung NC110 Display Replacement, Testing the new screen: passo 6, imagem 2 %32
    • Once you remove the protective film on the new screen you will never be able to return it. It is safe to test with it on for a short period.

    • Note the display cable tidy will need to be clipped back in place when replacing the final screen.

    • Plug in the new screen and clip the cable back into place. Gently lower the screen back in to position with the four screw holes. Screw in the four screws. Connect the mains adaptor and power up. Look for any missing pixels or anything unusual.

    • If satisfied, remove the power. Unscrew and gently lift the screen out and rest on the keyboard. You should be able to gently remove the tape attaching the protective screen, then follow reassembly.

    • In this example the screen never touches the keyboard because it is still covered in protective film/ screen. If for some reason yours does not have protection you will need to put a thin soft cloth over the keyboard first to avoid pressure or scratch damage.

Conclusão

To reassemble your device, follow these instructions in reverse order.

James Needham

Membro desde: 09/10/16

101 Reputação

Autoria de 1 guia

0 comentários

Adicione um comentário

Exibir estatísticas:

Últimas 24 horas: 0

Últimos 7 dias: 3

Últimos 30 dias: 14

Duração total: 1,667