Esta versão pode conter edições incorretas. Mude para o último instantâneo verificado.
O que você precisa
-
Este passo não foi traduzido. Ajude a traduzi-lo
-
Press and hold down the button on the bottom side of the phone with your finger.
-
-
Este passo não foi traduzido. Ajude a traduzi-lo
-
While holding the button down, remove the back cover of the phone.
-
-
Este passo não foi traduzido. Ajude a traduzi-lo
-
Remove the four screws from the back of the phone using a Phillips #00 screwdriver.
-
-
Este passo não foi traduzido. Ajude a traduzi-lo
-
Remove the two 7.3 mm screws from the camera and the speaker at the bottom back plate of the phone using a Phillips #00 screwdriver.
-
-
-
Este passo não foi traduzido. Ajude a traduzi-lo
-
Locate the USB port (where the charger can be plugged in). Using the iFixit opening tool, open the phone cover.
-
-
Este passo não foi traduzido. Ajude a traduzi-lo
-
Remove the 5.5 mm screws from both sides of the camera/speaker with a Phillips #00 screwdriver.
-
-
Este passo não foi traduzido. Ajude a traduzi-lo
-
Use the iFixit opening tool to remove the camera/speaker from the motherboard.
-
-
Este passo não foi traduzido. Ajude a traduzi-lo
-
Use the iFixit opening tool to gently pry the camera/speaker off.
-
-
Este passo não foi traduzido. Ajude a traduzi-lo
-
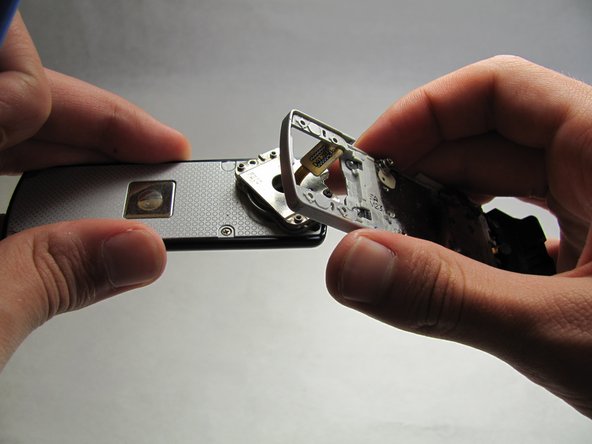
Use the iFixit opening tool to remove the yellow tab on the motherboard.
-
-
Este passo não foi traduzido. Ajude a traduzi-lo
-
Use the iFixit opening tool to remove the other orange tab to free the motherboard.
-
-
Este passo não foi traduzido. Ajude a traduzi-lo
-
To completely remove the motherboard, use the iFixit opening tool to leverage it up, then use your fingers to pull it out.
-
-
Este passo não foi traduzido. Ajude a traduzi-lo
-
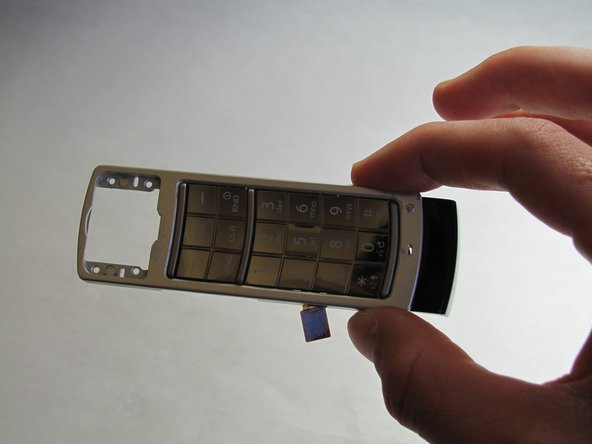
Open/swivel the phone so the back of the LCD panel is visible.
-
Use the iFixit opening tool to pry the keypad from the hinge on the back of the device.
-


Cancelar: não concluí este guia.
Uma outra pessoa concluiu este guia.
Equipe

Cal Poly, Team 6-18, Maness Spring 2010 Membro de Cal Poly, Team 6-18, Maness Spring 2010
CPSU-MANESS-S10S6G18
Membros da 3
Autoria de 12 guias