Esta versão pode conter edições incorretas. Mude para o último instantâneo verificado.
O que você precisa
-
Este passo não foi traduzido. Ajude a traduzi-lo
-
Insert the wedge of the nylon spudger and slide it between the front and back panels until the back comes off.
-
-
Este passo não foi traduzido. Ajude a traduzi-lo
-
Peel off the green tape that covers the connectors for the three black strips.
-
Use the tip of a spudger or your fingernail to flip up the small retaining flaps.
-
-
Este passo não foi traduzido. Ajude a traduzi-lo
-
Use a Phillips #00 screwdriver to remove the four 3.2mm screws.
-
-
-
Este passo não foi traduzido. Ajude a traduzi-lo
-
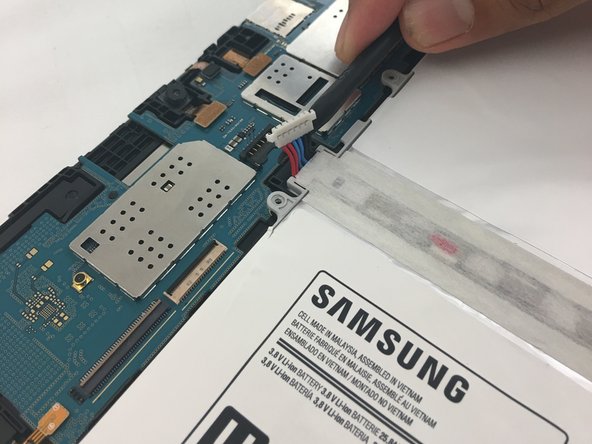
Detach the red, blue, and black cables by prying up on the white connector from the motherboard.
-
If using fingers instead, pull evenly on the full width of the cable so the wires are not overly strained.
-
-
Este passo não foi traduzido. Ajude a traduzi-lo
-
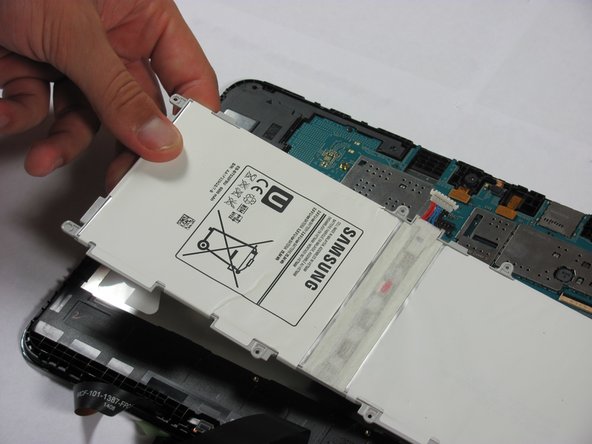
Use the nylon spudger to remove the battery by prying up on the edges.
-
-
Este passo não foi traduzido. Ajude a traduzi-lo
-
Once the battery is loose, lift it out of the device.
-
-
Este passo não foi traduzido. Ajude a traduzi-lo
-
Remove the two 2.7mm Phillips #00 screws from the motherboard.
-
-
Este passo não foi traduzido. Ajude a traduzi-lo
-
Use the flat end of a spudger to pry up and disconnect the five press-fit connectors from the motherboard.
-
-
Este passo não foi traduzido. Ajude a traduzi-lo
-
Use a spudger to pry up the motherboard, and remove it from the device.
-


Cancelar: não concluí este guia.
8 outras pessoas executaram este guia.
