Esta versão pode conter edições incorretas. Mude para o último instantâneo verificado.
O que você precisa
-
Este passo não foi traduzido. Ajude a traduzi-lo
-
Start out by separating the screen from the back cover using the larger plastic opening tool to pry them apart.
-
-
Este passo não foi traduzido. Ajude a traduzi-lo
-
Once every part of the screen is separated from the back cover, you should be able to fully remove it with your hands.
-
-
-
Este passo não foi traduzido. Ajude a traduzi-lo
-
To remove the battery you must use something small, such as tweezers, to disconnect the battery from its port.
-
-
Este passo não foi traduzido. Ajude a traduzi-lo
-
After the battery is disconnected, use the pulling tab to safely remove the battery.
-
-
Este passo não foi traduzido. Ajude a traduzi-lo
-
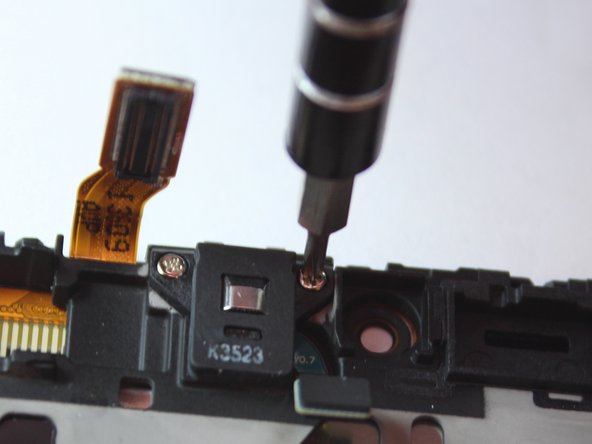
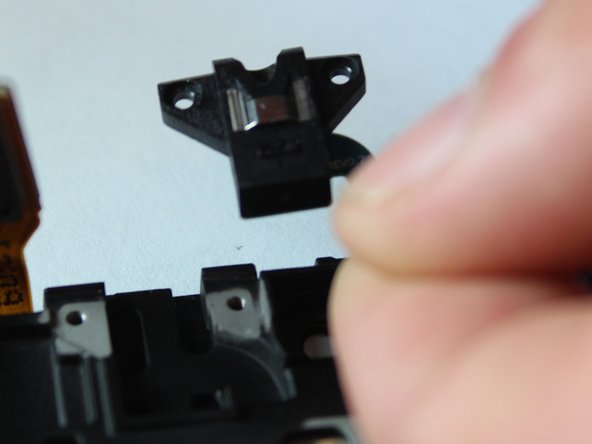
Unscrew the 2.9mm phillips #000 screws from the audio jack and remove component from the tablet.
-


Cancelar: não concluí este guia.
Uma outra pessoa concluiu este guia.
Equipe

USF Tampa, Team 4-2, Brown Fall 2014 Membro de USF Tampa, Team 4-2, Brown Fall 2014
USFT-BROWN-F14S4G2
Membros da 3
Autoria de 26 guias