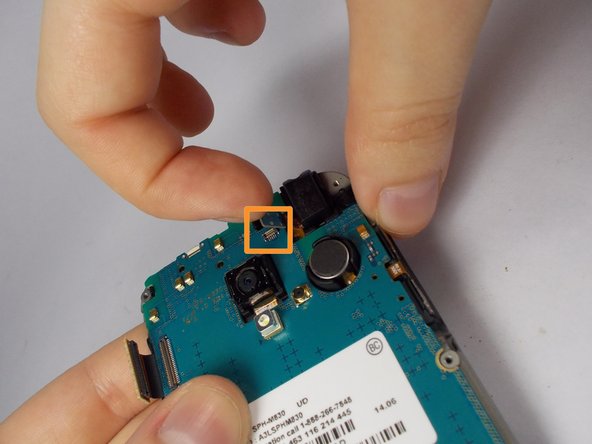
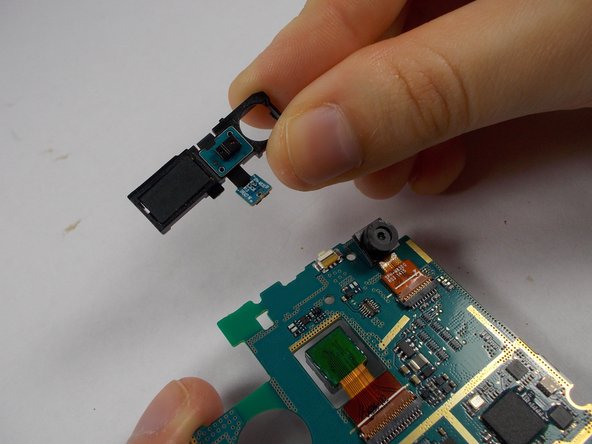
Ir para o conteúdo principal

Samsung Galaxy Rush Front Camera Replacement

O que você precisa

  1. Samsung Galaxy Rush Front Camera Replacement, Front Camera: passo 1, imagem 1 %32 Samsung Galaxy Rush Front Camera Replacement, Front Camera: passo 1, imagem 2 %32
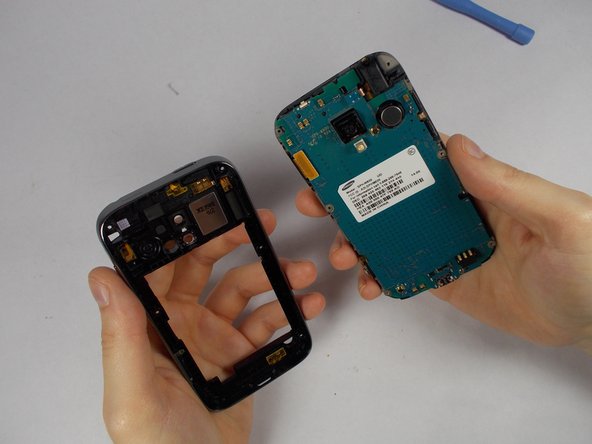
    • Looking at the back of your phone, use your finger to remove back cover.

  2. Samsung Galaxy Rush Front Camera Replacement: passo 2, imagem 1 %32 Samsung Galaxy Rush Front Camera Replacement: passo 2, imagem 2 %32
    • Remove the battery,

  3. Samsung Galaxy Rush Front Camera Replacement: passo 3, imagem 1 %32
    • With a small phillips-head screw driver, remove the six screws holding the back panel in place.

  4. Samsung Galaxy Rush Front Camera Replacement: passo 4, imagem 1 %32 Samsung Galaxy Rush Front Camera Replacement: passo 4, imagem 2 %32
    • Use the pry tool to pry the back panel from the rest of the phone. Pry from the edge closest to the screen for simplicity.

  5. Samsung Galaxy Rush Front Camera Replacement: passo 5, imagem 1 %32 Samsung Galaxy Rush Front Camera Replacement: passo 5, imagem 2 %32
    • Using tweezers, gently lift connectors from motherboard.

    • A connector will be on the upper left

    • The second connector is located towards the top of the phone. Above the camera. It comes off with ease.

  6. Samsung Galaxy Rush Front Camera Replacement: passo 6, imagem 1 %32 Samsung Galaxy Rush Front Camera Replacement: passo 6, imagem 2 %32
    • Use the tweezers to carefully remove the 2 adhesive orange ribbons.

    • These stay attached to the motherboard so be careful not to break them.

    • They are on the side of the phone.

  7. Samsung Galaxy Rush Front Camera Replacement: passo 7, imagem 1 %32
    • Use a philips-head screwdriver to remove the single screw on the bottom of the phone. Located to the right of the charging port.

  8. Samsung Galaxy Rush Front Camera Replacement: passo 8, imagem 1 %32
    • Lift the motherboard upwards separating it from your screen.

  9. Samsung Galaxy Rush Front Camera Replacement: passo 9, imagem 1 %32
    • Hold motherboard so that the circuits face away from you

    • Pop off the two black tabs on the upper most part of the motherboard.

  10. Samsung Galaxy Rush Front Camera Replacement: passo 10, imagem 1 %32
    • Flip the motherboard over so that the circuits are now facing your direction.

  11. Samsung Galaxy Rush Front Camera Replacement: passo 11, imagem 1 %32 Samsung Galaxy Rush Front Camera Replacement: passo 11, imagem 2 %32
    • Lift and remove the connecting tab

  12. Samsung Galaxy Rush Front Camera Replacement: passo 12, imagem 1 %32 Samsung Galaxy Rush Front Camera Replacement: passo 12, imagem 2 %32
    • Gently take the front camera with two fingers and pull upwards. A wiggle may help.

Conclusão

To reassemble your device, follow these instructions in reverse order.

Matthew

Membro desde: 10/22/14

1 Reputação

Autoria de 2 guias

Equipe

UMass Dartmouth, Team 6-4, Vijaybhaskar Fall 2014 Membro de UMass Dartmouth, Team 6-4, Vijaybhaskar Fall 2014

UMASSD-VIJAYBHASKAR-F14S6G4

Membros da 3

Autoria de 5 guias

0 comentários

Adicione um comentário

Exibir estatísticas:

Últimas 24 horas: 0

Últimos 7 dias: 0

Últimos 30 dias: 1

Duração total: 181