Ir para o conteúdo principal

Samsung Galaxy Player 5.0 Screen Replacement

O que você precisa

  1. Samsung Galaxy Player 5.0 Screen Replacement, Screen: passo 1, imagem 1 %32
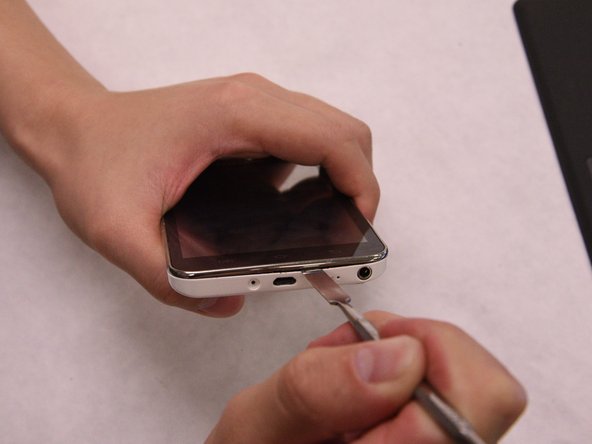
    • Remove the SD card before disassembling the device.

    • Use a screwdriver to remove the screw near the SD card.

  2. Samsung Galaxy Player 5.0 Screen Replacement: passo 2, imagem 1 %32 Samsung Galaxy Player 5.0 Screen Replacement: passo 2, imagem 2 %32
    • Go to the bottom of the device and remove the white caps covering the screws.

    • If it is difficult to remove the white caps, use a heat blower to heat them before removing them.

    • After removing the caps, use a screwdriver to remove the screws at the bottom of the device. Set aside.

  3. Samsung Galaxy Player 5.0 Screen Replacement: passo 3, imagem 1 %32 Samsung Galaxy Player 5.0 Screen Replacement: passo 3, imagem 2 %32 Samsung Galaxy Player 5.0 Screen Replacement: passo 3, imagem 3 %32
    • Starting from the bottom, use a pry tool to separate the front housing cover from the back cover.

    • Use a plastic prying tool if you can. Be extremely careful when separating the front housing cover.

    • Pull the front and back cover halves apart completely.

  4. Samsung Galaxy Player 5.0 Screen Replacement: passo 4, imagem 1 %32
    • Use the pry tool to separate the tab connecting the battery and motherboard.

  5. Samsung Galaxy Player 5.0 Screen Replacement: passo 5, imagem 1 %32
    Ferramenta utilizada nesse passo:
    Plastic Cards
    $2.99
    Comprar
    • Use the prying tool to separate the battery from the motherboard.

    • Metal spudgers and similar pry tools can puncture an unprotected battery, potentially causing a fire. To be on the safe side, it’s better to use a plastic card or nylon spudger.

  6. Samsung Galaxy Player 5.0 Screen Replacement: passo 6, imagem 1 %32
    • Remove the ear piece using a pry tool. Set aside.

  7. Samsung Galaxy Player 5.0 Screen Replacement: passo 7, imagem 1 %32
    • Remove the front and rear cameras.

  8. Samsung Galaxy Player 5.0 Screen Replacement: passo 8, imagem 1 %32
    • Disconnect the volume button from the motherboard.

    • It is not necessary to completely remove the volume buttons from the device after they have been disconnected.

  9. Samsung Galaxy Player 5.0 Screen Replacement: passo 9, imagem 1 %32 Samsung Galaxy Player 5.0 Screen Replacement: passo 9, imagem 2 %32
    • Use a screwdriver to remove the screw pictured.

    • Use a prying tool to remove the headphone jack.

    • Set both carefully aside.

  10. Samsung Galaxy Player 5.0 Screen Replacement: passo 10, imagem 1 %32
    • Disconnect the mean button flex cable.

    • Use a pry tool to open the locker on the motherboard and remove flex cable.

  11. Samsung Galaxy Player 5.0 Screen Replacement: passo 11, imagem 1 %32 Samsung Galaxy Player 5.0 Screen Replacement: passo 11, imagem 2 %32
    • Disconnect the LCD flex cable.

    • Use a screwdriver to remove six screws pictured.

  12. Samsung Galaxy Player 5.0 Screen Replacement: passo 12, imagem 1 %32 Samsung Galaxy Player 5.0 Screen Replacement: passo 12, imagem 2 %32 Samsung Galaxy Player 5.0 Screen Replacement: passo 12, imagem 3 %32
    • Hold the PCD unit and lift it up.

    • Switch out the old digitizer for the new one. Reconnect all the cables and screws in the reverse sequence.

Conclusão

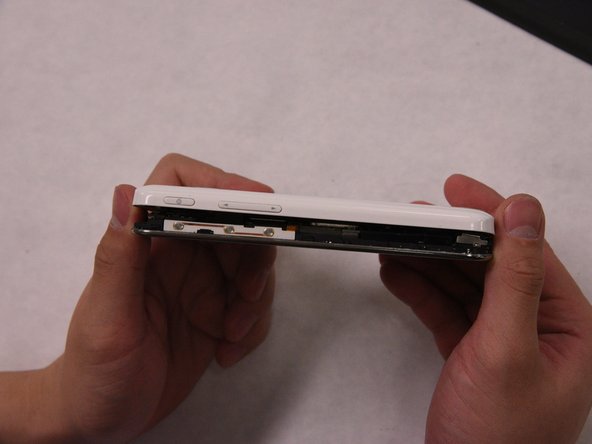
To reassemble your device, follow these instructions in reverse order.

Uma outra pessoa concluiu este guia.

Wenbin Weng

Membro desde: 01/28/17

122 Reputação

Autoria de 1 guia

Equipe

IUPUI, Team S4-G4, Wilson Spring 2017 Membro de IUPUI, Team S4-G4, Wilson Spring 2017

IUPUI-WILSON-S17S4G4

Membros da 4

Autoria de 2 guias

0 comentários

Adicione um comentário

Exibir estatísticas:

Últimas 24 horas: 0

Últimos 7 dias: 1

Últimos 30 dias: 5

Duração total: 679