Esta versão pode conter edições incorretas. Mude para o último instantâneo verificado.
O que você precisa
-
Este passo não foi traduzido. Ajude a traduzi-lo
-
Grasp the end of the stylus and remove it from its slot in the midframe.
-
-
Este passo não foi traduzido. Ajude a traduzi-lo
-
Pry with a plastic opening tool, or your fingernail, in the divot to the left of the rear-facing camera, near the power button.
-
-
Este passo não foi traduzido. Ajude a traduzi-lo
-
Lift the rear case by the corner nearest the divot and remove it from the phone.
-
-
Este passo não foi traduzido. Ajude a traduzi-lo
-
If you have an SD card inserted, use the flat end of a spudger, or your fingernail, to press the microSD card slightly deeper into its slot until you hear a click.
-
After the click, release the card and it will pop out of its slot.
-
Remove the microSD card.
-
-
Este passo não foi traduzido. Ajude a traduzi-lo
-
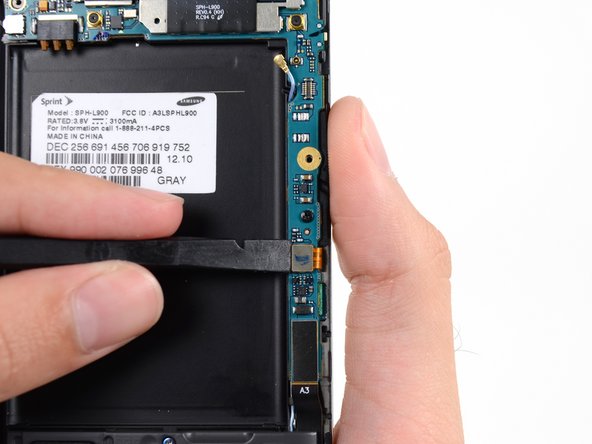
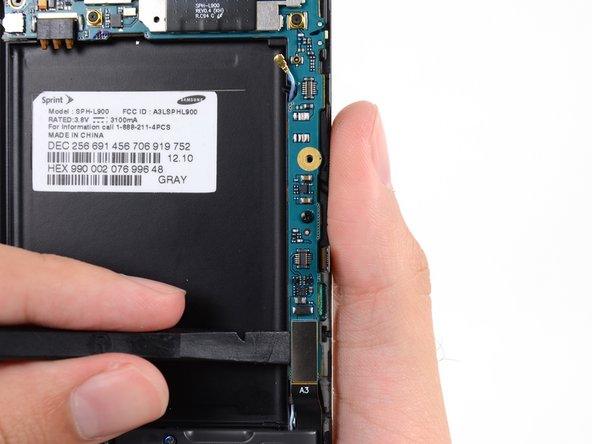
Insert a plastic opening tool, or your finger, into the notch of the battery compartment and lift the battery upward.
-
-
Este passo não foi traduzido. Ajude a traduzi-lo
-
Remove the eleven 4.0 mm Phillips #00 screws securing the midframe to the display assembly.
-
-
-
Este passo não foi traduzido. Ajude a traduzi-lo
-
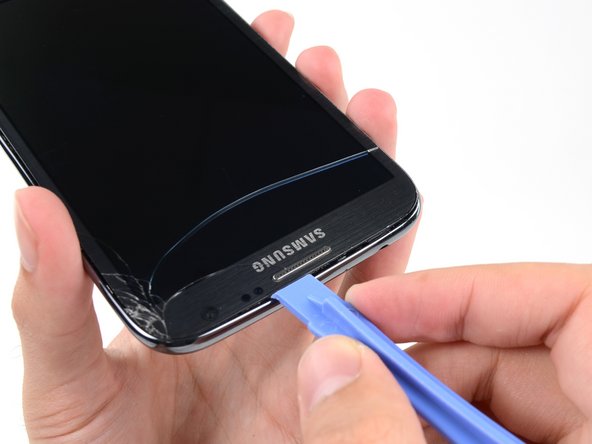
Insert your plastic opening tool between the midframe and front panel assembly on the side of the phone.
-
Slide the plastic opening tool down the seam.
-
-
Este passo não foi traduzido. Ajude a traduzi-lo
-
Continue to run the plastic opening tool down the seam.
-
-
Este passo não foi traduzido. Ajude a traduzi-lo
-
Carefully pry around the corner with a plastic opening tool.
-
-
Este passo não foi traduzido. Ajude a traduzi-lo
-
Pry along the top of the phone with a plastic opening tool.
-
-
Este passo não foi traduzido. Ajude a traduzi-lo
-
Push the plastic opening tool down to free the corner of the midframe from the display assembly.
-
-
Este passo não foi traduzido. Ajude a traduzi-lo
-
Free the clips along the power button side of the phone.
-
Lastly, free the two clips along the top and bottom edge of battery compartment.
-
-
Este passo não foi traduzido. Ajude a traduzi-lo
-
Use a spudger to disconnect the vibrator/power button assembly cable connector.
-
Disconnect the antenna cable connector.
-
Disconnect the display cable connector.
-
-
Este passo não foi traduzido. Ajude a traduzi-lo
-
Disconnect the front-facing camera cable connector.
-
Disconnect the headphone jack cable connector.
-
Disconnect the digitizer cable connector.
-
-
Este passo não foi traduzido. Ajude a traduzi-lo
-
Use the spudger to disconnect the antenna cable connector from the motherboard.
-
Disconnect the soft button cable connector.
-
Disconnect the USB board cable connector.
-
-
Este passo não foi traduzido. Ajude a traduzi-lo
-
Remove the 3 mm Phillips #00 screw securing the motherboard to the display assembly.
-
-
Este passo não foi traduzido. Ajude a traduzi-lo
-
Use a spudger to disconnect the rear-facing camera assembly cable connector.
-
-
Este passo não foi traduzido. Ajude a traduzi-lo
-
Use tweezers, or your fingers, to remove the rear-facing camera assembly.
-


Cancelar: não concluí este guia.
67 outras pessoas executaram este guia.


29 comentários
Hello Fellas,
My Note 2 has a busted wifi, bluetooth, and gps (it attempts to turn on the wifi but never actually does). I suspect it is a hardware issue since I have factory reset my phone (didn't fix the problem) and even updated the drivers on my phone. It seem to be a common problem with this phone. The only solution I have found online is to wack the back of my phone until the signal is fixed. This is a good temporary fix but the problem returns after a day or two (sometimes within hours). I was hoping I could maybe replace the wireless signal piece of hardware and finally fix my phone. Could someone point out the correct hardware piece, please. (btw: I do receive regular phone calls , text , and 4g data)
Thank you, Kevin
Great job Sam!
Just one question: What are the steps after Step 21?
It seems to end suddenly...
Secondly, where can I but a Note 2 motherboard?
Hey Fuz!
The guide ends at step 21, because the camera is the last thing to come off of the old motherboard, it will then be the first thing to go back on the replacement motherboard. All you have to do is follow the steps in reverse to reassemble the device. Unfortunately we don't sell the Note II motherboard right now, but a quick search on eBay brings up quite a few options!