Ir para o conteúdo principal

Samsung Galaxy Note II Motherboard Assembly Replacement

Pré-requisito somente
Este guia destina-se apenas a ser usado como pré-requisito para outros guias. É incompleto por si só.

O que você precisa

  1. Samsung Galaxy Note II Motherboard Assembly Replacement, Motherboard Assembly: passo 1, imagem 1 %32 Samsung Galaxy Note II Motherboard Assembly Replacement, Motherboard Assembly: passo 1, imagem 2 %32 Samsung Galaxy Note II Motherboard Assembly Replacement, Motherboard Assembly: passo 1, imagem 3 %32
    • Use a spudger to disconnect the vibrator/power button assembly cable connector.

    • Disconnect the antenna cable connector.

    • Disconnect the display cable connector.

  2. Samsung Galaxy Note II Motherboard Assembly Replacement: passo 2, imagem 1 %32 Samsung Galaxy Note II Motherboard Assembly Replacement: passo 2, imagem 2 %32 Samsung Galaxy Note II Motherboard Assembly Replacement: passo 2, imagem 3 %32
    • Disconnect the front-facing camera cable connector.

    • Disconnect the headphone jack cable connector.

    • Disconnect the digitizer cable connector.

  3. Samsung Galaxy Note II Motherboard Assembly Replacement: passo 3, imagem 1 %32 Samsung Galaxy Note II Motherboard Assembly Replacement: passo 3, imagem 2 %32 Samsung Galaxy Note II Motherboard Assembly Replacement: passo 3, imagem 3 %32
    • Use the spudger to disconnect the antenna cable connector from the motherboard.

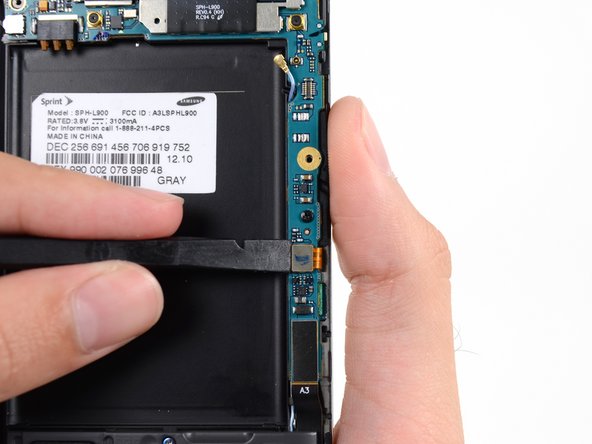
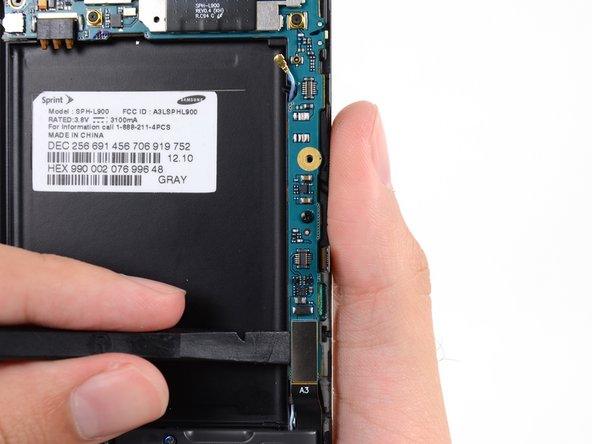
    • Disconnect the soft button cable connector.

    • Disconnect the USB board cable connector.

  4. Samsung Galaxy Note II Motherboard Assembly Replacement: passo 4, imagem 1 %32
    • Remove the 3 mm Phillips #00 screw securing the motherboard to the display assembly.

  5. Samsung Galaxy Note II Motherboard Assembly Replacement: passo 5, imagem 1 %32 Samsung Galaxy Note II Motherboard Assembly Replacement: passo 5, imagem 2 %32
    • Gently remove the motherboard.

    • Hold the motherboard by its edges to prevent ESD damage. Be careful not to snag it on any cables as you extract it from the display assembly.

Conclusão

To reassemble your device, follow these instructions in reverse order.

Sam Goldheart

Membro desde: 10/18/12

465.762 Reputação

Autoria de 538 guias

Equipe

iFixit Membro de iFixit

Staff

Membros da 135

Autoria de 16.817 guias

0 comentários

Adicione um comentário

Exibir estatísticas:

Últimas 24 horas: 0

Últimos 7 dias: 0

Últimos 30 dias: 0

Duração total: 47