Ir para o conteúdo principal

Samsung Galaxy Mega Display Assembly Replacement

O que você precisa

  1. Samsung Galaxy Mega Display Assembly Replacement, Remove Rear Cover: passo 1, imagem 1 %32 Samsung Galaxy Mega Display Assembly Replacement, Remove Rear Cover: passo 1, imagem 2 %32
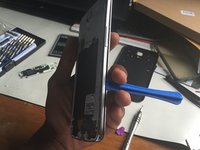
    • Use the opening tool or a fingernail to pry open the rear cover at the top left corner.

    • Once the rear cover is removed, you'll have access to the SIM card, the SD card, and screws.

  2. Samsung Galaxy Mega Display Assembly Replacement, SIM, SD, Screw and Battery Removal: passo 2, imagem 1 %32 Samsung Galaxy Mega Display Assembly Replacement, SIM, SD, Screw and Battery Removal: passo 2, imagem 2 %32 Samsung Galaxy Mega Display Assembly Replacement, SIM, SD, Screw and Battery Removal: passo 2, imagem 3 %32
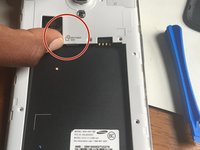
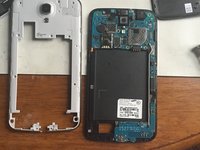
    • After removing the back cover, remove the battery, the SIM card, and SD card (if present).

    • Remove the highlighted PH000 screws from the rear of the phone.

    • Ensure the phone has been powered down via the OS (if possible) before removing the battery.

  3. Samsung Galaxy Mega Display Assembly Replacement, Speaker Removal: passo 3, imagem 1 %32
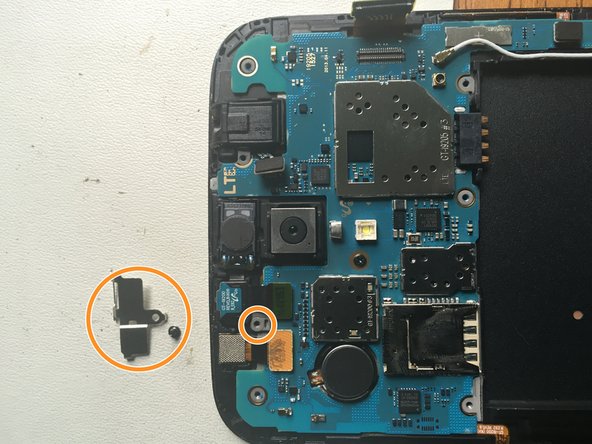
    • Using the opening tool, gently pry the speaker upwards and remove it.

    • The speaker is fragile; take caution when removing it to prevent damage.

  4. Samsung Galaxy Mega Display Assembly Replacement, Removal of Back Frame: passo 4, imagem 1 %32 Samsung Galaxy Mega Display Assembly Replacement, Removal of Back Frame: passo 4, imagem 2 %32 Samsung Galaxy Mega Display Assembly Replacement, Removal of Back Frame: passo 4, imagem 3 %32
    • Insert the pry tool along the side of the device. Pry gently until you hear clicks.

    • Repeat along all sides of the phone. You will continue hearing a clicking sound as the frame begins to release.

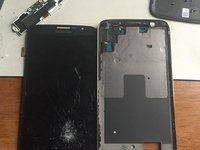
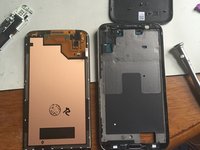
    • Gently pull the battery clip up (shown in photo 2). Then, twist the frame slightly clockwise, as there is a little clip around the camera that needs to be released.

  5. Samsung Galaxy Mega Display Assembly Replacement, Removing Ribbons: passo 5, imagem 1 %32 Samsung Galaxy Mega Display Assembly Replacement, Removing Ribbons: passo 5, imagem 2 %32
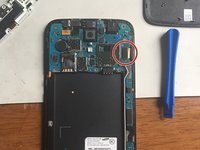
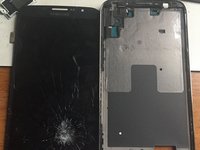
    • Use the opening tool to remove the LCD cable.

    • Once the back frame has been removed, the motherboard and connectors will be exposed.

    • Remove the front camera by unscrewing the panel.

    • Disconnect the front camera cable.

  6. Samsung Galaxy Mega Display Assembly Replacement, Adding some heat: passo 6, imagem 1 %32 Samsung Galaxy Mega Display Assembly Replacement, Adding some heat: passo 6, imagem 2 %32 Samsung Galaxy Mega Display Assembly Replacement, Adding some heat: passo 6, imagem 3 %32
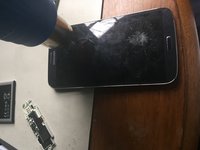
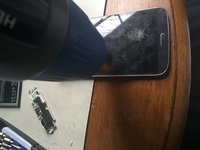
    • Use the heat gun to heat around the edges of the screen.

    • Insert three opening picks between the glass and the silver frame of the phone to pry it open.

    • Do not insert a pick at the bottom of the screen. The back button and the menu button break easily.

  7. Samsung Galaxy Mega Display Assembly Replacement, Removing screen: passo 7, imagem 1 %32 Samsung Galaxy Mega Display Assembly Replacement, Removing screen: passo 7, imagem 2 %32 Samsung Galaxy Mega Display Assembly Replacement, Removing screen: passo 7, imagem 3 %32
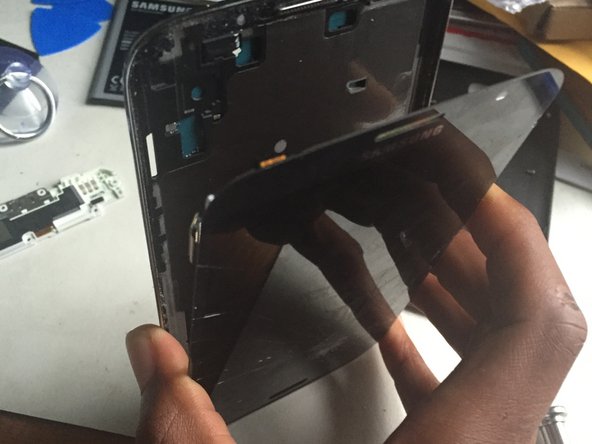
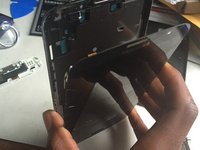
    • With the opening picks still inside the phone, lift the screen up toward you. Do not pull it off right away, but leave the screen at an angle.

    • Put the screen down along with the opening picks in order to keep it loose. Heat up the bottom to loosen the adhesive from the back and the menu button.

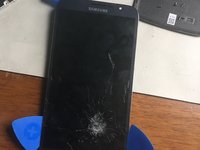
    • Carefully pull the screen towards you. Keep an eye on the bottom to make sure that the buttons are separating from the adhesive.

    • Be very careful when removing the button flex cables from the screen. If these cables are broken, you will need to replace the charging port assembly.

  8. Samsung Galaxy Mega Display Assembly Replacement, Final step screen is off: passo 8, imagem 1 %32 Samsung Galaxy Mega Display Assembly Replacement, Final step screen is off: passo 8, imagem 2 %32 Samsung Galaxy Mega Display Assembly Replacement, Final step screen is off: passo 8, imagem 3 %32
    • Verify that the buttons are completely separated from the adhesive.

    • Separate the screen from the bezel.

Conclusão

To reassemble your device, follow these instructions in reverse order.

45 outras pessoas executaram este guia.

3 comentários

replaced screen everything works fine excepe want pickup network .this was a unlocked phone is there any way replacing it would lock it up again

KENNETH P - Responder

Unless you replaced the board, I can't see how. You might have left something disconnected.

Rongwey - Responder

check your antenna cable connection, it will not pick up a signal if not connected

Ron Lindon - Responder

Adicione um comentário

Exibir estatísticas:

Últimas 24 horas: 0

Últimos 7 dias: 2

Últimos 30 dias: 10

Duração total: 19,025