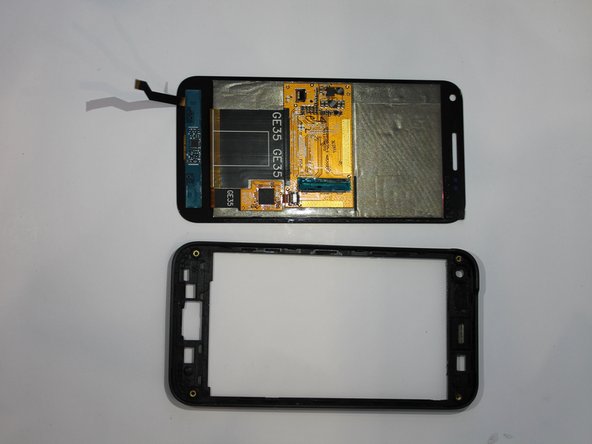
Ir para o conteúdo principal

Samsung Captivate Glide Screen Replacement

O que você precisa

  1. Samsung Captivate Glide Screen Replacement, Motherboard: passo 1, imagem 1 %32 Samsung Captivate Glide Screen Replacement, Motherboard: passo 1, imagem 2 %32 Samsung Captivate Glide Screen Replacement, Motherboard: passo 1, imagem 3 %32
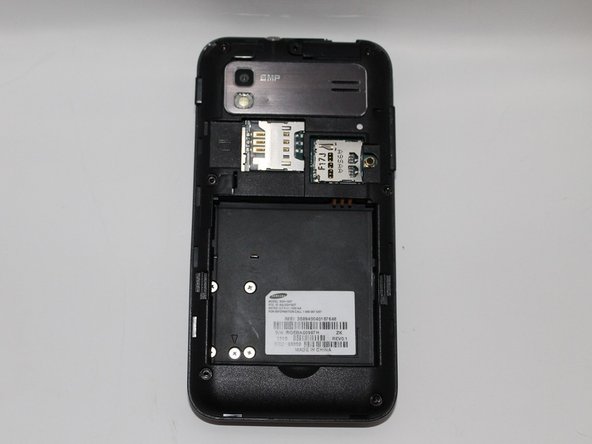
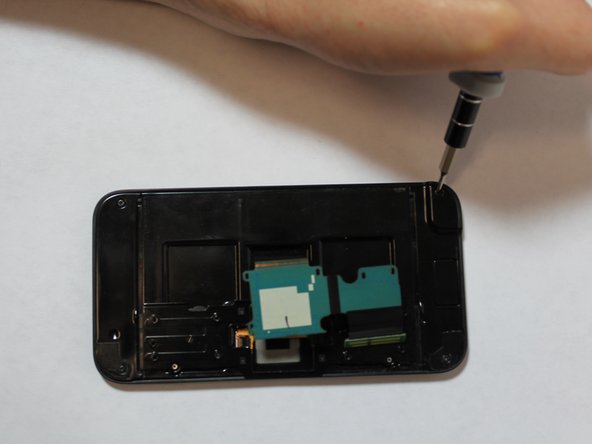
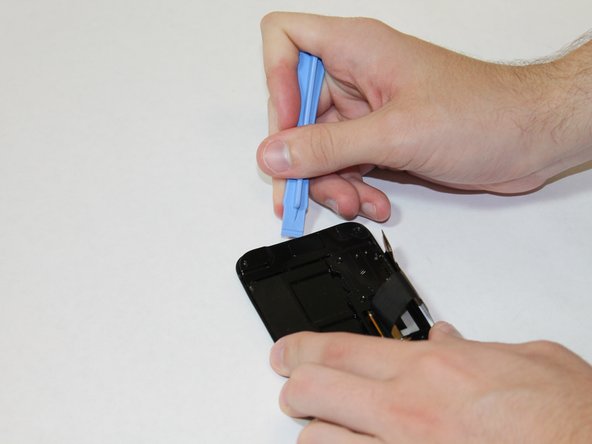
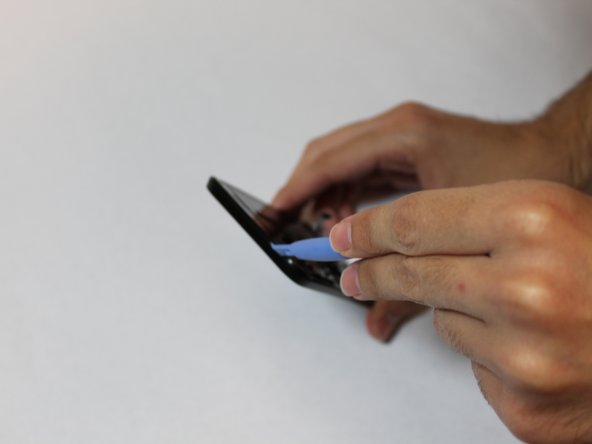
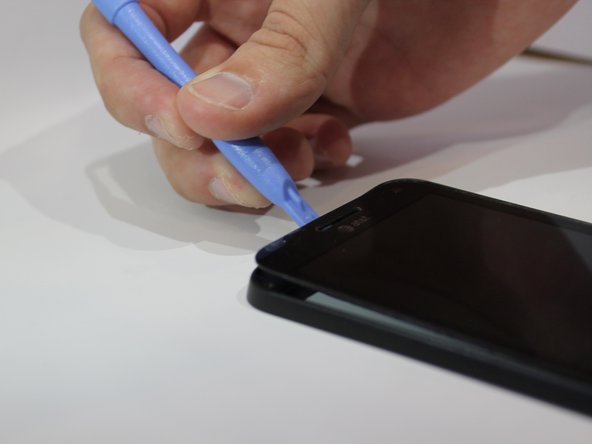
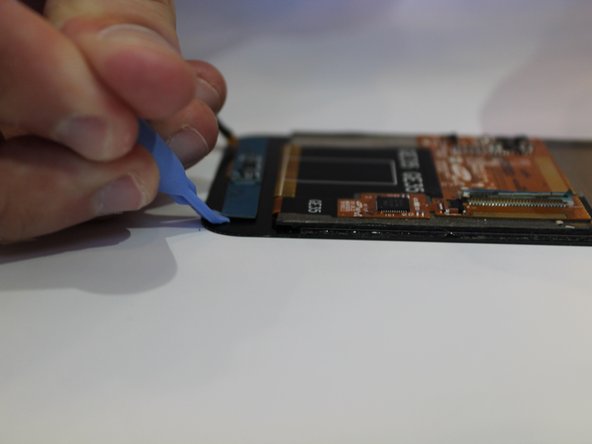
    • Remove back cover using fingernail or plastic opening tool. The cover pulls up and off.

  2. Samsung Captivate Glide Screen Replacement: passo 2, imagem 1 %32 Samsung Captivate Glide Screen Replacement: passo 2, imagem 2 %32
    • Remove battery with plastic opening tool or finger.

  3. Samsung Captivate Glide Screen Replacement: passo 3, imagem 1 %32 Samsung Captivate Glide Screen Replacement: passo 3, imagem 2 %32
    • Remove the seven screws from backplate using the #00 screwdriver.

  4. Samsung Captivate Glide Screen Replacement: passo 4, imagem 1 %32 Samsung Captivate Glide Screen Replacement: passo 4, imagem 2 %32 Samsung Captivate Glide Screen Replacement: passo 4, imagem 3 %32
    • Remove the back plate using the plastic opening tool.

    • There is a lip on each side, and both must be pried up.

    • You can work your way around the edges after prying the two sides.

  5. Samsung Captivate Glide Screen Replacement: passo 5, imagem 1 %32 Samsung Captivate Glide Screen Replacement: passo 5, imagem 2 %32
    • Use the plastic opening tool to detach the two tabs connecting the motherboard to the base of the phone.

  6. Samsung Captivate Glide Screen Replacement: passo 6, imagem 1 %32
    • Disconnect the antenna cable from the motherboard using tweezers.

  7. Samsung Captivate Glide Screen Replacement: passo 7, imagem 1 %32
    • Remove the single screw connecting the motherboard to the base of the phone by using the #00 Phillips screwdriver.

  8. Samsung Captivate Glide Screen Replacement: passo 8, imagem 1 %32 Samsung Captivate Glide Screen Replacement: passo 8, imagem 2 %32
    • Lift the motherboard out of the base of the phone.

  9. Samsung Captivate Glide Screen Replacement, Screen: passo 9, imagem 1 %32 Samsung Captivate Glide Screen Replacement, Screen: passo 9, imagem 2 %32
    • Remove the eight screws with the #00 screwdriver.

  10. Samsung Captivate Glide Screen Replacement: passo 10, imagem 1 %32 Samsung Captivate Glide Screen Replacement: passo 10, imagem 2 %32
    • Remove blue tape using the tweezers.

  11. Samsung Captivate Glide Screen Replacement: passo 11, imagem 1 %32
    • Remove screws with the #00 screwdriver.

  12. Samsung Captivate Glide Screen Replacement: passo 12, imagem 1 %32
    • Using the plastic opening tool, remove the back plate by prying on the four main points.

    • You may encounter difficultly at certain points. Work the plastic opening tool along the edge to keep back plate from closing again.

  13. Samsung Captivate Glide Screen Replacement: passo 13, imagem 1 %32
    • Lift the back plate.

    • To remove to slide flex cable, gently peel back from the back plate and remove back plate.

  14. Samsung Captivate Glide Screen Replacement: passo 14, imagem 1 %32 Samsung Captivate Glide Screen Replacement: passo 14, imagem 2 %32 Samsung Captivate Glide Screen Replacement: passo 14, imagem 3 %32
    • Slide the flex cable through the slot. Be careful to not tear the cable.

    • Set the front plate down.

  15. Samsung Captivate Glide Screen Replacement: passo 15, imagem 1 %32 Samsung Captivate Glide Screen Replacement: passo 15, imagem 2 %32
    • Remove the four corner screws using the #00 screwdriver.

  16. Samsung Captivate Glide Screen Replacement: passo 16, imagem 1 %32 Samsung Captivate Glide Screen Replacement: passo 16, imagem 2 %32 Samsung Captivate Glide Screen Replacement: passo 16, imagem 3 %32
    • Using the plastic opening tool, release all the clips on all four sides holding the screen assembly.

    • You can now remove the back plate by sliding the flex cable through the slot.

  17. Samsung Captivate Glide Screen Replacement: passo 17, imagem 1 %32 Samsung Captivate Glide Screen Replacement: passo 17, imagem 2 %32 Samsung Captivate Glide Screen Replacement: passo 17, imagem 3 %32
    • Use the plastic opening tool to release the main jaw connector, front speaker and camera.

  18. Samsung Captivate Glide Screen Replacement: passo 18, imagem 1 %32 Samsung Captivate Glide Screen Replacement: passo 18, imagem 2 %32
    • By using the plastic opening tool you can release the keypad flex cable from the jaw connecter clamp.

  19. Samsung Captivate Glide Screen Replacement: passo 19, imagem 1 %32 Samsung Captivate Glide Screen Replacement: passo 19, imagem 2 %32
    • Use a heat gun or blow dryer.

    • Heat the outside edges using quick movements for about 45 seconds.

  20. Samsung Captivate Glide Screen Replacement: passo 20, imagem 1 %32 Samsung Captivate Glide Screen Replacement: passo 20, imagem 2 %32 Samsung Captivate Glide Screen Replacement: passo 20, imagem 3 %32
    • Using the plastic opening tool to pry around the edges, release the touch screen from the screen frame.

  21. Samsung Captivate Glide Screen Replacement: passo 21, imagem 1 %32 Samsung Captivate Glide Screen Replacement: passo 21, imagem 2 %32 Samsung Captivate Glide Screen Replacement: passo 21, imagem 3 %32
    • While adhesive is still warm, use the plastic opening tool to gently remove the keyboard flex cable from the screen.

    • You can now replace the screen assembly.

Conclusão

To reassemble your device, follow these instructions in reverse order.

Uma outra pessoa concluiu este guia.

Tyler Moore

Membro desde: 09/23/14

139 Reputação

Autoria de 1 guia

Equipe

USF Tampa, Team 5-3, Mcgee Fall 2014 Membro de USF Tampa, Team 5-3, Mcgee Fall 2014

USFT-MCGEE-F14S5G3

Membros da 4

Autoria de 5 guias

0 comentários

Adicione um comentário

Exibir estatísticas:

Últimas 24 horas: 0

Últimos 7 dias: 0

Últimos 30 dias: 2

Duração total: 970