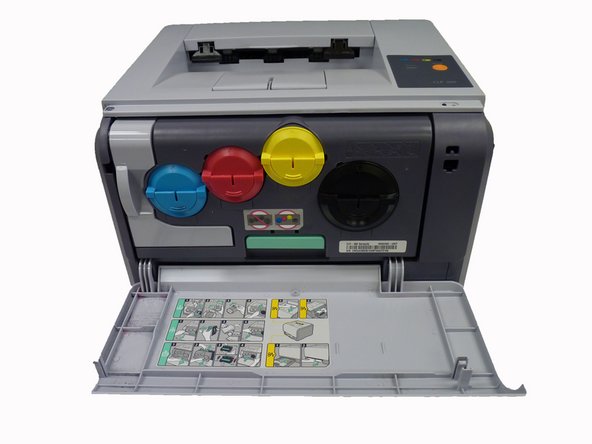
Ir para o conteúdo principal

Samsung CLP-300 Black Toner Transfer Unit Replacement

O que você precisa

  1. Samsung CLP-300 Black Toner Transfer Unit Replacement, Black Toner Transfer Unit: passo 1, imagem 1 %32
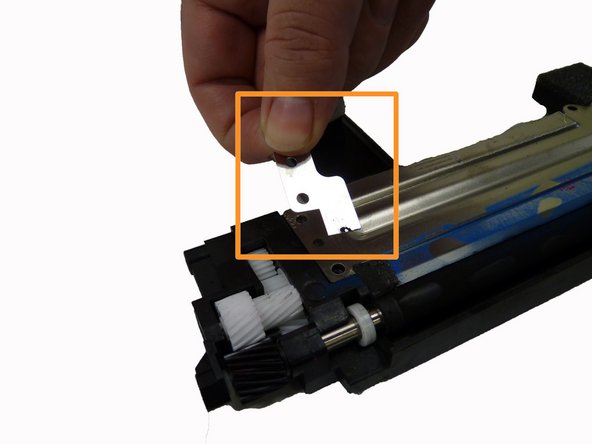
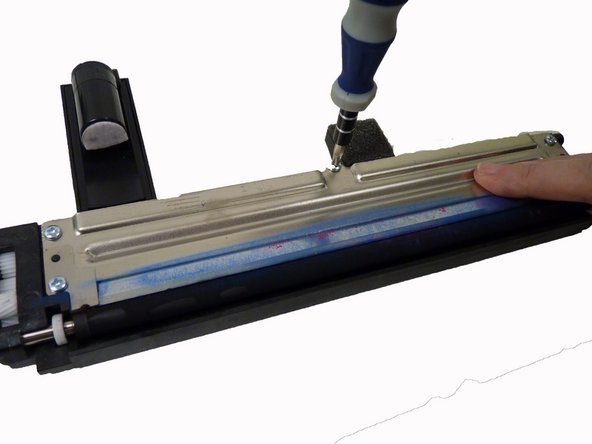
    • Turn the printer off and wait a few minutes for it to cool.

  2. Samsung CLP-300 Black Toner Transfer Unit Replacement: passo 2, imagem 1 %32
    • Pull paper tray out and set aside.

  3. Samsung CLP-300 Black Toner Transfer Unit Replacement: passo 3, imagem 1 %32 Samsung CLP-300 Black Toner Transfer Unit Replacement: passo 3, imagem 2 %32
    • Open the front cover.

  4. Samsung CLP-300 Black Toner Transfer Unit Replacement: passo 4, imagem 1 %32
    • Pull the waste toner container out of the printer using the handle.

    • Make sure to keep waste toner container upright to avoid spillage.

  5. Samsung CLP-300 Black Toner Transfer Unit Replacement: passo 5, imagem 1 %32 Samsung CLP-300 Black Toner Transfer Unit Replacement: passo 5, imagem 2 %32 Samsung CLP-300 Black Toner Transfer Unit Replacement: passo 5, imagem 3 %32
    • Pull the imaging unit out of the printer using bottom handle.

    • Use green handle on top of imaging unit to steady unit as you pull it out.

    • At this point you can set the printer aside as you will only need the imaging unit to continue repair.

  6. Samsung CLP-300 Black Toner Transfer Unit Replacement: passo 6, imagem 1 %32 Samsung CLP-300 Black Toner Transfer Unit Replacement: passo 6, imagem 2 %32
    • Remove these two screws.

    • Do not expose imaging unit to light for more than a few minutes. Covering unit with a piece of paper is sufficient protection while you complete repair.

  7. Samsung CLP-300 Black Toner Transfer Unit Replacement: passo 7, imagem 1 %32
    • Carefully pry plastic arm away from main unit.

  8. Samsung CLP-300 Black Toner Transfer Unit Replacement: passo 8, imagem 1 %32 Samsung CLP-300 Black Toner Transfer Unit Replacement: passo 8, imagem 2 %32 Samsung CLP-300 Black Toner Transfer Unit Replacement: passo 8, imagem 3 %32
    • Carefully pry plastic from screw base so that the entire organic photo conductor piece slides open to the left.

    • When removing the organic photo conductor take care to not lose the small spring on the back left.

    • At this point you may want to put on plastic gloves to keep from staining hands with printer ink.

  9. Samsung CLP-300 Black Toner Transfer Unit Replacement: passo 9, imagem 1 %32 Samsung CLP-300 Black Toner Transfer Unit Replacement: passo 9, imagem 2 %32
    • Slide each toner transfer unit out separately, placing all aside except for the black toner transfer unit.

    • Keep toner rollers level to avoid toner spillage.

  10. Samsung CLP-300 Black Toner Transfer Unit Replacement: passo 10, imagem 1 %32 Samsung CLP-300 Black Toner Transfer Unit Replacement: passo 10, imagem 2 %32 Samsung CLP-300 Black Toner Transfer Unit Replacement: passo 10, imagem 3 %32
    • Remove these five screws from the top of the black toner transfer unit.

    • Remove main and smaller z-shaped plates.

  11. Samsung CLP-300 Black Toner Transfer Unit Replacement: passo 11, imagem 1 %32 Samsung CLP-300 Black Toner Transfer Unit Replacement: passo 11, imagem 2 %32
    • Remove these three screws from the right end of the toner transfer unit.

  12. Samsung CLP-300 Black Toner Transfer Unit Replacement: passo 12, imagem 1 %32
    • Remove plastic end piece.

    • Gently pull out black toner roller.

    • Insert new roller in place of old roller turning slightly to fit.

    • Be careful not to pinch small foam square when inserting new roller.

    • Cover new roller with toner by rotating roller by hand.

Conclusão

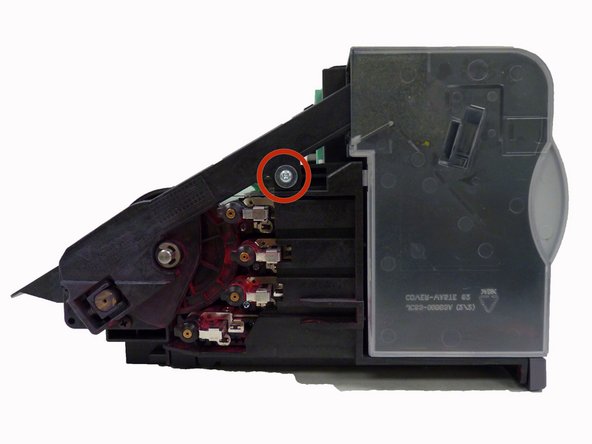
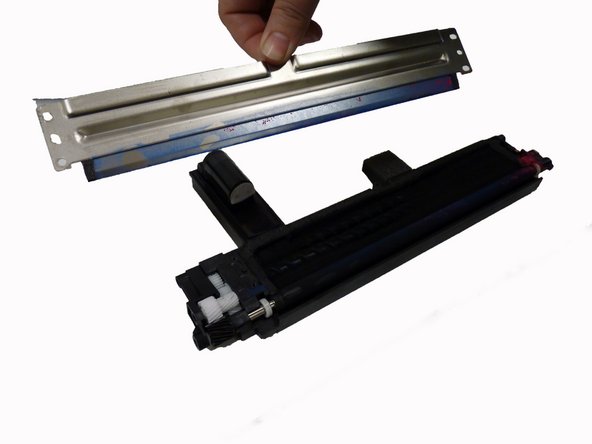
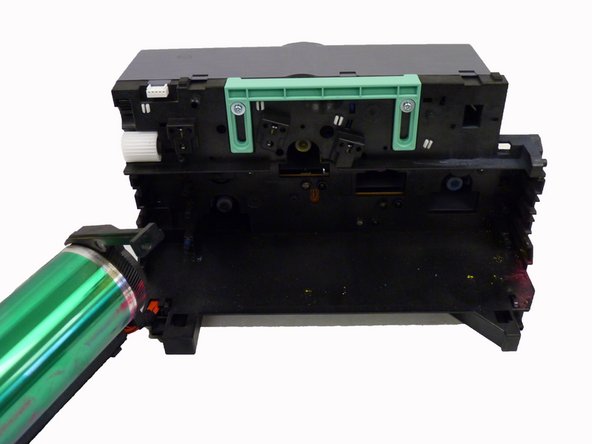
To reassemble your device, follow these instructions in reverse order.

2 outras pessoas executaram este guia.

Heather Howard

Membro desde: 10/15/14

586 Reputação

Autoria de 4 guias

Equipe

University of Maine, Team 1-1, Diaz Fall 2014 Membro de University of Maine, Team 1-1, Diaz Fall 2014

UMAINE-DIAZ-F14S1G1

Membros da 3

Autoria de 8 guias

2 comentários

I need more information pertaining step 8. In order to separate the parts, in which directions should the be moved first and where is the best point to apply force ?

Bernd Dreyer - Responder

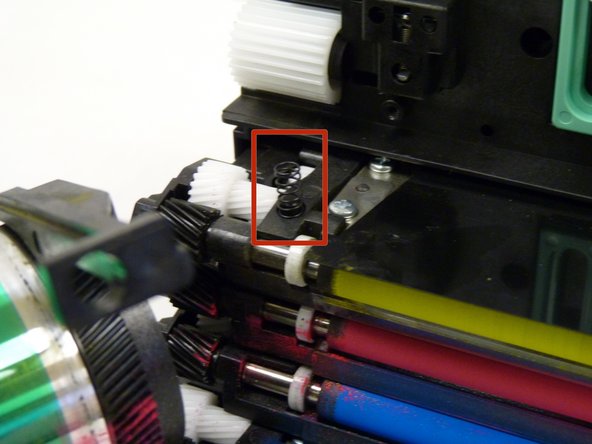
I need more information for step 12: I removed the old roller. Unfortunately I don't know anymore how exactly the metal discs and the white plastic rings are placed.

Daniel Roller - Responder

Adicione um comentário

Exibir estatísticas:

Últimas 24 horas: 0

Últimos 7 dias: 5

Últimos 30 dias: 21

Duração total: 3,275