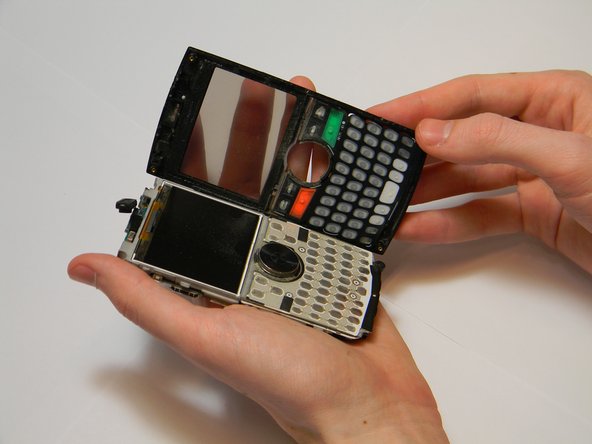
Ir para o conteúdo principal

Samsung BlackJack II Front Casing Replacement

O que você precisa

  1. Samsung BlackJack II Front Casing Replacement, Battery: passo 1, imagem 1 %32 Samsung BlackJack II Front Casing Replacement, Battery: passo 1, imagem 2 %32 Samsung BlackJack II Front Casing Replacement, Battery: passo 1, imagem 3 %32
    • Apply downward pressure to the top of the battery panel while pulling down to slide it off the phone.

  2. Samsung BlackJack II Front Casing Replacement: passo 2, imagem 1 %32 Samsung BlackJack II Front Casing Replacement: passo 2, imagem 2 %32 Samsung BlackJack II Front Casing Replacement: passo 2, imagem 3 %32
    • Locate the grooves on the sides of the battery near the bottom of the phone. Use your fingers to pull the battery up and out of the phone.

  3. Samsung BlackJack II Front Casing Replacement, Back Casing: passo 3, imagem 1 %32 Samsung BlackJack II Front Casing Replacement, Back Casing: passo 3, imagem 2 %32
    • Use the spudger to pry the two plastic caps out of the top corners of the phone casing.

    • To get a better grip, you may use the tweezers to finish pulling the plastic caps from the phone.

  4. Samsung BlackJack II Front Casing Replacement: passo 4, imagem 1 %32
    • Remove the six 4.0 mm screws using the Phillips 00 screwdriver.

  5. Samsung BlackJack II Front Casing Replacement: passo 5, imagem 1 %32 Samsung BlackJack II Front Casing Replacement: passo 5, imagem 2 %32 Samsung BlackJack II Front Casing Replacement: passo 5, imagem 3 %32
    • Insert the plastic opening tool in the gap between the back panel and rest of the body.

    • Slide the tool along the edges until the two pieces come apart.

    • The circuit board is attached to the front casing. Both casings should separate without having to sever electrical connections.

  6. Samsung BlackJack II Front Casing Replacement, Front Casing: passo 6, imagem 1 %32 Samsung BlackJack II Front Casing Replacement, Front Casing: passo 6, imagem 2 %32
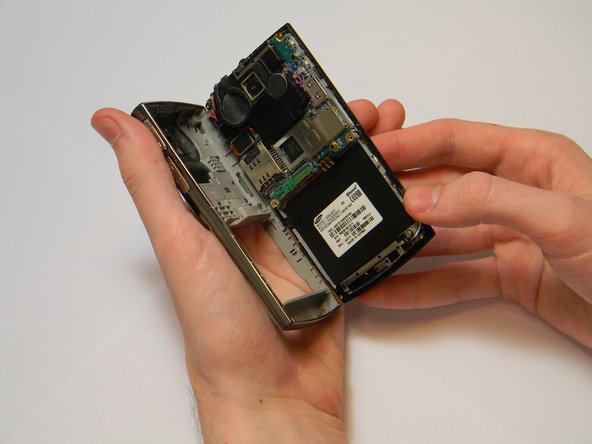
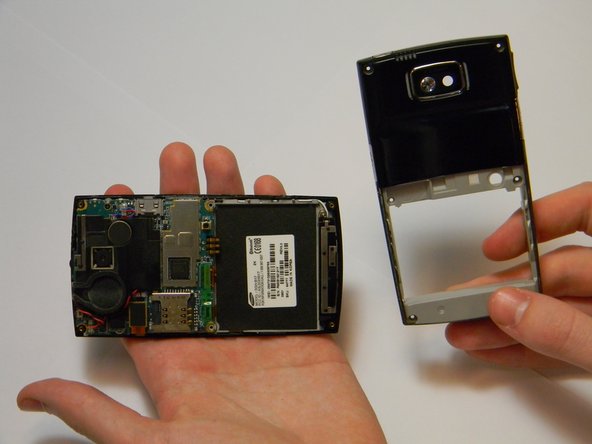
    • Pry apart the plastic tabs along the edges of the phone.

    • Separate the front panel from the main body of the phone using your fingers.

Conclusão

To reassemble your device, follow these instructions in reverse order.

Uma outra pessoa concluiu este guia.

Ryan Rumsey

Membro desde: 01/30/13

8 Reputação

Autoria de 6 guias

Equipe

Cal Poly, Team 20-1, Maness Winter 2013 Membro de Cal Poly, Team 20-1, Maness Winter 2013

CPSU-MANESS-W13S20G1

Membros da 4

Autoria de 12 guias

0 comentários

Adicione um comentário

Exibir estatísticas:

Últimas 24 horas: 1

Últimos 7 dias: 2

Últimos 30 dias: 3

Duração total: 442