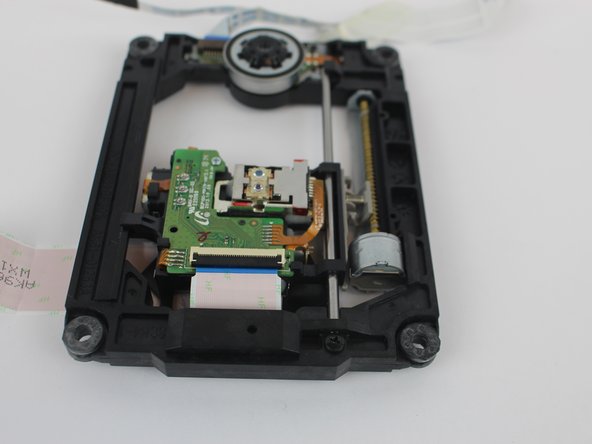
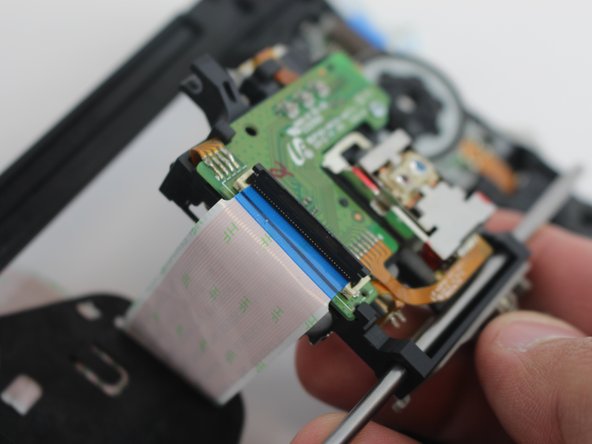
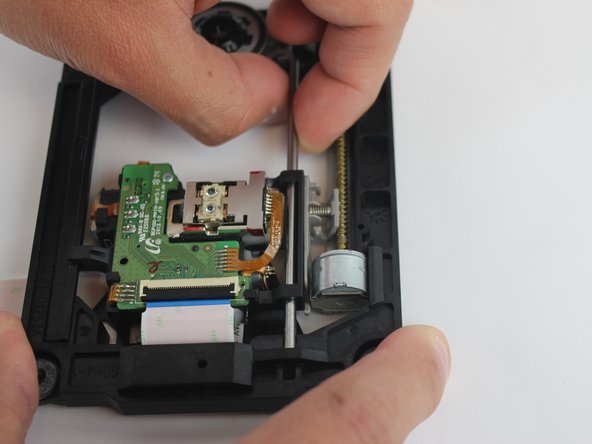
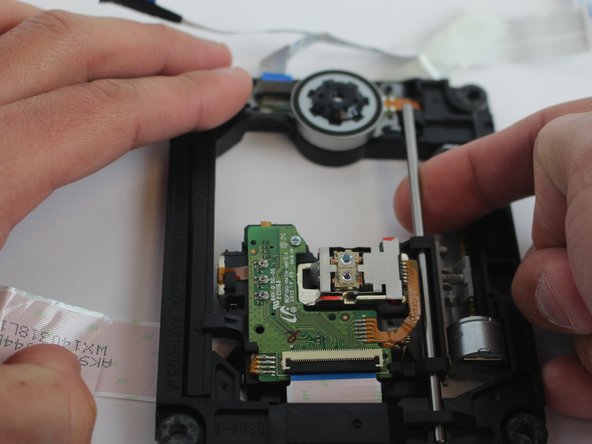
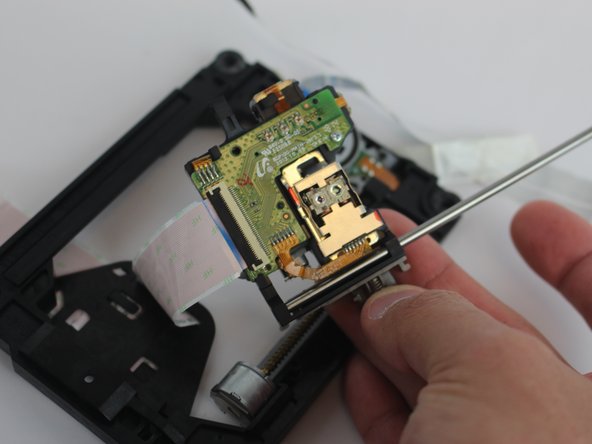
Ir para o conteúdo principal

Samsung BD-F5700 Disc Reader Replacement

O que você precisa

  1. Samsung BD-F5700 Disc Reader Replacement, Power Cord: passo 1, imagem 1 %32 Samsung BD-F5700 Disc Reader Replacement, Power Cord: passo 1, imagem 2 %32 Samsung BD-F5700 Disc Reader Replacement, Power Cord: passo 1, imagem 3 %32
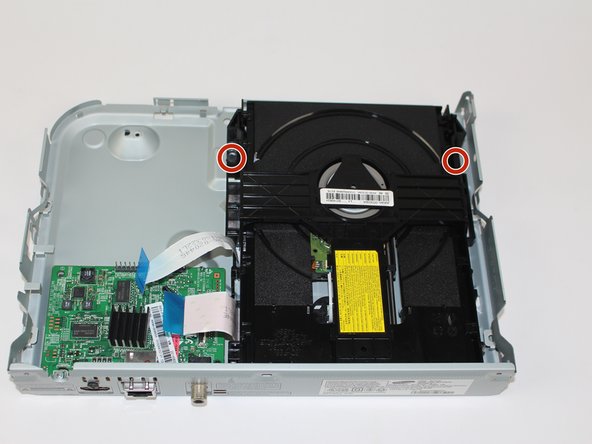
    • Use Phillips 0 Screwdriver to remove two (2), 10 mm rear screws.

    • Use the iFixit opening tool to help separate the top plastic casing from the bottom metal casing.

    • When opening the device, be careful to not damage the ribbon cable circled in image 3.

  2. Samsung BD-F5700 Disc Reader Replacement: passo 2, imagem 1 %32 Samsung BD-F5700 Disc Reader Replacement: passo 2, imagem 2 %32 Samsung BD-F5700 Disc Reader Replacement: passo 2, imagem 3 %32
    • Use Phillips 0 screwdriver to remove two (2), 10 mm screws from the plastic cover.

    • Remove plastic cover from board.

  3. Samsung BD-F5700 Disc Reader Replacement: passo 3, imagem 1 %32 Samsung BD-F5700 Disc Reader Replacement: passo 3, imagem 2 %32
    • Pull upward on back of the black and white wire to dislocate the black tab piece from device.

    • To remove the cord from the device entirely, press on the white tab in the device and gently pull.

  4. Samsung BD-F5700 Disc Reader Replacement: passo 4, imagem 1 %32
    • Insert the iFixit Opening tool into the black tab on the power cord, and use leverage to open the black tab.

    • Pull the tab off the wire so that it can be placed on the replacement cord.

  5. Samsung BD-F5700 Disc Reader Replacement, Disc Reader: passo 5, imagem 1 %32 Samsung BD-F5700 Disc Reader Replacement, Disc Reader: passo 5, imagem 2 %32 Samsung BD-F5700 Disc Reader Replacement, Disc Reader: passo 5, imagem 3 %32
    • Firmly grip the hard plastic tab attached to the base and pull upwards.

    • It is important to not tear the ribbon cables.

  6. Samsung BD-F5700 Disc Reader Replacement: passo 6, imagem 1 %32 Samsung BD-F5700 Disc Reader Replacement: passo 6, imagem 2 %32
    • Remove the two 7mm screws with a Phillips #1 screwdriver.

  7. Samsung BD-F5700 Disc Reader Replacement: passo 7, imagem 1 %32 Samsung BD-F5700 Disc Reader Replacement: passo 7, imagem 2 %32 Samsung BD-F5700 Disc Reader Replacement: passo 7, imagem 3 %32
    • Pinch both tabs on the side of the disc tray, push towards the front, and lift the disc tray out to remove.

  8. Samsung BD-F5700 Disc Reader Replacement: passo 8, imagem 1 %32 Samsung BD-F5700 Disc Reader Replacement: passo 8, imagem 2 %32 Samsung BD-F5700 Disc Reader Replacement: passo 8, imagem 3 %32
    • Flip up the black locking tab on the ZIF connector.

  9. Samsung BD-F5700 Disc Reader Replacement: passo 9, imagem 1 %32 Samsung BD-F5700 Disc Reader Replacement: passo 9, imagem 2 %32 Samsung BD-F5700 Disc Reader Replacement: passo 9, imagem 3 %32
    • Remove the 10 mm screw using a Phillips #1 screwdriver.

    • Remove the small metal bar by pulling it outwards.

  10. Samsung BD-F5700 Disc Reader Replacement: passo 10, imagem 1 %32 Samsung BD-F5700 Disc Reader Replacement: passo 10, imagem 2 %32
    • Flip the disc tray over so the laser points downward.

    • Pull the disc reader out of the disc tray.

Conclusão

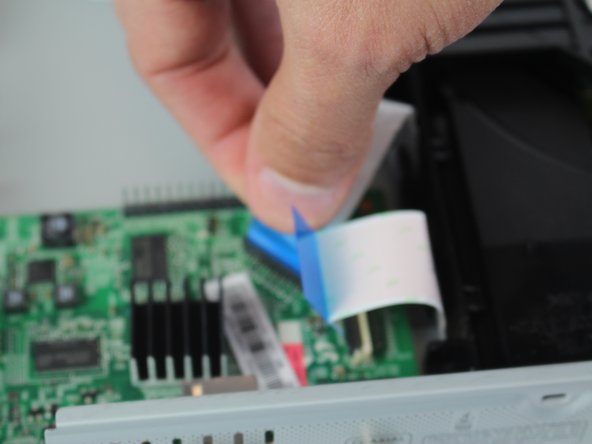
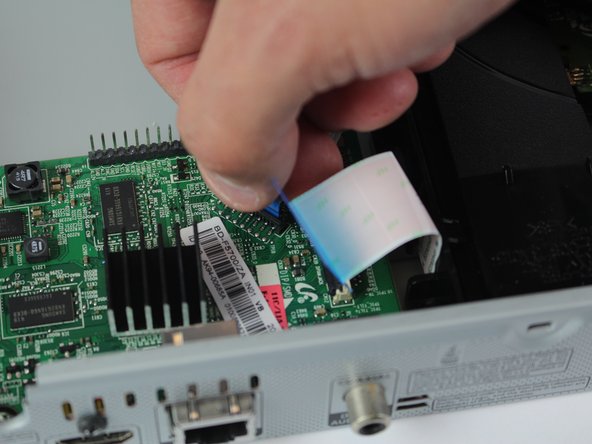
To reassemble your device, follow these instructions in reverse order.

2 outras pessoas executaram este guia.

Livan Perez

Membro desde: 02/15/18

303 Reputação

Autoria de 2 guias

Equipe

USF Tampa, Team S16-G4, Boczar Spring 2018 Membro de USF Tampa, Team S16-G4, Boczar Spring 2018

USFT-BOCZAR-S18S16G4

Membros da 4

Autoria de 4 guias

0 comentários

Adicione um comentário

Exibir estatísticas:

Últimas 24 horas: 0

Últimos 7 dias: 1

Últimos 30 dias: 5

Duração total: 604