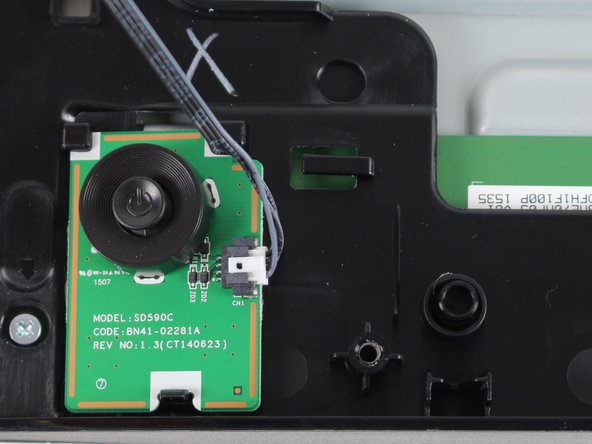
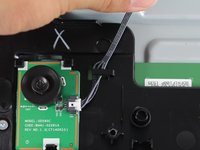
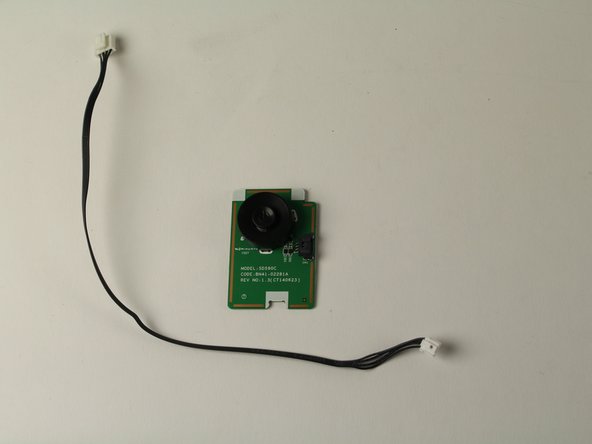
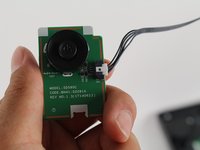
Ir para o conteúdo principal

Samsung 27E510C NAV Button Replacement

O que você precisa

  1. Samsung 27E510C  NAV Button Replacement, Back Panel: passo 1, imagem 1 %32 Samsung 27E510C  NAV Button Replacement, Back Panel: passo 1, imagem 2 %32 Samsung 27E510C  NAV Button Replacement, Back Panel: passo 1, imagem 3 %32
    • Use the #1 Phillips head screw driver to remove each 13.75mm length screw from the rear panel.

    • The screw alone with the ports is a different size than the rest, its length is 12mm.

  2. Samsung 27E510C  NAV Button Replacement: passo 2, imagem 1 %32 Samsung 27E510C  NAV Button Replacement: passo 2, imagem 2 %32
    • Insert the heavy duty spudger in between the monitors back panel and its frame.

    • Use the heavy duty spudger to pry open the back panel.

    • Over aggressive prying could break the tabs holding the back panel in place.

  3. Samsung 27E510C  NAV Button Replacement, Rear navigation button: passo 3, imagem 1 %32
    • Carefully remove the tape holding down the connector wire.

    • You will need to re-attach the tape upon reassembly.

  4. Samsung 27E510C  NAV Button Replacement: passo 4, imagem 1 %32
    • Disconnect the navigation button from the motherboard by holding down the thumb tab and pulling its connector out.

  5. Samsung 27E510C  NAV Button Replacement: passo 5, imagem 1 %32 Samsung 27E510C  NAV Button Replacement: passo 5, imagem 2 %32
    • Remove the navigation buttons connector wire from the monitors body tab.

  6. Samsung 27E510C  NAV Button Replacement: passo 6, imagem 1 %32
    • With one thumb, hold down the tab on the bottom of the navigation buttons base.

    • While holding the tab down, lift the base of the navigation button with your other hand.

  7. Samsung 27E510C  NAV Button Replacement: passo 7, imagem 1 %32 Samsung 27E510C  NAV Button Replacement: passo 7, imagem 2 %32 Samsung 27E510C  NAV Button Replacement: passo 7, imagem 3 %32
    • Remove the connector wire from the defective navigation button by first gripping its connectors thumb tab.

    • While gripping the thumb tab, pull the connector from the base of the navigation button.

    • You can save the connector wire since it may not be defective.

Conclusão

To reassemble your device, follow these instructions in reverse order.

giggythore

Membro desde: 10/14/17

366 Reputação

Autoria de 3 guias

Equipe

Cal Poly, Team S9-G1, Banghart Fall 2017 Membro de Cal Poly, Team S9-G1, Banghart Fall 2017

CPSU-BANGHART-F17S9G1

Membros da 6

Autoria de 14 guias

0 comentários

Adicione um comentário

Exibir estatísticas:

Últimas 24 horas: 1

Últimos 7 dias: 2

Últimos 30 dias: 7

Duração total: 454