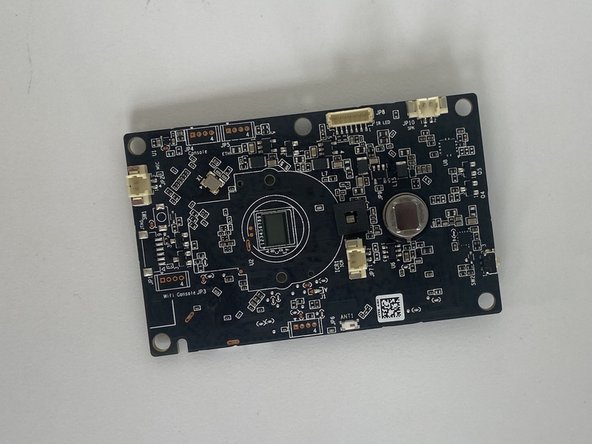
Ir para o conteúdo principal

Ring Stick Up Cam Battery Motherboard Replacement

O que você precisa

  1. Ring Stick Up Cam Battery Motherboard Replacement, Battery: passo 1, imagem 1 %32
    • Turn the camera so the lens is facing away from you, and the back is facing towards you.

    • Place one hand securely on the base and the other on the stand.

    • Carefully twist your bottom hand counterclockwise until the indicator line reaches the unlock icon.

  2. Ring Stick Up Cam Battery Motherboard Replacement: passo 2, imagem 1 %32
    • Gently pull down to separate the stand from the camera body.

  3. Ring Stick Up Cam Battery Motherboard Replacement: passo 3, imagem 1 %32 Ring Stick Up Cam Battery Motherboard Replacement: passo 3, imagem 2 %32
    • Hold the camera so the opening containing the battery is toward the ceiling.

    • Squeeze the silver lever labeled "push" and extract the battery from its slot.

  4. Ring Stick Up Cam Battery Motherboard Replacement, Motherboard: passo 4, imagem 1 %32
    • Remove the upper and lower silicon covers on the rear panel with your fingers or the hook-end of the halberd spudger.

  5. Ring Stick Up Cam Battery Motherboard Replacement: passo 5, imagem 1 %32
    • Remove the 6 mm white screw from the rear panel with the a T3 Torx screwdriver.

  6. Ring Stick Up Cam Battery Motherboard Replacement: passo 6, imagem 1 %32
    • Rotate the device so the base is facing upward.

    • Remove the two 6 mm screws from the base (on either side of the QR code) using a Phillips #00 screwdriver.

    • Remove the two 4 mm screws that connect the silver latch on the outside rim using a Phillips #00 screwdriver.

  7. Ring Stick Up Cam Battery Motherboard Replacement: passo 7, imagem 1 %32
    • Remove the silver latch from the base.

    • Remove the front cover.

    • Remove the eight 6 mm screws from the inside panel with a Philips #00 screwdriver.

    • Remove the two 4 mm screws from the inside panel with a Phillips #00 screwdriver.

  8. Ring Stick Up Cam Battery Motherboard Replacement: passo 8, imagem 1 %32
    • Pry the inside panel open using your hands or a spudger if necessary.

  9. Ring Stick Up Cam Battery Motherboard Replacement: passo 9, imagem 1 %32
    • Remove the seven 4 mm screws connecting the motherboard to the camera body with a Phillips #00 screwdriver.

  10. Ring Stick Up Cam Battery Motherboard Replacement: passo 10, imagem 1 %32 Ring Stick Up Cam Battery Motherboard Replacement: passo 10, imagem 2 %32
    • Lift the motherboard from the camera body with the halberd spudger.

  11. Ring Stick Up Cam Battery Motherboard Replacement: passo 11, imagem 1 %32 Ring Stick Up Cam Battery Motherboard Replacement: passo 11, imagem 2 %32
    • Rotate the device to its side.

    • With your fingers, carefully remove the white part of the cord clip from the beige base.

    • Repeat this for the remaining three cords connecting the motherboard to the camera body.

  12. Ring Stick Up Cam Battery Motherboard Replacement: passo 12, imagem 1 %32
    • Fold the motherboard downward from the camera body, revealing a white connecting strip.

    • Using the flat end of a spudger, flick the black hinge upward.

    • Pull the white strip out of the slot.

  13. Ring Stick Up Cam Battery Motherboard Replacement: passo 13, imagem 1 %32 Ring Stick Up Cam Battery Motherboard Replacement: passo 13, imagem 2 %32
    • Carefully insert the spudger underneath gold adhesive at the lower left-hand corner of the motherboard.

    • Gently remove the adhesive cover from the motherboard.

Conclusão

To reassemble your device, follow these instructions in reverse order.

Vanessa Hasbrouck

Membro desde: 02/24/23

339 Reputação

Autoria de 2 guias

Equipe

Marist, Team 1-1, Chaterdon Spring 2023 Membro de Marist, Team 1-1, Chaterdon Spring 2023

MARS-CHATERDON-S23S1G1

Membros da 3

Autoria de 5 guias

Um comentário

Would like to see a chip identification teardown in the future please 😊

Bryan Watson - Responder

Adicione um comentário

Exibir estatísticas:

Últimas 24 horas: 0

Últimos 7 dias: 0

Últimos 30 dias: 7

Duração total: 183