Ir para o conteúdo principal

Ridgid R86034 Fuse Cartridge Replacement

O que você precisa

  1. Ridgid R86034 Fuse Cartridge Replacement, Disassembling Ridgid R86034 Housing: passo 1, imagem 1 %32
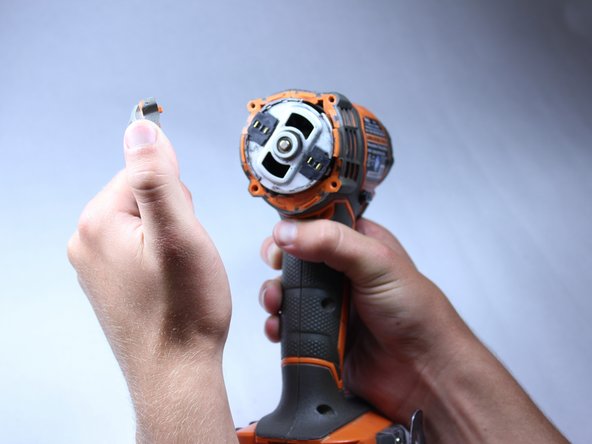
    • Use the flat side of a metal spudger to peel the black rubber cover off of the casing.

    • Use some force; the rubber cover is securely attached to the housing.

    • Rotate the casing until it fits onto the housing with no gaps between it and the clear cover.

    • Orientation is important when putting the rubber cover on the casing.

  2. Ridgid R86034 Fuse Cartridge Replacement: passo 2, imagem 1 %32 Ridgid R86034 Fuse Cartridge Replacement: passo 2, imagem 2 %32
    • Remove the plastic cover with your hands.

    • There is no need to force off the plastic cover. The plastic cover should be much easier to remove than the rubber cover.

  3. Ridgid R86034 Fuse Cartridge Replacement: passo 3, imagem 1 %32 Ridgid R86034 Fuse Cartridge Replacement: passo 3, imagem 2 %32 Ridgid R86034 Fuse Cartridge Replacement: passo 3, imagem 3 %32
    • Unscrew the four 16 mm long screws from the back panel with a T10 Torx Screwdriver.

    • Use a firm grip to peel off the back panel. It is sealed tight and requires a good amount of force to remove.

  4. Ridgid R86034 Fuse Cartridge Replacement: passo 4, imagem 1 %32 Ridgid R86034 Fuse Cartridge Replacement: passo 4, imagem 2 %32
    • Unscrew the eight 15 mm T10 Torx screws from the housing

    • The screw hole located nearest the battery port is deep and small. Most screwdrivers with replaceable bits will not fit into the hole. Instead, use a conventional screwdriver that fits.

  5. Ridgid R86034 Fuse Cartridge Replacement: passo 5, imagem 1 %32
    • Place the driver flat on a table before completely separating the two halves of the housing so components of the drill don't fall out during opening.

    • Pry apart the two halves of the housing at the back side of the driver using the metal spudger.

    • The housing is easier to remove if you pry from multiple sides.

  6. Ridgid R86034 Fuse Cartridge Replacement: passo 6, imagem 1 %32 Ridgid R86034 Fuse Cartridge Replacement: passo 6, imagem 2 %32
    • Do not remove the direction switch.

    • Pull out all electrical components from housing by hand.

    • Lift out the motor.

    • Follow the wires.

    • The components should come out of their respective slots with ease and require little force to lift out.

    • The circuit board located nearest the battery pack and the LED light will be hard to pull out.

    • Remember to precisely place all components in their correct slots with their correct orientations when reassembling.

  7. Ridgid R86034 Fuse Cartridge Replacement, Fuse Cartridge: passo 7, imagem 1 %32
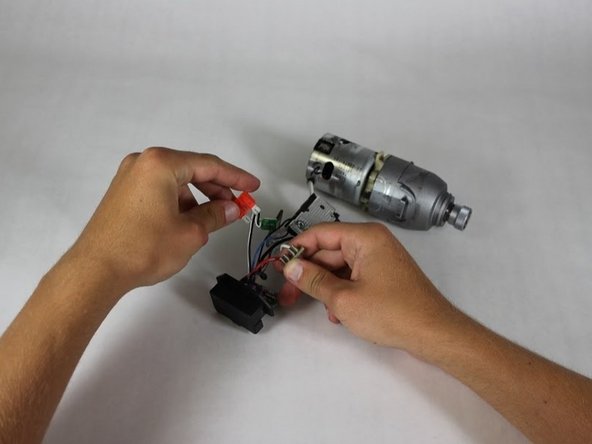
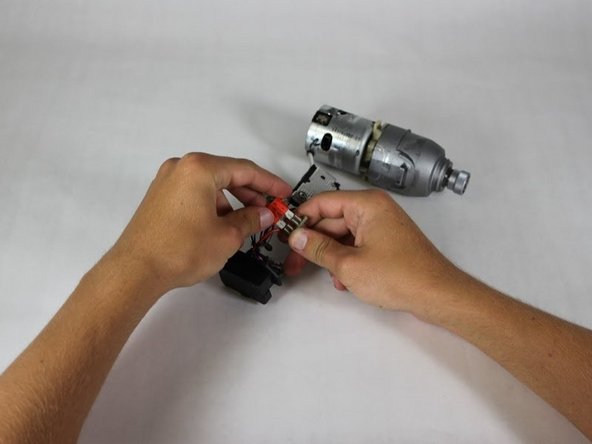
    • Identify the translucent orange fuse cartridge connected by a thick red wire and a thick white wire.

  8. Ridgid R86034 Fuse Cartridge Replacement: passo 8, imagem 1 %32 Ridgid R86034 Fuse Cartridge Replacement: passo 8, imagem 2 %32 Ridgid R86034 Fuse Cartridge Replacement: passo 8, imagem 3 %32
    • Firmly grasp the orange fuse cartridge and pull it out of its socket.

    • The fuse does not come out easy, don't be afraid to pull hard to get it to come out.

  9. Ridgid R86034 Fuse Cartridge Replacement: passo 9, imagem 1 %32 Ridgid R86034 Fuse Cartridge Replacement: passo 9, imagem 2 %32 Ridgid R86034 Fuse Cartridge Replacement: passo 9, imagem 3 %32
    • Insert the new fuse cartridge.

Conclusão

To reassemble your device, follow these instructions in reverse order.

Tommy Lovelace

Membro desde: 04/23/15

204 Reputação

Autoria de 2 guias

Equipe

Cal Poly, Team 15-5, Amido Spring 2015 Membro de Cal Poly, Team 15-5, Amido Spring 2015

CPSU-AMIDO-S15S15G5

Membros da 4

Autoria de 12 guias

0 comentários

Adicione um comentário

Exibir estatísticas:

Últimas 24 horas: 0

Últimos 7 dias: 3

Últimos 30 dias: 10

Duração total: 1,143