Introdução
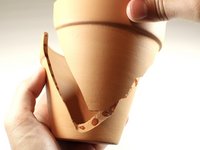
If your ceramic pot breaks, do not worry: you can repair it even if it is reduced to pieces. All you will need is precision and a strong adhesive. This guide will focus on the repair of a ceramic pot, but can be used to repair other ceramic, pottery, and porcelain items.
For this repair you will be reconstructing your ceramic pot with Gorilla Glue that you purchased from a hardware store. This guide will also explain how much glue to apply and for how long, how to handle sharp edges and strong adhesive, and how long to let the glue set.
Step 4 requires you to use Gorilla Glue. Gorilla Glue is an inexpensive and effective adhesive for this fix. Alternative adhesives can also work as long as they are waterproof and translucent.
O que você precisa


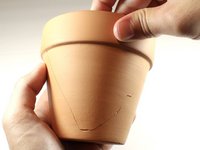


Repeat steps as needed until your pot is fully reassembled.
Repeat steps as needed until your pot is fully reassembled.
Cancelar: não concluí este guia.
2 outras pessoas executaram este guia.

Equipe

University of North Texas, Team 1-14, Friess Fall 2021 Membro de University of North Texas, Team 1-14, Friess Fall 2021
UNT-FRIESS-F21S1G14
1 Membro
Autoria de 3 guias