Ir para o conteúdo principal
Participe da comunidade de reparos - Criar conta

Repairing Art Artwork

O que você precisa

  1. Repairing Art Artwork, Repairing Art Artwork: passo 1, imagem 1 %32 Repairing Art Artwork, Repairing Art Artwork: passo 1, imagem 2 %32 Repairing Art Artwork, Repairing Art Artwork: passo 1, imagem 3 %32
    • There are some unexpected colors here. And we want light blue instead of the darker ones. We use tools with color covering power to fix colors. Let's start with color pencils.

    Pergunte ao FixBot

    Comentar

  2. Repairing Art Artwork: passo 2, imagem 1 %32
    • Apply a similar light blue color to the place where we have incorrect color. The pencil works a little. But seems like we need something more powerful to cover the darker color.

    Pergunte ao FixBot

    Comentar

  3. Repairing Art Artwork: passo 3, imagem 1 %32 Repairing Art Artwork: passo 3, imagem 2 %32
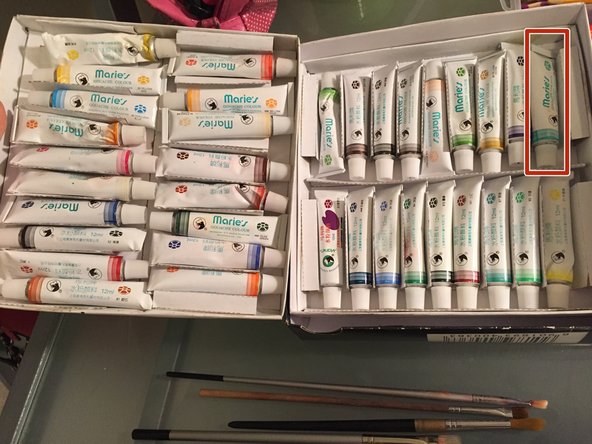
    • Let's find the same light blue color from the paints. And select a brush with appropriate size.

    Pergunte ao FixBot

    Comentar

  4. Repairing Art Artwork: passo 4, imagem 1 %32 Repairing Art Artwork: passo 4, imagem 2 %32 Repairing Art Artwork: passo 4, imagem 3 %32
    • Squeeze some light blue paint to a flat space. It could be a cover, a paperboard, plate, or anything with smooth surface. The we add a little white color, so it matches the light blue we had on the hand drawing.

    Pergunte ao FixBot

    Comentar

  5. Repairing Art Artwork: passo 5, imagem 1 %32 Repairing Art Artwork: passo 5, imagem 2 %32 Repairing Art Artwork: passo 5, imagem 3 %32
    • We use brush to paint on the place of incorrect color. Then use a black pen to redraw the outline because the paint we just add there covers some outline. Then we have all those small figures fixed.

    Pergunte ao FixBot

    Comentar

  6. Repairing Art Artwork: passo 6, imagem 1 %32 Repairing Art Artwork: passo 6, imagem 2 %32
    • For the place where paper was apart, we turn to back side to fix it.

    Pergunte ao FixBot

    Comentar

  7. Repairing Art Artwork: passo 7, imagem 1 %32 Repairing Art Artwork: passo 7, imagem 2 %32 Repairing Art Artwork: passo 7, imagem 3 %32
    • Cut some tape, and put one side to the edge of paper. Then push the rest of tape following the tearing line. Do the same for the other tear. The you can see that the front side tear is very invisible.

    Pergunte ao FixBot

    Comentar

Conclusão

To reassemble your device, follow these instructions in reverse order.

Cancelar: não concluí este guia.

4 outras pessoas executaram este guia.

Qing He

Membro desde: 11/10/15

205 Reputação

Autoria de 1 guia

0Comentários do guia

Comentar

Visualizações:

Últimas 24 horas: 5

Últimos 7 dias: 11

Últimos 30 dias: 58

Ao todo: 2,469