Esta versão pode conter edições incorretas. Mude para o último instantâneo verificado.
O que você precisa
-
Este passo não foi traduzido. Ajude a traduzi-lo
-
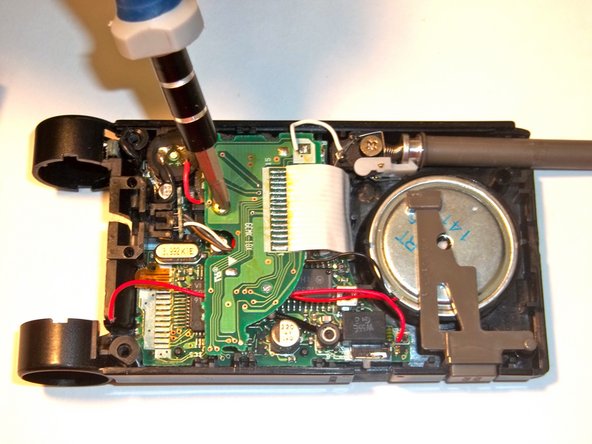
Orient the phone so that the phone model and other descriptive information is facing upward.
-
Locate the two silver screws near the hinge where the battery is housed.
-
Remove the silver screws using a Phillips head #2 screwdriver.
-
-
Este passo não foi traduzido. Ajude a traduzi-lo
-
Make sure you pull the cover off carefully in order to prevent damage to the back cover.
-
-
-
Este passo não foi traduzido. Ajude a traduzi-lo
-
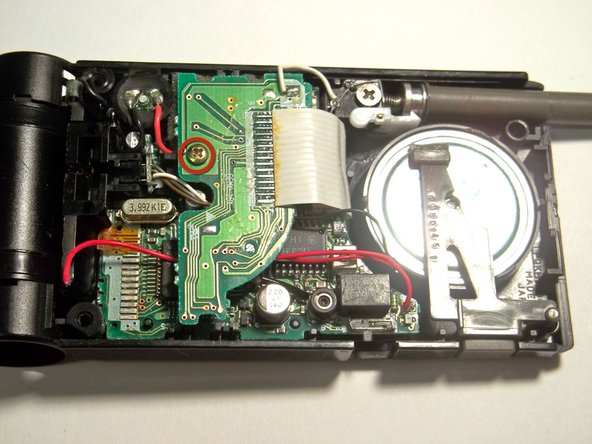
Locate and unscrew the circled screw using a Philips head #2 screw driver or screw driver head.
-
-
Este passo não foi traduzido. Ajude a traduzi-lo
-
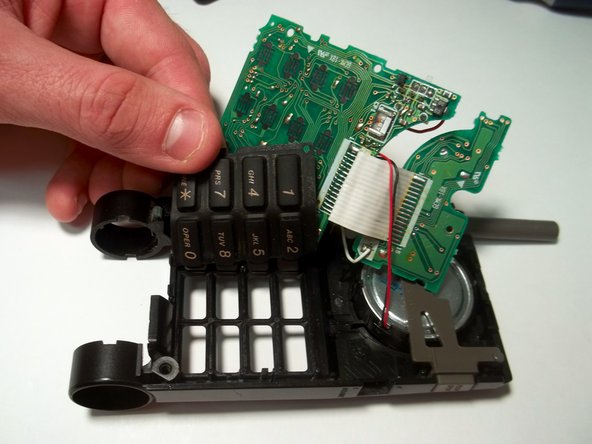
Be careful when lifting the motherboard. To prevent damage to the motherboard, gradually lift it from its place in the assembly.
-
-
Este passo não foi traduzido. Ajude a traduzi-lo
-
Now that the motherboard has been lifted out of place, the keypad can be accessed.
-
Using your fingers push the buttons from the the phone toward the lifted motherboard.
-
Remove the keypad from the assembly.
-


Equipe

Clemson, Team 15-1, Benson Fall 2012 Membro de Clemson, Team 15-1, Benson Fall 2012
CLEM-BENSON-F12S15G1
Membros da 4
Autoria de 10 guias