Esta versão pode conter edições incorretas. Mude para o último instantâneo verificado.
O que você precisa
-
Este passo não foi traduzido. Ajude a traduzi-lo
-
Pry off the four white feet with the pointed end of the spudger
-
-
Este passo não foi traduzido. Ajude a traduzi-lo
-
Gently unscrew the four 15.5 mm Phillips #2 screws that hold the bottom panel to the dock.
-
-
-
Este passo não foi traduzido. Ajude a traduzi-lo
-
Use the flat end of the spudger to pry the lid off from the two connectors holding it to the body of the dock.
-
-
Este passo não foi traduzido. Ajude a traduzi-lo
-
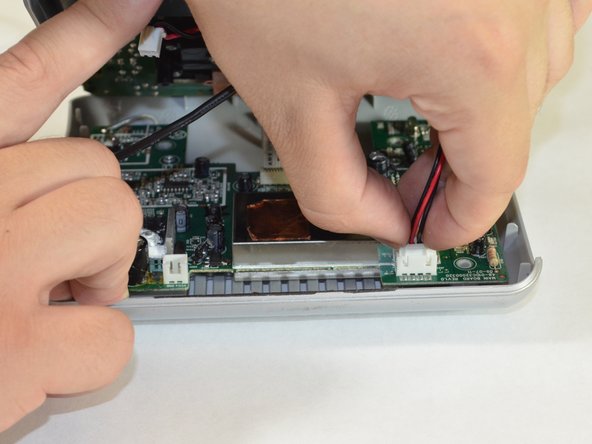
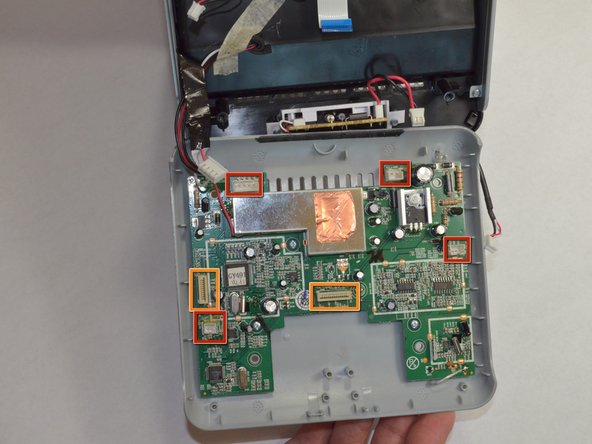
Carefully pull up and out the four electrical connectors and two ribbon connectors that connect the bottom panel to the dock.
-
Electrical Connectors
-
Ribbon Connectors
-


Cancelar: não concluí este guia.
2 outras pessoas executaram este guia.
Equipe

Cal Poly, Team 3-48, Amido Spring 2013 Membro de Cal Poly, Team 3-48, Amido Spring 2013
CPSU-AMIDO-S13S3G48
Membros da 4
Autoria de 6 guias