Ir para o conteúdo principal

Razor Hovertrax 2.0 Light Replacement

O que você precisa

  1. Razor Hovertrax 2.0 Light Replacement, Battery: passo 1, imagem 1 %32 Razor Hovertrax 2.0 Light Replacement, Battery: passo 1, imagem 2 %32
    • Use a #2 Philips screwdriver to remove the eight 18.5 mm screws from the bottom of the Hovertrax 2.0.

  2. Razor Hovertrax 2.0 Light Replacement: passo 2, imagem 1 %32 Razor Hovertrax 2.0 Light Replacement: passo 2, imagem 2 %32
    • To remove the led connector from the board, press the clip in with your fingers and gently pull up.

    • The connector you are removing is black and has two pins.

    • If it does not want to come out, gently wiggle the connector side to side while pulling up.

  3. Razor Hovertrax 2.0 Light Replacement: passo 3, imagem 1 %32
    • Disconnect the battery connector by grabbing the black side with one hand and the yellow side with the other hand and gently pull apart. (Try not to pull on the wires, it could damage them)

    • If you are replacing other parts, leave the battery disconnected until the end.

  4. Razor Hovertrax 2.0 Light Replacement: passo 4, imagem 1 %32 Razor Hovertrax 2.0 Light Replacement: passo 4, imagem 2 %32
    • Remove the two 17.2 mm hex head bolts using the 4 mm hex screwdriver that secures the battery in place.

  5. Razor Hovertrax 2.0 Light Replacement: passo 5, imagem 1 %32
    • The battery should be able to be lifted up out of the device now.

  6. Razor Hovertrax 2.0 Light Replacement, Light: passo 6, imagem 1 %32 Razor Hovertrax 2.0 Light Replacement, Light: passo 6, imagem 2 %32 Razor Hovertrax 2.0 Light Replacement, Light: passo 6, imagem 3 %32
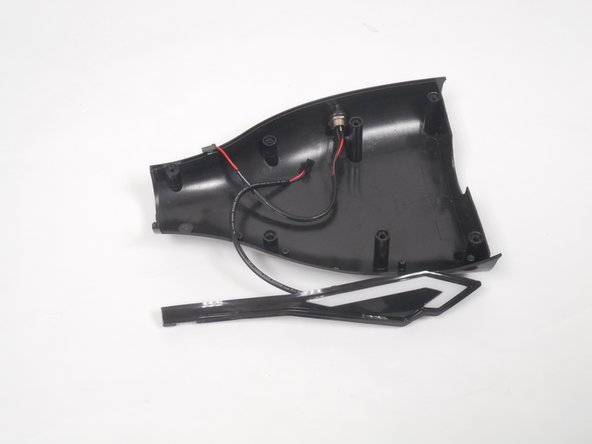
    • Get the back cover you removed over the battery, the led light housing is located here.

    • Removed circled screws and remove the light housing

    • To install new light housing, take new unit and tighten the screws.

    • Do not reinstall the battery yet.

  7. Razor Hovertrax 2.0 Light Replacement: passo 7, imagem 1 %32 Razor Hovertrax 2.0 Light Replacement: passo 7, imagem 2 %32
    • Remove cover on the opposite side of the battery.

    • Remove the screws with #2 Philips screwdriver circled to gain access to the lights.

  8. Razor Hovertrax 2.0 Light Replacement: passo 8, imagem 1 %32 Razor Hovertrax 2.0 Light Replacement: passo 8, imagem 2 %32
    • Carefully remove the black cover, and unplug the indicated connectors.

    • The two connectors you are removing are two pin black connectors.'

    • Be cautious not to rip the cover off or tug too hard on the connectors.

    • You should be left with the cover by itself.

  9. Razor Hovertrax 2.0 Light Replacement: passo 9, imagem 1 %32 Razor Hovertrax 2.0 Light Replacement: passo 9, imagem 2 %32
    • Remove the four indicated screws using a Philips head screwdriver.

    • After removing all the screws lift the led light housing off the cover.

Conclusão

To reassemble your device, follow these instructions in reverse order.

0 comentários

Adicione um comentário

Exibir estatísticas:

Últimas 24 horas: 0

Últimos 7 dias: 3

Últimos 30 dias: 4

Duração total: 38