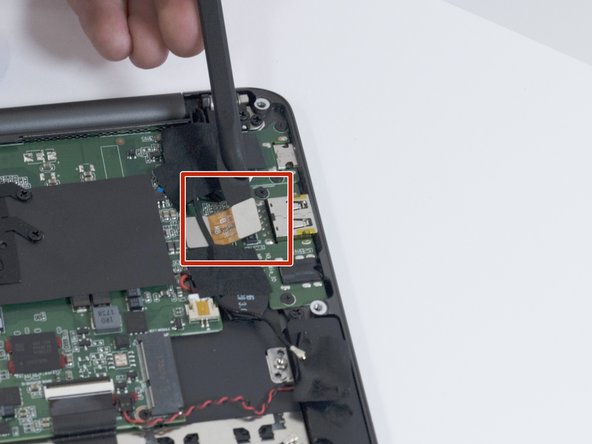
Ir para o conteúdo principal

Razer Blade Stealth 2017 Audio and USB-A Port Replacement

O que você precisa

  1. Razer Blade Stealth 2017 Audio and USB-A Port Replacement, Battery: passo 1, imagem 1 %32 Razer Blade Stealth 2017 Audio and USB-A Port Replacement, Battery: passo 1, imagem 2 %32
    • Before you begin, be sure to turn off your laptop and discharge the battery down to 25%.

    • Use a Torx T5 screwdriver to remove the eight, 3mm screws on the bottom cover of the laptop.

    • Whenever you remove screws from the device, remember to save and label them.

  2. Razer Blade Stealth 2017 Audio and USB-A Port Replacement: passo 2, imagem 1 %32
    • Remove the bottom cover of the laptop by sliding it away from the hinge.

    • Do not force the cover up!

  3. Razer Blade Stealth 2017 Audio and USB-A Port Replacement: passo 3, imagem 1 %32 Razer Blade Stealth 2017 Audio and USB-A Port Replacement: passo 3, imagem 2 %32
    • Use your fingernail to pry up and disconnect the battery from the motherboard.

  4. Razer Blade Stealth 2017 Audio and USB-A Port Replacement: passo 4, imagem 1 %32
    • Use a Phillips #00 screwdriver to remove the six, 5mm screws securing the battery.

  5. Razer Blade Stealth 2017 Audio and USB-A Port Replacement: passo 5, imagem 1 %32 Razer Blade Stealth 2017 Audio and USB-A Port Replacement: passo 5, imagem 2 %32
    • Remove any tape attached to the battery.

    • Use the plastic spudger to pry out the battery.

  6. Razer Blade Stealth 2017 Audio and USB-A Port Replacement, Audio and USB-A Port: passo 6, imagem 1 %32 Razer Blade Stealth 2017 Audio and USB-A Port Replacement, Audio and USB-A Port: passo 6, imagem 2 %32
    • Use a plastic spudger to lift up the module connector.

  7. Razer Blade Stealth 2017 Audio and USB-A Port Replacement: passo 7, imagem 1 %32 Razer Blade Stealth 2017 Audio and USB-A Port Replacement: passo 7, imagem 2 %32
    • Use a Phillips #00 screwdriver to remove the two, 3mm screws from the USB-A and audio port module.

  8. Razer Blade Stealth 2017 Audio and USB-A Port Replacement: passo 8, imagem 1 %32
    • Use a plastic spudger to remove the USB-A and audio port module from the chassis.

Conclusão

To reassemble your device, follow these instructions in reverse order.

Uma outra pessoa concluiu este guia.

Helene Willits

Membro desde: 10/10/19

762 Reputação

Autoria de 6 guias

Equipe

Cal Poly, Team S11-G3, Regan Fall 2019 Membro de Cal Poly, Team S11-G3, Regan Fall 2019

CPSU-REGAN-F19S11G3

Membros da 4

Autoria de 7 guias

0 comentários

Adicione um comentário

Exibir estatísticas:

Últimas 24 horas: 0

Últimos 7 dias: 1

Últimos 30 dias: 14

Duração total: 1,701