Esta versão pode conter edições incorretas. Mude para o último instantâneo verificado.
O que você precisa
-
Este passo não foi traduzido. Ajude a traduzi-lo
-
Use an 8" adjustable crescent wrench to fit it into the base of the pedal.
-
-
Este passo não foi traduzido. Ajude a traduzi-lo
-
Twist the the wrench in a counter -clockwise direction to unscrew the right-side pedal (The chain side).
-
Repeat the process on the other side with a clockwise direction.
-
-
Este passo não foi traduzido. Ajude a traduzi-lo
-
Turn the wrench continuously until the pedal detaches from the crank arm.
-
-
Este passo não foi traduzido. Ajude a traduzi-lo
-
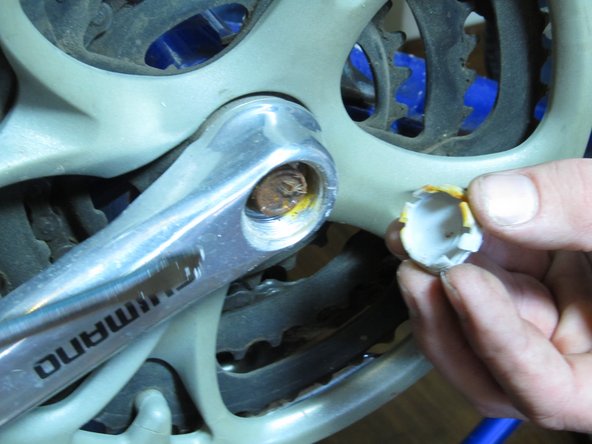
Use a flathead screwdriver to remove the dust cap of the crank arm.
-
Repeat the process on other side.
-
-
-
Este passo não foi traduzido. Ajude a traduzi-lo
-
Next, use a socket wrench to unscrew the crank arm.
-
Turn the socket wrench clockwise to remove the bolt.
-
-
Este passo não foi traduzido. Ajude a traduzi-lo
-
Insert the crank arm puller into the screw hole.
-
Now use a crescent wrench to tighten the crank arm puller. Twist it in a clockwise direction until the puller is fully tightened.
-
-
Este passo não foi traduzido. Ajude a traduzi-lo
-
Turn the crank arm puller in a clockwise direction to remove it.
-
Repeat step 2 to 4 on the other side.
-
-
Este passo não foi traduzido. Ajude a traduzi-lo
-
Flip the crank arm over with the chainring on it.
-
Locate the four screws on the back of the chainring.
-
-
Este passo não foi traduzido. Ajude a traduzi-lo
-
Use a Phillips #2 screwdriver to remove the four screws on the back of the chainring.
-
-
Este passo não foi traduzido. Ajude a traduzi-lo
-
Hold on to the crank arm and pull out the chain guard gently.
-


Cancelar: não concluí este guia.
Uma outra pessoa concluiu este guia.
Equipe

Cal Poly, Team 7-49, Forte Fall 2012 Membro de Cal Poly, Team 7-49, Forte Fall 2012
CPSU-FORTE-F12S7G49
Membros da 5
Autoria de 5 guias