Esta versão pode conter edições incorretas. Mude para o último instantâneo verificado.
O que você precisa
-
Este passo não foi traduzido. Ajude a traduzi-lo
-
Remove the backplate.
-
Using a Torx T20 screwdriver, remove the four screws attaching the back plate.
-
-
Este passo não foi traduzido. Ajude a traduzi-lo
-
Remove the drill handle.
-
Using the Phillips #2 screwdriver, remove the five screws attaching the drill handle to the body.
-
-
-
Este passo não foi traduzido. Ajude a traduzi-lo
-
Remove the gear casing from the body.
-
Using the Philips #2 screwdriver, remove the four screws attaching the gear casing to the body.
-
-
Este passo não foi traduzido. Ajude a traduzi-lo
-
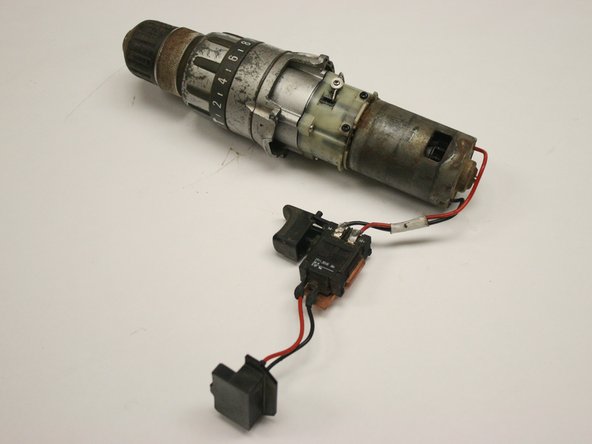
Use a multimeter set above 18V DC to check electrical connections where wires meet drill, switch, or battery terminal.
-
-
Este passo não foi traduzido. Ajude a traduzi-lo
-
Look for corrosion or burnt wires.
-
If there are any bad connections or if there is visible damage, replace damaged wire and solder.
-
-
Este passo não foi traduzido. Ajude a traduzi-lo
-
After soldering sand off jaged solder then wrap with electrical tape
-
Cancelar: não concluí este guia.
Uma outra pessoa concluiu este guia.


