Esta versão pode conter edições incorretas. Mude para o último instantâneo verificado.
O que você precisa
-
Este passo não foi traduzido. Ajude a traduzi-lo
-
Remove the backplate.
-
Using a Torx T20 screwdriver, remove the four screws attaching the back plate.
-
-
Este passo não foi traduzido. Ajude a traduzi-lo
-
Remove the drill handle.
-
Using the Phillips #2 screwdriver, remove the five screws attaching the drill handle to the body.
-
-
Este passo não foi traduzido. Ajude a traduzi-lo
-
Remove the gear casing from the body.
-
Using the Philips #2 screwdriver, remove the four screws attaching the gear casing to the body.
-
-
-
Este passo não foi traduzido. Ajude a traduzi-lo
-
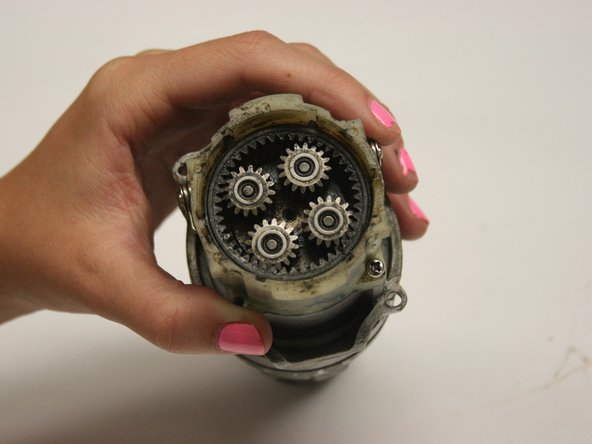
Prepare to remove the gear chamber.
-
Using the Phillips #2 screwdriver, unscrew the four screws at the rear of the plastic gear chamber.
-
-
Este passo não foi traduzido. Ajude a traduzi-lo
-
Remove the motor from the drill by gently pulling the motor away from the gear chamber.
-
-
Este passo não foi traduzido. Ajude a traduzi-lo
-
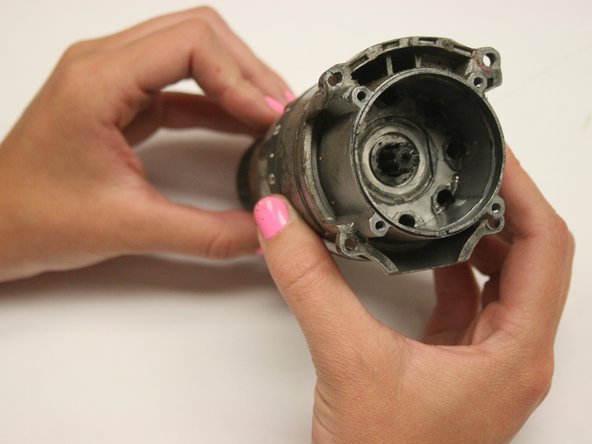
Remove the plastic gear chamber.
-
Using the Phillips #2 screwdriver, remove the four screws that attach the plastic gear chamber.
-
-
Este passo não foi traduzido. Ajude a traduzi-lo
-
Remove each component from the gear assembly. Replace components as needed.
-
Reassemble the drill following the gear replacement instructions in reverse order.
-


Cancelar: não concluí este guia.
4 outras pessoas executaram este guia.
Equipe

Cal Poly, Team 15-48, Garner Spring 2010 Membro de Cal Poly, Team 15-48, Garner Spring 2010
CPSU-GARNER-S10S15G48
Membros da 6
Autoria de 10 guias