Ir para o conteúdo principal

Este guia tem alterações mais recentes. Mudar para a última versão não verificada.

RIDGID R84015 X2 Planetary Gear Replacement Guide

O que você precisa

  1. RIDGID R84015 X2 Planetary Gear Replacement Guide, RIDGID R84015 X2 Case Removal: passo 1, imagem 1 %32 RIDGID R84015 X2 Planetary Gear Replacement Guide, RIDGID R84015 X2 Case Removal: passo 1, imagem 2 %32
    • Remove the backplate.

    • Using a Torx T20 screwdriver, remove the four screws attaching the back plate.

  2. RIDGID R84015 X2 Planetary Gear Replacement Guide: passo 2, imagem 1 %32
    • Remove the drill handle.

    • Using the Phillips #2 screwdriver, remove the five screws attaching the drill handle to the body.

  3. RIDGID R84015 X2 Planetary Gear Replacement Guide: passo 3, imagem 1 %32 RIDGID R84015 X2 Planetary Gear Replacement Guide: passo 3, imagem 2 %32
    • Remove the gear casing from the body.

    • Using the Philips #2 screwdriver, remove the four screws attaching the gear casing to the body.

  4. RIDGID R84015 X2 Planetary Gear Replacement Guide, Planetary Gear: passo 4, imagem 1 %32
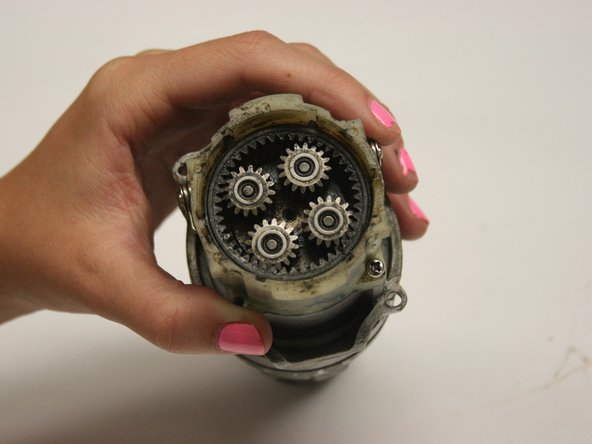
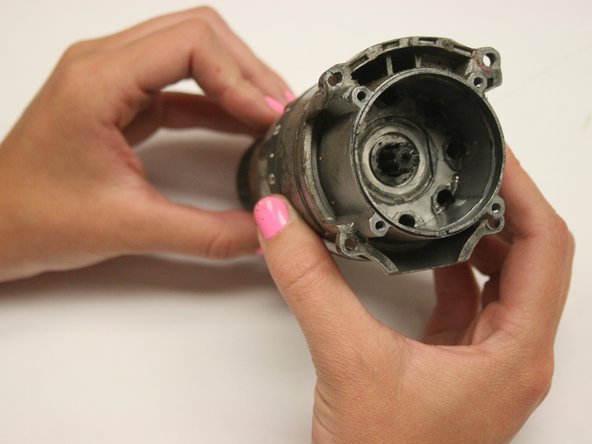
    • Prepare to remove the gear chamber.

    • Using the Phillips #2 screwdriver, unscrew the four screws at the rear of the plastic gear chamber.

  5. RIDGID R84015 X2 Planetary Gear Replacement Guide: passo 5, imagem 1 %32 RIDGID R84015 X2 Planetary Gear Replacement Guide: passo 5, imagem 2 %32
    • Remove the motor from the drill by gently pulling the motor away from the gear chamber.

    • NOTE: Handle the gear chamber with caution as the gears are now loose.

  6. RIDGID R84015 X2 Planetary Gear Replacement Guide: passo 6, imagem 1 %32
    • Remove the plastic gear chamber.

    • Using the Phillips #2 screwdriver, remove the four screws that attach the plastic gear chamber.

  7. RIDGID R84015 X2 Planetary Gear Replacement Guide: passo 7, imagem 1 %32 RIDGID R84015 X2 Planetary Gear Replacement Guide: passo 7, imagem 2 %32
    • Remove each component from the gear assembly. Replace components as needed.

    • Reassemble the drill following the gear replacement instructions in reverse order.

Linha de Chegada

4 outras pessoas executaram este guia.

Evan Long

Membro desde: 04/15/10

262 Reputação

Autoria de 4 guias

Equipe

Cal Poly, Team 15-48, Garner Spring 2010 Membro de Cal Poly, Team 15-48, Garner Spring 2010

CPSU-GARNER-S10S15G48

Membros da 6

Autoria de 10 guias

Um comentário

Very helpful, thank you! I was not sure how to detach the motor from the gearbox and didn't want to apply any brute force, and this explained it well.

YURIY - Responder

Adicione um comentário

Exibir estatísticas:

Últimas 24 horas: 1

Últimos 7 dias: 1

Últimos 30 dias: 13

Duração total: 6,215