Ir para o conteúdo principal

RIDGID R32104 Trigger Replacement

O que você precisa

  1. RIDGID R32104 Trigger  Replacement, Trigger: passo 1, imagem 1 %32
    • Turn off your saw and unplug before starting.

    • Place the Worm Drive Saw down and adjust the base plate, so that way the main housing assembly and handle set is easily accessible.

  2. RIDGID R32104 Trigger  Replacement: passo 2, imagem 1 %32 RIDGID R32104 Trigger  Replacement: passo 2, imagem 2 %32
    • Using the Torque 20 screwdriver, remove the twelve 3/10 cm screws holding the handle set together.

  3. RIDGID R32104 Trigger  Replacement: passo 3, imagem 1 %32 RIDGID R32104 Trigger  Replacement: passo 3, imagem 2 %32
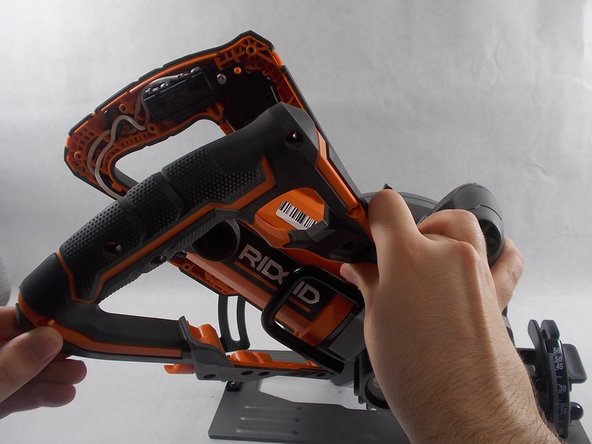
    • Carefully remove the handle set from the main housing assembly.

  4. RIDGID R32104 Trigger  Replacement: passo 4, imagem 1 %32 RIDGID R32104 Trigger  Replacement: passo 4, imagem 2 %32 RIDGID R32104 Trigger  Replacement: passo 4, imagem 3 %32
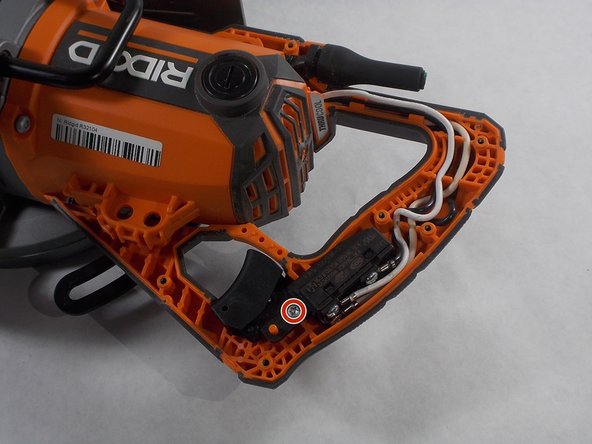
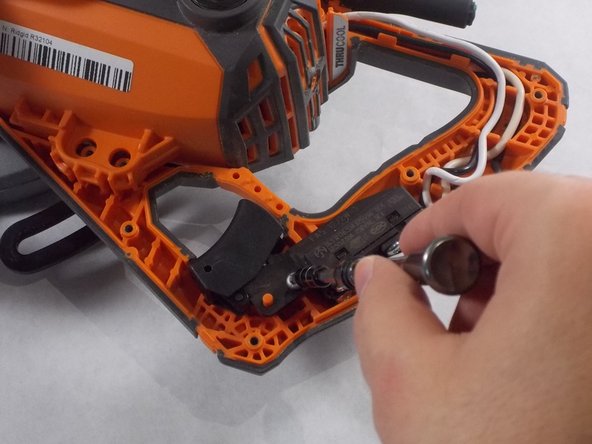
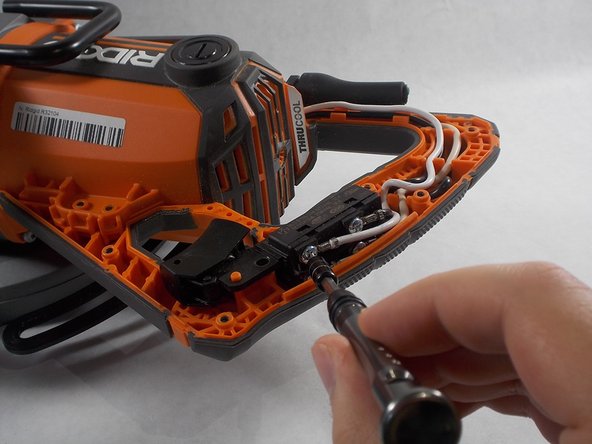
    • Place the Worm Drive Saw on its side to help remove the trigger.

    • Use the Torque 20 screwdriver to remove the single 3/10 cm screw that attaches the trigger switch to the handle set.

  5. RIDGID R32104 Trigger  Replacement: passo 5, imagem 1 %32 RIDGID R32104 Trigger  Replacement: passo 5, imagem 2 %32
    • Use the Phillips 2 screwdriver to remove the four 3/10 cm screws holding the trigger and four wires, from the main housing assembly, in place.

  6. RIDGID R32104 Trigger  Replacement: passo 6, imagem 1 %32
    • Remove the trigger switch and trigger from the handle set.

Conclusão

To reassemble your device, follow these instructions in reverse order.

2 outras pessoas executaram este guia.

Lucas Pimentel

Membro desde: 04/02/19

1.010 Reputação

Autoria de 8 guias

Equipe

0 comentários

Adicione um comentário

Exibir estatísticas:

Últimas 24 horas: 0

Últimos 7 dias: 6

Últimos 30 dias: 9

Duração total: 360