Ir para o conteúdo principal

RCA RCT6378W2 Screen Replacement

Guia arquivado
Este guia é mantido exclusivamente para fins históricos. Use a versão atualizada do guia para executar o reparo.

O que você precisa

  1. RCA RCT6378W2 Screen Replacement, Screen Replacement: passo 1, imagem 1 %32
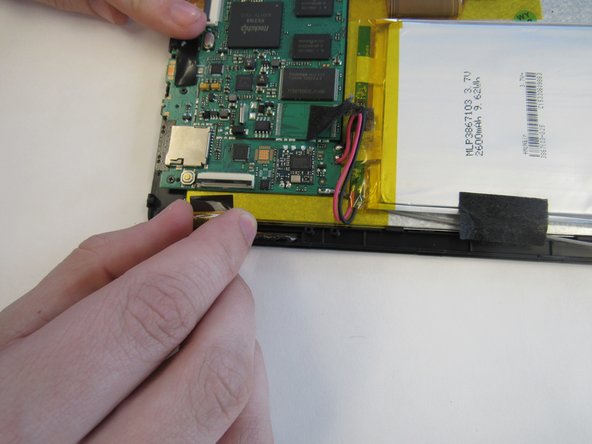
    • Remove two 2.4mm x 4mm screws from bottom of the tablet with Phillips #00 Screwdriver.

  2. RCA RCT6378W2 Screen Replacement: passo 2, imagem 1 %32 RCA RCT6378W2 Screen Replacement: passo 2, imagem 2 %32
    • Remove back cover with lever tool, exposing the battery and motherboard.

  3. RCA RCT6378W2 Screen Replacement: passo 3, imagem 1 %32 RCA RCT6378W2 Screen Replacement: passo 3, imagem 2 %32
    • Using the tweezers, remove the black tape connecting the screen to the motherboard.

  4. RCA RCT6378W2 Screen Replacement: passo 4, imagem 1 %32 RCA RCT6378W2 Screen Replacement: passo 4, imagem 2 %32
    • Pull up the switch to remove the input connector.

  5. RCA RCT6378W2 Screen Replacement: passo 5, imagem 1 %32
    • Heat the iOpener in the microwave, following the instructions provided with the tool. Lay the heated iOpener on the front screen for two minutes to soften the connection of the screen to the tablet.

  6. RCA RCT6378W2 Screen Replacement: passo 6, imagem 1 %32 RCA RCT6378W2 Screen Replacement: passo 6, imagem 2 %32
    • Use the suction cup and lever tool tool to pry the front screen from the tablet.

Conclusão

To reassemble your device, follow these instructions in reverse order.

2 outras pessoas executaram este guia.

mikayla

Membro desde: 01/29/15

408 Reputação

Autoria de 2 guias

Equipe

Clemson, Team 14-4, Shirley Spring 2015 Membro de Clemson, Team 14-4, Shirley Spring 2015

CLEM-SHIRLEY-S15S14G4

Membros da 6

Autoria de 15 guias

0 comentários

Adicione um comentário

Exibir estatísticas:

Últimas 24 horas: 0

Últimos 7 dias: 0

Últimos 30 dias: 0

Duração total: 1,189