Ir para o conteúdo principal

RCA CC310 Effect Button Circuit Board Replacement

O que você precisa

  1. RCA CC310 Effect Button Circuit Board Replacement, Disassembling RCA CC310 Left Cover: passo 1, imagem 1 %32 RCA CC310 Effect Button Circuit Board Replacement, Disassembling RCA CC310 Left Cover: passo 1, imagem 2 %32
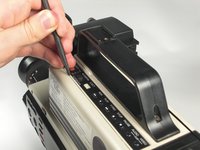
    • Remove the six 7.9mm Phillips #0 screws on the back and bottom.

    • Remove the one 3.8mm Phillips #0 screw on the bottom.

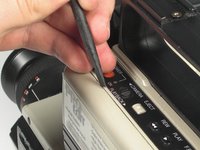
    • Remove the two 7.5mm Phillips #0 screws on the back and bottom.

  2. RCA CC310 Effect Button Circuit Board Replacement: passo 2, imagem 1 %32 RCA CC310 Effect Button Circuit Board Replacement: passo 2, imagem 2 %32
    • Remove 5.8mm Phillips #1 screw from the side button panel.

    • Slide the viewfinder all the way to the right and remove the 7.9mm Phillips #0 screw.

  3. RCA CC310 Effect Button Circuit Board Replacement: passo 3, imagem 1 %32 RCA CC310 Effect Button Circuit Board Replacement: passo 3, imagem 2 %32
    • Pry along the seam on the top side near the buttons with a spudger.

  4. RCA CC310 Effect Button Circuit Board Replacement: passo 4, imagem 1 %32 RCA CC310 Effect Button Circuit Board Replacement: passo 4, imagem 2 %32
    • Pull the left panel away from the rest of the camcorder.

    • Unplug the red speaker cable located at the rear of the device.

    • Be careful to not pull too hard. The speaker cable is still connected to the panel and it can rip.

  5. RCA CC310 Effect Button Circuit Board Replacement, Effect Button Circuit Board: passo 5, imagem 1 %32 RCA CC310 Effect Button Circuit Board Replacement, Effect Button Circuit Board: passo 5, imagem 2 %32
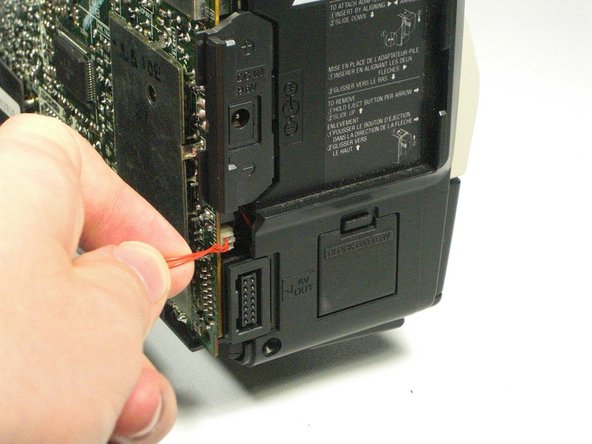
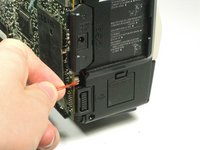
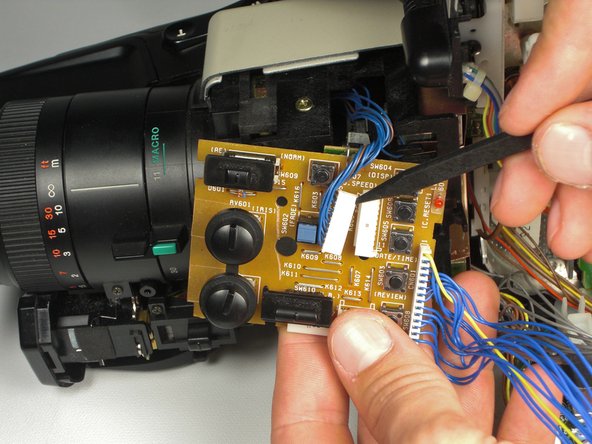
    • Unplug the two cables on the bottom of the effect button circuit board.

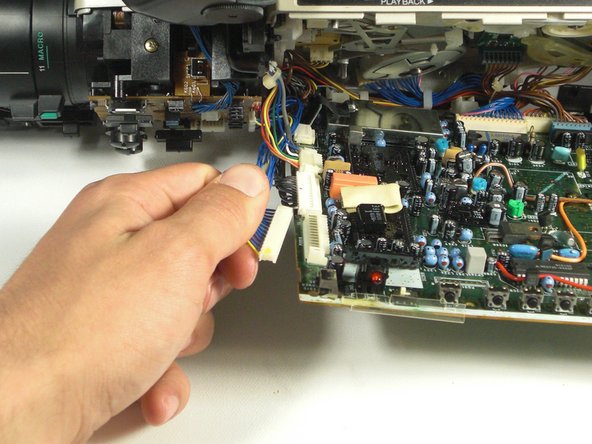
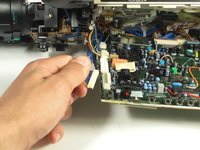
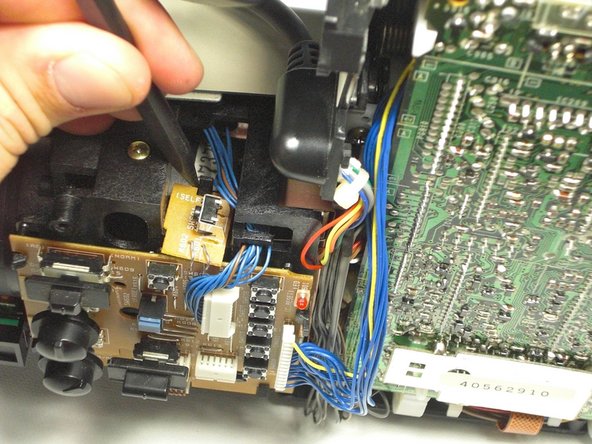
    • Unplug the cable at the top left side of the motherboard.

  6. RCA CC310 Effect Button Circuit Board Replacement: passo 6, imagem 1 %32 RCA CC310 Effect Button Circuit Board Replacement: passo 6, imagem 2 %32 RCA CC310 Effect Button Circuit Board Replacement: passo 6, imagem 3 %32
    • Pull the plastic tabs away from the circuit board.

    • Pull the board away from the camcorder.

    • Use a spudger to help push the mini-circuit board away from the camcorder at the same time.

    • Unplug the cable in the middle of the effects board.

Conclusão

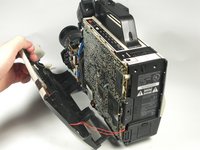
To reassemble your device, follow these instructions in reverse order.

Uma outra pessoa concluiu este guia.

Oliver Adams

Membro desde: 01/19/11

629 Reputação

Autoria de 6 guias

Equipe

Cal Poly, Team 5-20, Amido Winter 2011 Membro de Cal Poly, Team 5-20, Amido Winter 2011

CPSU-AMIDO-W11S5G20

Membros da 4

Autoria de 7 guias

0 comentários

Adicione um comentário

Exibir estatísticas:

Últimas 24 horas: 0

Últimos 7 dias: 1

Últimos 30 dias: 5

Duração total: 1,694