Este guia tem alterações mais recentes. Mudar para a última versão não verificada.
Introdução
The time and date, as well as other settings, are kept by the PRAM battery when your machine is off.
O que você precisa
-
-
Turn the keyboard locking screw so that it is parallel to the space bar.
-
Pull the keyboard release tabs toward you and lift up on the keyboard until it pops free.
-
Lift the keyboard out by pulling it up and away from you. Rest the keyboard, face down, on top of the track pad.
-
-
-
-
Remove the two silver Phillips #1 screws that attach the heat shield to the internal metal framework.
-
Lift the heat shield up and pull it toward you.
-
-
-
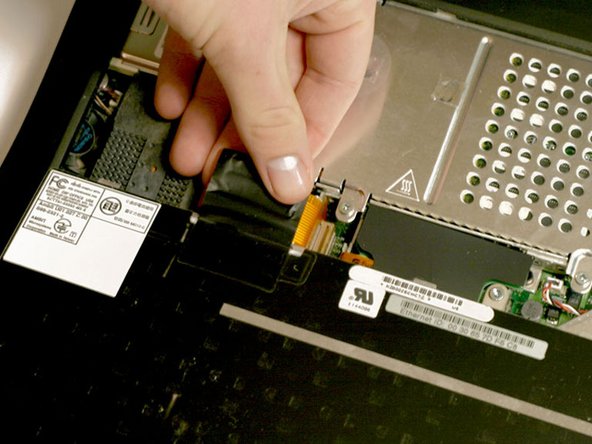
Firmly grasp the plastic tab attached to the Airport card and pull up and then to the right.
-
-
-
Pull the battery cable directly up from the logic board.
-
Remove the battery from its holder by pulling up and to the left.
-


To reassemble your device, follow these instructions in reverse order.
To reassemble your device, follow these instructions in reverse order.
Cancelar: não concluí este guia.
24 outras pessoas executaram este guia.
Documentos anexados

6 comentários
Frankly speaking I do not have idea why do I need steps 2-7 to replace battery? Why I can't go directly to step 8 if it is possible? BTW - the battery seems to be composed from 4 standard batteries. Is anyone aware how to assembly new battery? It is not available as spare part (616-0108)
Agreed, I just successfully removed my PRAM battery skipping all those steps, just popped the keyboard out, removed the DVD drive from the right-hand out and popped that bad boy out, no problemo.
I read that you "removed the DVD drive from the right-hand out...." I'm baffled as to what you mean or how that is done. Can you explain that step?
Why do I need to remove the airport card? It's just like telling somebody to remove their shoes to take off their hat?
Here's a comment about removing the DVD drive.
The DVD drive comes in a module that can be slid in and out of the computer. This is part of the Pismo's wonderful accessibility for repairs, etc. (The module actually can be replaced by a second battery or a weight-saving module, simply by sliding out the DVD drive and sliding in the other module.)
To get out the DVD drive, find the lever that pops it out. This is located at the right front of the computer, below the keyboard. It has an L-shape. There is a small lip at the far right of the lever that you can catch with your fingernail; pull that toward you. The DVD drive will pop out about 1/4" to 1/2". Then simply slide out the DVD drive.