Esta versão pode conter edições incorretas. Mude para o último instantâneo verificado.
O que você precisa
-
Este passo não foi traduzido. Ajude a traduzi-lo
-
Turn the console upside down and remove the five 15.8 mm-long Phillips #1 screws.
-
-
Este passo não foi traduzido. Ajude a traduzi-lo
-
While holding the top and bottom halves of the console together, flip the console back over. Lift the top cover straight up to remove it.
-
-
Este passo não foi traduzido. Ajude a traduzi-lo
-
Remove five Phillips #1 screws securing the metal shield to the controller ports:
-
Two 14 mm screws
-
Three 8 mm screws
-
-
Este passo não foi traduzido. Ajude a traduzi-lo
-
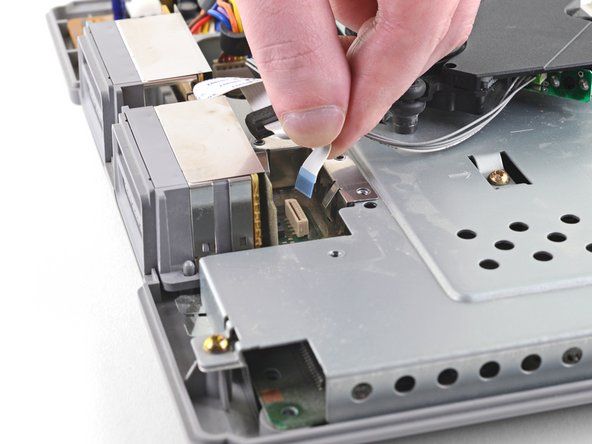
Pull the controller port's ribbon cable straight up and out of its socket on the motherboard to disconnect it.
-
-
-
Este passo não foi traduzido. Ajude a traduzi-lo
-
Lift the controller ports straight up and out of the bottom case.
-
-
Este passo não foi traduzido. Ajude a traduzi-lo
-
Pull the optical drive power cable straight up and out of its socket on the motherboard to disconnect it.
-
-
Este passo não foi traduzido. Ajude a traduzi-lo
-
Use the flat end of a spudger to lift up and unlock one side of the data cable's connector on the motherboard. Repeat this step on the other side of the connector.
-
Gently pull the optical drive data cable straight up and out of its socket on the motherboard to disconnect it.
-
-
Este passo não foi traduzido. Ajude a traduzi-lo
-
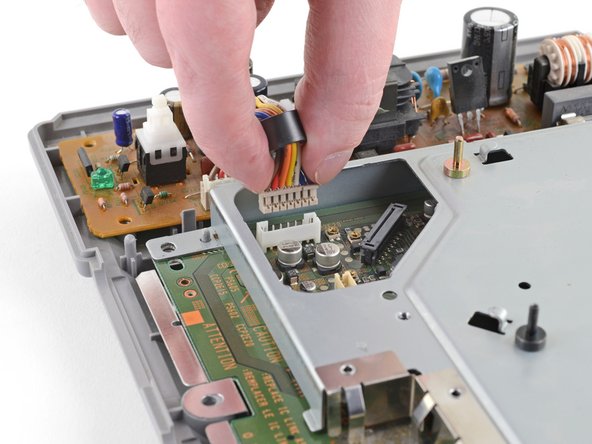
Pull the power supply cable straight up and out of its socket on the motherboard to disconnect it.
-
-
Este passo não foi traduzido. Ajude a traduzi-lo
-
Remove the five 14 mm-long Phillips #1 screws from the motherboard's metal shield.
-
-
Este passo não foi traduzido. Ajude a traduzi-lo
-
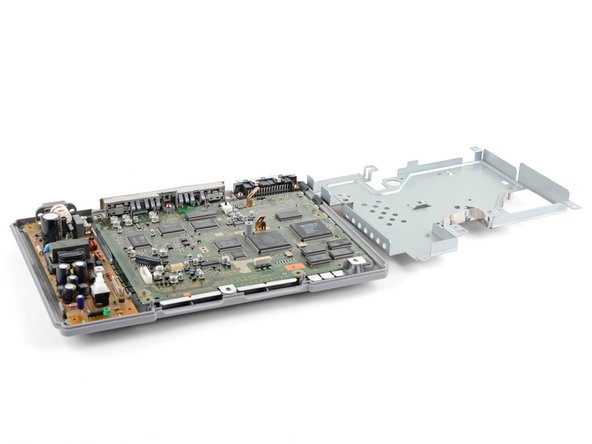
From the left side, lift up the metal shield and rotate it about its right edge, opening it like a book.
-
-
Este passo não foi traduzido. Ajude a traduzi-lo
-
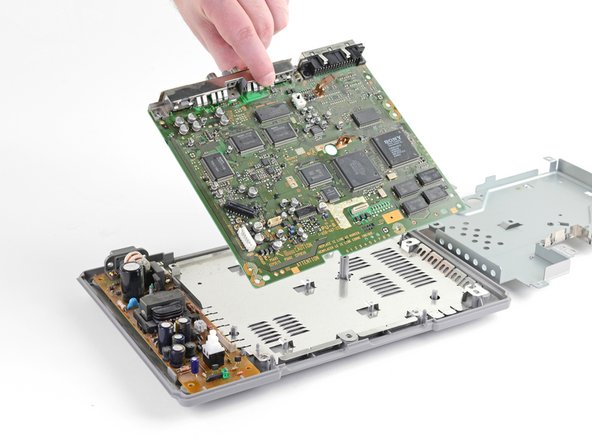
Remove the three 14 mm-long Phillips #1 screws securing the motherboard to the bottom case.
-


Cancelar: não concluí este guia.
27 outras pessoas executaram este guia.

2 comentários
Excelente guía, esto ayuda a muchos para aprender a reparar y no hacer gastos innecesarios.