Esta versão pode conter edições incorretas. Mude para o último instantâneo verificado.
O que você precisa
-
Este passo não foi traduzido. Ajude a traduzi-lo
-
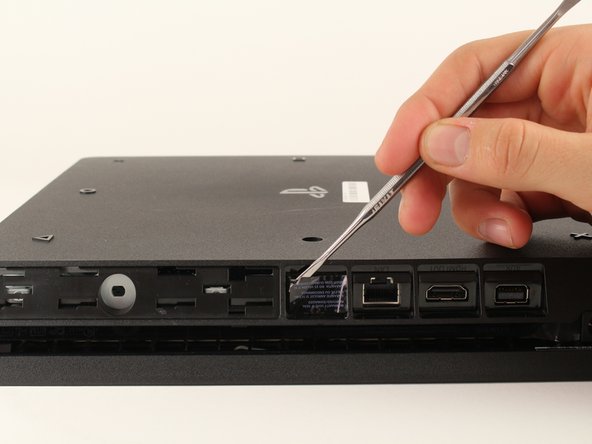
Locate the plastic warranty sticker next to the three ports on the side of the console.
-
Remove the warranty sticker by peeling it off with any kind of spudger.
-
-
-
Este passo não foi traduzido. Ajude a traduzi-lo
-
Unscrew and remove the now exposed 5.0mm screw using a T8 security Torx screwdriver with a counter-clockwise motion.
-
-
Este passo não foi traduzido. Ajude a traduzi-lo
-
Place the Playstation 4 Slim upside down with the side of the screw you just removed facing you.
-
Pry up on the two corners that are facing you with your fingers.
-
Remove the bottom cover by sliding it towards the back corners and lifting up.
-
Cancelar: não concluí este guia.
36 outras pessoas executaram este guia.
2 comentários
Wo kann man die Bodenplatte kaufen?
Hi hello it's Good


